
Soups & Stews
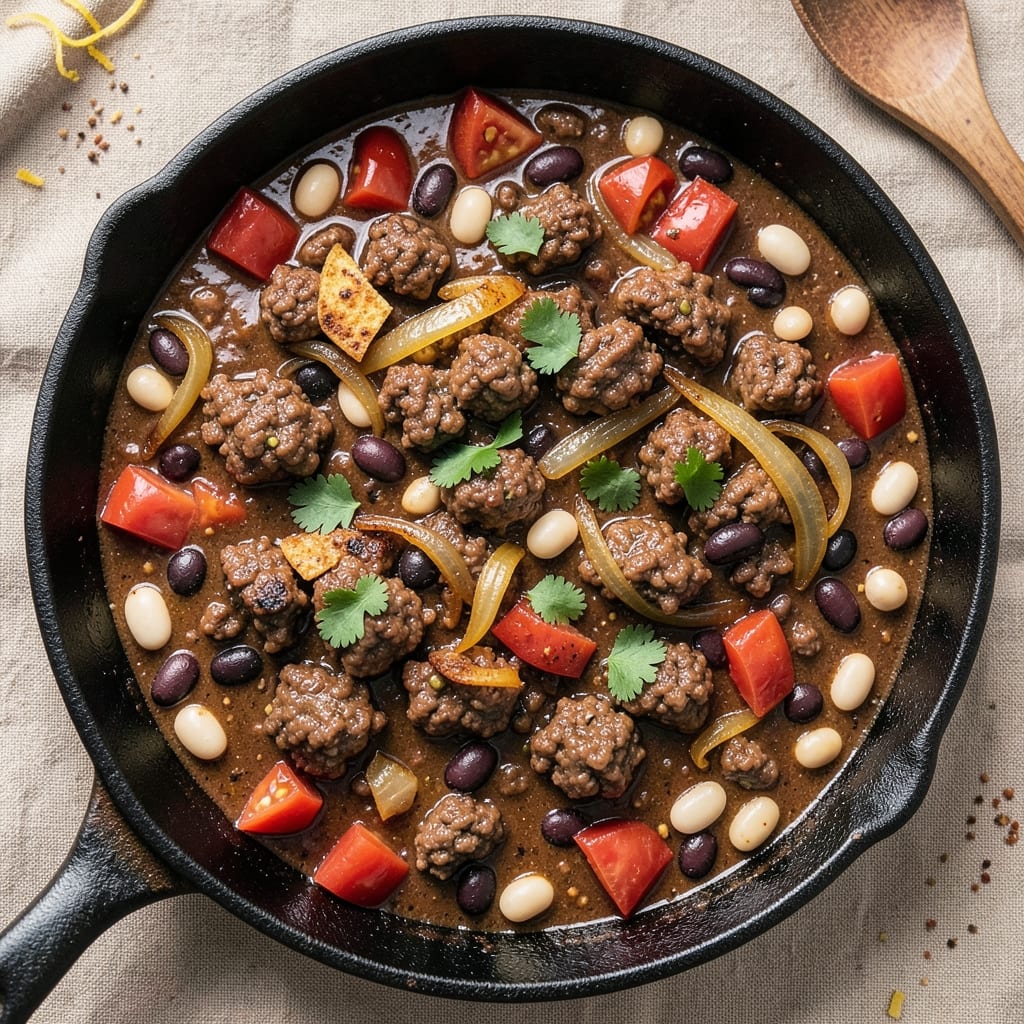
This American beef chili recipe delivers the deep, smoky flavors of a classic comfort dish in one satisfying pot. The secret lies in slow-browning ground beef with cumin and chili powder, creating a rich foundation that simmers into a hearty, tender stew. My version balances traditional spices with just the right amount of heat, ensuring every spoonful is packed with bold, familiar taste.
The beauty of this chili is its simplicity—no fancy techniques, just quality ingredients and time. You'll start by browning the meat to develop deep flavor, then build layers of warmth with spices like cumin, garlic, and smoked paprika. A long simmer transforms tough beef into tender, melt-in-your-mouth bites while the beans absorb all that smoky goodness.
What you'll end up with is a steaming bowl of chili that's rich, slightly spicy, and deeply satisfying. The aroma alone will have everyone gathering around the table, and the texture—tender beef, hearty beans, and a thick, flavorful broth—makes it perfect for cold nights or game day gatherings. Serve it with crusty bread or over rice to soak up every last drop.
This recipe works equally well on the stovetop, in a slow cooker, or even in an Instant Pot, giving you flexibility for any schedule. Whether you're feeding a crowd or meal prepping for the week, this chili delivers restaurant-quality results with minimal effort. Let's get started!
Ingredients for american beef chili
Pantry staples plus a few key ingredients for that authentic smoky chili flavor.
| Ingredient | Amount | Notes |
|---|---|---|
| Ground Beef 🥩 | 1 ½ lb | 80/20 fat ratio preferred |
| Yellow Onion 🧅 | 1 whole | Medium size, diced |
| Garlic Cloves 🧄 | 4 cloves | Freshly minced |
| Canned Kidney Beans 🌱 | 15 oz | Drained, rinsed |
| Canned Black Beans 🌱 | 15 oz | Drained, rinsed |
| Diced Tomatoes (Canned) 🍅 | 14 ½ oz | Fire-roasted preferred |
| Chili Powder 🌶️ | 2 tbsp | Smoked variety recommended |
| Ground Cumin 🌿 | 1 ½ tbsp | Toasted for depth |
| Smoked Paprika 🌶️ | 1 tbsp | For smoky flavor |
| Salt 🧂 | 1 ½ tsp | Kosher or sea salt |
| Black Pepper 🌶️ | ½ tsp | Freshly ground |
| Beef Broth 💧 | 1 ½ cups | Low-sodium preferred |
| Tomato Paste 🍅 | 1 tbsp | For thickening |
| Dark Brown Sugar 🍚 | 1 tbsp | Balances heat |
| Cayenne Pepper 🔥 | ¼ tsp | Adjust for heat |
The beef makes all the difference—80/20 fat ratio gives you that rich, tender bite. Costco or Walmart usually have the best prices for ground beef, and you can't beat the convenience of pre-diced onions from the produce section. For the beans, Libby's or Bush's are my go-tos—they're reliable and easy to find. Fire-roasted diced tomatoes add that smoky depth without extra work, but regular diced works too if that's what you've got. The spices? Penzeys or local bulk bins for the freshest, but the grocery store stuff is fine if it's not ancient.
No smoked paprika? Regular paprika plus a pinch of liquid smoke works in a pinch. Short on cumin? Dried coriander at half the amount gives a similar earthiness. Using canned beans? Always drain and rinse—it cuts down on that canned taste. For the tomato paste, those little squeeze tubes at Trader Joe's are perfect—no waste, and they keep for ages. The cayenne is optional, but if you're sensitive to heat, start with just a pinch and taste as you go.
This chili tastes even better the next day—3-4 days in the fridge, no problem. Portion it out into containers for easy lunches, and it freezes beautifully for up to 3 months. The flavors meld and deepen over time, so don't skip the overnight rest if you can help it. Leftovers reheat well—just add a splash of broth to loosen it up if it gets too thick.
Why You'll Love This Recipe
- Pantry-Friendly Powerhouse: I swear by this recipe when my fridge is bare. Just ground beef, onions, and a few pantry staples—no fancy ingredients, just bold flavor.
- Garlic-Kissed Depth: That slow-cooked garlic? It’s the secret. It softens into the beef, turning every bite into a little flavor explosion—no one will guess it’s this easy.
- Leftovers That Beg: Honestly, I make this on Sunday because the second batch tastes even better. The beans soak up all the juices, and reheating? Absolute perfection.
- Tailgate to Taco Night: Between us, this chili works everywhere. Slap it in a bowl with cheese for game day, or stuff it into tortillas for a quick weeknight dinner. Zero guilt.
Step-by-step instructions for smoky cumin-kissed beef chili
Here's how to build rich, smoky layers of flavor in one pot—no shortcuts, just deep satisfaction.
Brown the Ground Beef for Maximum Flavor
Heat a large Dutch oven over medium-high heat until hot. Add the 1.5 lb ground beef and break it apart with a wooden spoon, letting it brown in batches if needed. Don't rush this—you want deep brown color and crispy edges. Once fully browned (about 8-10 minutes), drain all but 2 tablespoons of the rendered fat.
Here's the thing—browning the beef first creates that fundamental meaty flavor that carries through the entire chili. If you skip this step, you'll end up with something closer to beef stew than authentic chili. Press the beef down gently with a spatula during the first minute to prevent it from clumping.
Sauté Aromatics Until Fragrant
Add the diced yellow onion and minced garlic cloves to the Dutch oven. Cook for 5-6 minutes until the onions soften and turn translucent, and the garlic releases its sweet, pungent aroma. You should smell that deep, toasty garlic scent—this is when the chili starts building its flavor foundation.
I like to add a pinch of salt at this stage to help draw out moisture from the onions, which makes them caramelize faster. If the onions start to stick, add a splash of water and scrape up those browned bits—they're packed with flavor. This is where the chili's depth begins.
Toast the Spices for Complex Flavor
Reduce heat to medium-low and add the 2 tbsp chili powder, 1.5 tbsp ground cumin, 1 tbsp smoked paprika, 1.5 tsp salt, 0.5 tsp black pepper, and 0.25 tsp cayenne pepper. Stir constantly for 1-2 minutes until the spices become fragrant and slightly darker in color.
Toasting the spices releases their essential oils and deepens their flavors dramatically. You'll notice the kitchen fills with that warm, earthy aroma—this is the moment that matters. Don't let the spices burn; just let them bloom until they're aromatic but not colored. This step transforms good chili into extraordinary chili.
Build the Chili Base with Tomatoes and Broth
Pour in the 14.5 oz diced tomatoes, 1 tbsp tomato paste, 1.5 cups beef broth, and 1 tbsp dark brown sugar. Stir well to combine, scraping up any browned bits from the bottom of the pot. Bring to a gentle simmer and let it cook uncovered for 15 minutes, stirring occasionally.
The sugar here isn't just for sweetness—it helps balance the heat and enhances the caramelization of the tomatoes. This initial simmer allows all the flavors to meld together before we add the beans. If the mixture looks too thick, add a splash of water or broth to keep it moving.
Simmer with Beans Until Thick and Rich
Add the 15 oz drained kidney beans and 15 oz drained black beans. Stir gently to distribute them evenly. Return to a simmer and cook uncovered for 30-40 minutes, stirring occasionally, until the chili thickens to your desired consistency. The beans should be heated through and the flavors should be well-developed.
Real talk: the chili will continue thickening as it cools, so don't worry if it looks a bit loose at this stage. Taste and adjust seasoning—you might need a bit more salt or a pinch of cayenne for perfect balance. Let it simmer gently; rushing this step leads to mushy beans and weak flavor. When done, the chili should coat the back of a spoon with a velvety texture.
Pro Tips For Making American Beef Chili
- Brown the Beef Thoroughly: I used to add the onions and garlic right after dumping in the raw beef, and the chili always tasted undercooked. Now I cook the beef on medium-high heat until it’s deeply browned—no pink left—before even thinking about onions. That crust makes all the difference in flavor.
- Drain and Rinse the Beans: Canned beans have that weird metallic taste, and skipping this step is a mistake. Drain them well, then rinse under cold water to cut that canned-bean tang. Pat them dry with a towel afterward—they’ll absorb more of the chili’s flavors instead of turning it into soup.
- Sweat the Onions Low and Slow: I learned this the hard way—crispy onions in chili? No thanks. Cook them on low heat with a pinch of salt until they’re soft and translucent, not golden. If they start to brown, you’re going too fast, and that’s when the chili turns bitter. Patience here saves the dish.
- Use Two Garlic Cloves, Minced Fine: Sounds weird, but it works: I double the garlic (to 4 cloves) and crush it into a paste before cooking. This releases more flavor and prevents those stubborn garlic bits from lurking at the bottom. Sauté it with the onions until it’s fragrant—don’t rush, or it’ll burn.
Dietary considerations for this dish
Gluten-Free Adaptations
This chili recipe is naturally gluten-free since it relies on simple ingredients like beef, beans, and spices. However, always double-check your beef broth label—many store-bought versions contain hidden gluten. I recommend Pacific Foods or Imagine brands for certified gluten-free options. The tomato paste and fire-roasted diced tomatoes are also typically gluten-free, but brands like Muir Glen guarantee it. 🌱
Dairy-Free Considerations
No dairy ingredients are used in this recipe, making it naturally dairy-free. The rich, smoky flavors come entirely from the ground beef, cumin, and smoked paprika. If you're avoiding other allergens, ensure your beef broth and beans are processed in a facility free from cross-contamination risks. Brands like Libby's and Bush's are typically safe for dairy-free diets.
Low-Carb Options
For a lower-carb version, reduce or omit the kidney and black beans and add extra ground beef or diced mushrooms for bulk. You can also use cauliflower rice as a serving base instead of traditional rice or bread. The tomato paste and diced tomatoes provide natural sweetness, so no sugar substitutes are needed unless you're avoiding all carbs.
Vegetarian Substitutes
Swap the ground beef for crumbled tempeh or lentils to make this chili vegetarian. Tempeh adds a meaty texture when marinated in soy sauce and smoked paprika before cooking. For extra depth, use mushroom broth instead of beef broth. The beans and spices will still deliver that classic chili flavor, just with a plant-based twist. 🌱
Spice Sensitivity Adjustments
If you're sensitive to heat, reduce the cayenne pepper to ¼ tsp or less and omit the smoked paprika entirely. Instead, add 1 tsp dried oregano for earthy flavor without heat. For a milder kick, use ½ tsp chipotle powder in adobo sauce—it adds smokiness without intense spice. Always taste as you go and adjust gradually.
Protein Swaps
For a lighter option, replace half the ground beef with lean ground turkey or chicken thighs. If you prefer plant-based proteins, crumbled tofu or extra-firm tempeh work well when seasoned with 1 tsp liquid smoke and 1 tsp garlic powder before cooking. The beans will still provide heartiness, while the new protein adds variety. 💡
Nutrition facts
Frequently asked questions
Can I make this chili in a slow cooker?
Brown the beef and sauté the aromatics as directed, then transfer everything to a 6-quart slow cooker. Cook on low for 6-7 hours or high for 3-4 hours, stirring once halfway. The slow cooking enhances the smoky flavors even more. For best results, use a Dutch oven for browning before transferring.
How do I adjust the heat level?
Start by reducing the cayenne pepper to ¼ tsp for mild heat, or omit it entirely. For a smoky kick without spice, replace the cayenne with ½ tsp chipotle powder in adobo sauce. Always taste before serving—you can add more chili powder or cayenne gradually if needed. The smoked paprika adds depth without heat.
What's the best way to store leftovers?
Let the chili cool completely, then store in an airtight container in the fridge for up to 4 days. For freezing, portion into individual containers and freeze for up to 3 months. Thaw overnight in the fridge—never microwave directly from frozen. The flavors actually improve after resting overnight!
Can I use canned tomatoes instead of fresh?
Yes, canned tomatoes work perfectly—they're what traditional chili recipes use! Choose fire-roasted diced tomatoes for extra smoky flavor. Drain them well to avoid watery chili. For even better texture, crush 2-3 tomatoes by hand before adding to create a thicker, heartier base.
Why does my chili taste bland?
Most likely, you skipped browning the beef or didn't toast the spices. Always brown the meat until deeply colored and toast spices until fragrant. Another common issue is not enough salt—build flavor gradually by adding ½ tsp more salt during cooking. A splash of apple cider vinegar (1 tsp) at the end can brighten flavors if needed.