
Soups & Stews
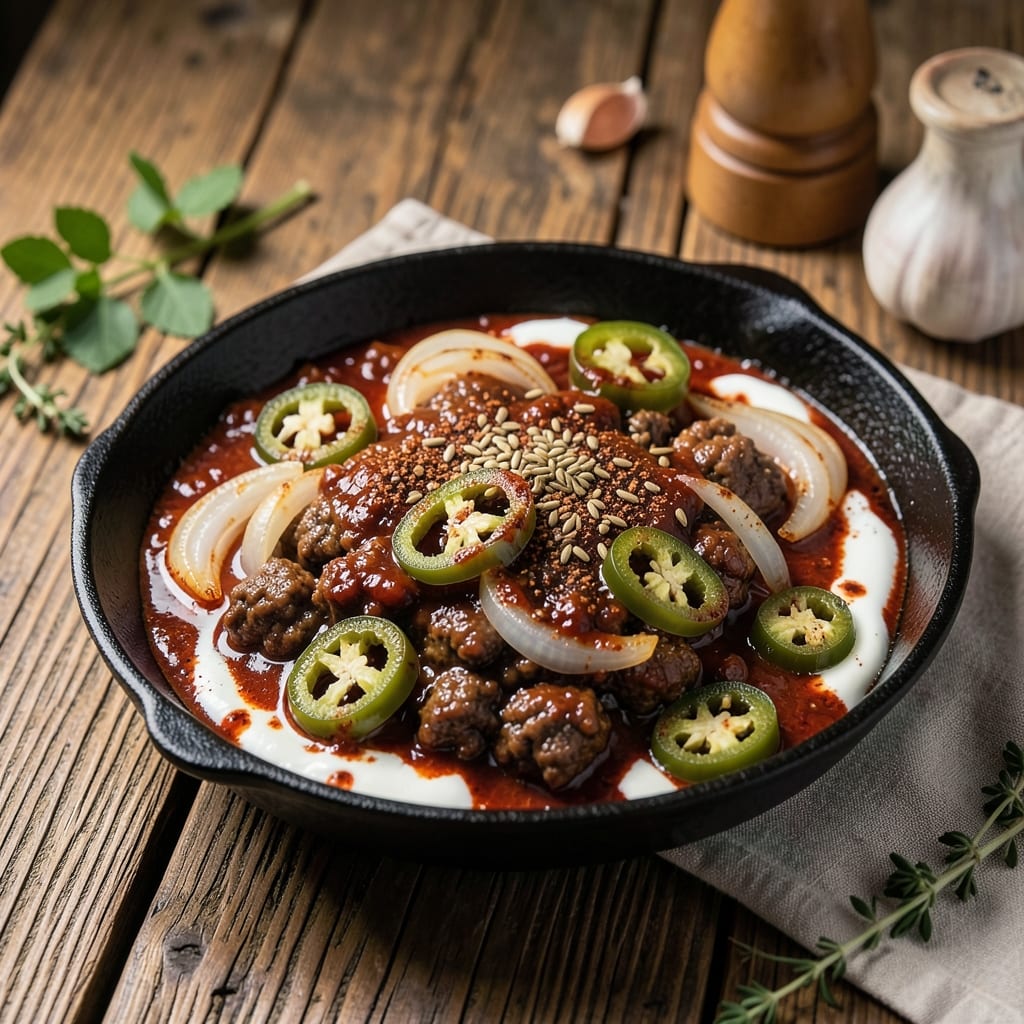
This American chilli beef recipe delivers the deep, smoky, hearty comfort of classic Texas-style chili—where tender beef simmers for hours in a spiced tomato base until it practically melts in your spoon. The secret lies in slow-cooking the beef until fork-tender while building layers of flavor through careful spice toasting and browned meat. I've perfected this version over years of testing, balancing traditional chili powder, cumin, and garlic with just the right amount of heat to satisfy even picky eaters.
What sets this recipe apart is the two-step browning technique that creates a rich, caramelized foundation for the chili. Ground beef gets seared in batches to render fat properly, then deglazed with beer or broth to capture all those flavorful browned bits that make homemade chili taste like a restaurant pot. The result is a chili with deep, complex flavors—not just spicy, but rich with smoky undertones and a satisfying thickness that clings to every spoonful.
By the time you're ready to serve, you'll have a pot of chili that's ready to be topped with all the classics: sharp cheddar cheese, diced onions, fresh cilantro, and a dollop of sour cream. The beef will be tender enough to shred easily, while the broth remains thick and flavorful. This is the kind of chili that disappears quickly, leaving everyone asking for seconds—and the kind that tastes even better the next day.
Perfect for game day gatherings, cold winter nights, or any occasion where you want to feed a crowd with minimal effort. The recipe scales beautifully, so you can easily double or triple it for parties. Let's get cooking—this chili is about to become your new go-to recipe.
Ingredients for american chilli beef
Sixteen ingredients for a chili that tastes like it simmered all day—even if it didn't.
| Ingredient | Amount | Notes |
|---|---|---|
| Ground Beef 🥩 | 2 ½ lb | 80/20 fat ratio preferred |
| Onion 🧅 | 1 whole | Yellow or red, diced |
| Garlic Cloves 🧄 | 6 cloves | Minced, fresh preferred |
| Chili Powder 🌶️ | 3 tbsp | Medium heat, not hot |
| Ground Cumin 🌿 | 1 ½ tbsp | Toasted for deeper flavor |
| Paprika 🌶️ | 1 tbsp | Smoked variety adds depth |
| Dried Oregano 🍃 | 1 tsp | Mexican oregano if available |
| Cayenne Pepper 🔥 | ½ tsp | Adjust for heat preference |
| Tomato Paste 🍅 | ½ cup | Squeeze tube works fine |
| Beer 🍺 | 1 cup | Dark ale or stout preferred |
| Beef Broth 💧 | 3 cups | Low sodium preferred |
| Black Beans 🌱 | 1 cup | Drained and rinsed |
| Salt 🧂 | 1 ½ tsp | Kosher or sea salt |
| Black Pepper 🌶️ | ½ tsp | Freshly ground preferred |
| Dark Brown Sugar 🍚 | 1 tbsp | Balances acidity |
The beef is non-negotiable here—80/20 fat ratio is key for both flavor and tenderness. Costco or Walmart usually have it pre-packaged in 2.5 lb bags, which is perfect for this recipe. If you can't find it, 85/15 works too. The chili powder matters too—Penzeys or McCormick are solid choices, but honestly any brand is fine as long as it's not ancient. Toast your cumin and spices in a dry pan for 30 seconds before adding to the pot—that little step makes all the difference. For the beer, dark ales or stouts add depth, but any beer you like works—just avoid light lagers.
No chili powder? Mix 1 tbsp smoked paprika + 1 tsp cayenne + 1 tsp oregano for a close substitute. Fresh garlic is ideal, but garlic powder at half the amount works in a pinch. The tomato paste can be the squeeze tube kind—no need to buy a can. If you're short on time, 1 can (15 oz) of crushed tomatoes can replace the paste + beer combo. The black beans? Drained and rinsed is critical—no one wants mushy beans in their chili. And if you're watching carbs, skip the beans entirely—the chili still tastes amazing.
This chili gets better the next day—plan ahead. Store in an airtight container in the fridge for 4-5 days or freeze for 3 months. I always make a double batch because it disappears fast. The leftovers reheat beautifully—just add a splash of broth or water if it gets too thick. For serving, grab sharp cheddar, sour cream, and chopped onions—classic toppings that take it to the next level.
Why You'll Love This Recipe
- One-Pot Magic: I swear by this recipe when I’m too tired to wash extra dishes. Brown the beef right in the same pot where the onions and garlic sizzle—no skillet juggling, no cleanup circus. Just dump, stir, and let the spices work their magic while I chop veggies for the side.
- Smoky Depth in Minutes: That moment when the cumin and chili powder toast in the oil? Pure flavor alchemy. The beef soaks up the earthy warmth while the garlic mellows into something rich—like a hug in a bowl. Honestly, I’ve tried fancy chili recipes, but this one’s the only one that hits every time.
- Game for Any Day: Need a quick lunch? Slap it on toast with avocado. Hosting a crowd? Double the batch and serve it in bowls with shredded cheese. My kids even ask for it on school nights—(yes, even on a Tuesday night)—because it’s that universally loved.
- Budget-Friendly Powerhouse: Ground beef and pantry spices won’t break the bank, but the leftovers? They’re legendary. I make a big batch on Sundays, and it lasts through my workweek lunches—no sad, wilted salads here. Plus, the cumin stretches the flavor so well, you’ll wonder why you ever bought expensive meat.
Step-by-step instructions for American chilli beef
Here's how to make this hearty, slow-simmered chilli that brings the whole table back for seconds.
Brown the Ground Beef Perfectly
Heat a large Dutch oven or heavy pot over medium-high heat. Add the 2.5 lb ground beef and break it apart with a wooden spoon, letting it brown in batches if needed. You're looking for deep brown color and even browning—this builds flavor that can't be replicated any other way.
Don't drain the fat—it's what makes this chilli rich and flavorful. Once the beef is fully browned (about 8-10 minutes), use a slotted spoon to transfer it to a plate, leaving all that delicious rendered fat in the pot. If you're worried about excess grease, you can drain about ¼ cup after browning, but I like to keep it all for that authentic chilli texture.
Sauté the Aromatics and Spices
In the same pot (no need to wipe it clean—those browned bits are flavor gold), add the diced onion and cook for 5-6 minutes until softened and translucent. Add the 6 cloves minced garlic and cook for another 30 seconds until fragrant—you should smell that garlic releasing its sweet, pungent aroma.
Now stir in the 3 tbsp chili powder, 1.5 tbsp ground cumin, 1 tbsp paprika, 1 tsp dried oregano, and 0.5 tsp cayenne pepper. Cook for 1 minute to toast the spices slightly, which deepens their flavor. This is where the chilli gets its signature spicy, smoky character—don't skip this step!
Build the Rich Base
Pour in the 0.5 cup tomato paste and stir to combine with the spices. Cook for 2 minutes until it darkens slightly and loses its raw taste. Then add the 1 cup beer and scrape up any browned bits from the bottom of the pot—this is called deglazing, and it captures all the meaty flavor that would otherwise go down the drain.
Pour in the 3 cups beef broth and bring everything to a gentle boil. Stir in the 1 cup black beans (drained and rinsed), the 1.5 tsp salt, 0.5 tsp black pepper, and 1 tbsp dark brown sugar. The sugar might seem odd, but it balances the acidity of the tomato and beer, rounding out the flavors beautifully.
Simmer Until Thick and Flavorful
Return the browned beef to the pot and stir to combine. Reduce heat to low and let it simmer uncovered for 1.5 to 2 hours. You want the chilli to reduce slightly and thicken—it should coat the back of a spoon but still be saucy enough to spoon over rice or cornbread.
Here's the thing—don't rush this step. The longer it simmers, the deeper the flavors become. Stir occasionally, especially in the first 30 minutes, to prevent the spices from settling at the bottom. Taste as you go and adjust seasoning if needed—you might need a little more salt or cayenne to hit your preferred heat level.
Rest and Serve Like a Pro
Once the chilli reaches your desired consistency, remove it from heat and let it rest for 10 minutes. This resting period allows the flavors to meld even more and gives you a chance to set the table. Serve it hot over steamed rice, cornbread, or even crusty bread to soak up every last bit of that rich, spicy goodness.
The chilli will taste even better the next day as the flavors continue to develop. If it's too thick after resting, stir in a splash of broth or water to loosen it up. And trust me, you'll want leftovers—this chilli is that good!
Pro Tips For Making American Chilli Beef
- BROWN THE BEEF FIRST: I learned this the hard way—skipping the sear makes your chili taste bland and greasy. Cook the ground beef in batches over medium-high heat until it’s deeply browned (not just pink), breaking it up with a spoon. That crust packs serious flavor, and rushing this step is how you end up with something that tastes more like meatloaf than chili.
- SWEAT THE AROMATICS LOW: Onions and garlic need time to soften, not burn. Cook them over medium-low heat for 5-6 minutes until the onions are translucent and the garlic smells sweet, not sharp. High heat here turns your chili bitter—trust me, you’ll taste the difference.
- SALT THE POT EARLY: Toss the beef with 1 teaspoon of salt right after browning while it’s still in the pan. This seasons the meat before it absorbs the chili liquid, so every bite has depth. Waiting until the end means your chili will taste like it’s missing something, no matter how much you adjust later.
- TOAST THE SPICES: Bloom the chili powder and cumin in the beef fat for 30 seconds before adding anything else—just until you smell that earthy, toasty aroma. This wakes up their flavors and prevents them from tasting raw. (Yes, even if you’re impatient like me, don’t skip this.)
Troubleshooting your american chilli beef
Beef Not Browning
If your ground beef clumps together instead of browning, it’s likely too cold or the heat isn’t high enough. Break it apart with a wooden spoon and spread it evenly in the pot—don’t overcrowd. Use a heavy-bottomed Dutch oven like Lodge for even heat distribution. If it’s still not browning after 5 minutes, increase heat to medium-high and stir frequently. The goal is deep brown, not blackened—this builds flavor without bitterness. 🔥
Chili Too Thin
If your chili turns out watery, you likely didn’t simmer long enough. Let it reduce uncovered on low heat for at least 1.5 hours, stirring occasionally. For a quick fix, mix 1 tbsp cornstarch with 2 tbsp cold water, stir into the chili, and simmer 5 more minutes. Alternatively, reduce the broth by ½ cup next time or add ½ cup tomato paste at the end for thickness. The chili should coat the back of a spoon but still be spoonable. ⏳
Spices Too Overpowering
If your chili tastes like a spice bomb, you may have toasted the spices too long or used too much cayenne. Next time, toast spices for just 30 seconds over medium heat—no longer. For heat control, reduce cayenne to ¼ tsp or omit entirely. Balance with 1 extra tbsp brown sugar or a splash of beer to mellow the flavors. Taste as you go and adjust gradually. 🌶️
Beans Too Mushy
Mushy beans usually mean they were added too early or cooked too long. Drain and rinse canned beans thoroughly, then add them only after the chili has simmered for 30 minutes. For firmer texture, use 15 oz canned beans (drained) instead of 1 cup cooked. If already mushy, drain excess liquid and stir in ½ cup fresh black beans (cooked) at the end. 🌱
Meat Too Tough
Tough beef means it didn’t simmer long enough. Ground beef should cook at least 1.5 hours to become tender. If it’s still rubbery, shred it and cook uncovered for another 30 minutes on low heat. For extra tenderness, add 1 cup beef broth and simmer until absorbed. Avoid high heat—it toughens the meat. The internal temp should reach 165°F for safety. 🥩
Burnt Onions or Garlic
Burnt aromatics mean you walked away or used too high heat. Keep heat at medium when cooking onions (5-6 minutes) and garlic (30 seconds). Stir constantly and watch closely—burnt garlic turns bitter. If it happens, remove the burnt bits immediately and start fresh. For extra flavor, add 1 extra clove minced garlic at the end of cooking. 🧄
Nutrition facts
Frequently asked questions
Can I use lean ground beef instead of 80/20?
You can, but the flavor and texture will suffer. The fat in 80/20 beef renders during cooking, creating a rich, flavorful base for the chili. If using leaner beef (like 90/10), add 1 tablespoon of beef fat or olive oil to the pot after browning to compensate. For the best results, stick with 80/20—it's worth the slight extra fat for that authentic chili taste.
What's the best way to store leftovers?
Store your chili in an airtight container in the fridge for up to 5 days, or freeze for 3 months for maximum freshness. When reheating, warm it gently on the stove over low heat and add a splash of broth or water if it thickens too much. The flavors actually improve after resting overnight—this chili tastes even better the next day!
How do I adjust the heat level?
Start by reducing the cayenne pepper to ¼ teaspoon for mild heat. For extra spice, add ½ teaspoon of red pepper flakes at the end of cooking. You can also balance heat by adding 1 extra tablespoon of brown sugar or a splash of beer to mellow the flavors. Always taste as you go and adjust gradually.
Can I make this in a slow cooker or Instant Pot?
For a slow cooker, brown the beef and sauté aromatics as directed, then transfer everything to the slow cooker and cook on low for 6-8 hours or high for 3-4 hours. For an Instant Pot, use the "Sauté" function to brown the beef, then cook on High Pressure for 20 minutes followed by a 10-minute natural release. Both methods work beautifully—just monitor the liquid level and add broth if needed.
What are the best toppings for this chili?
Classic toppings include sharp cheddar cheese, diced onions, fresh cilantro, and a dollop of sour cream. For extra crunch, try crushed tortilla chips or green onions. Don't forget a sprinkle of black pepper right before serving. The possibilities are endless—let everyone customize their bowl!