
Main Courses
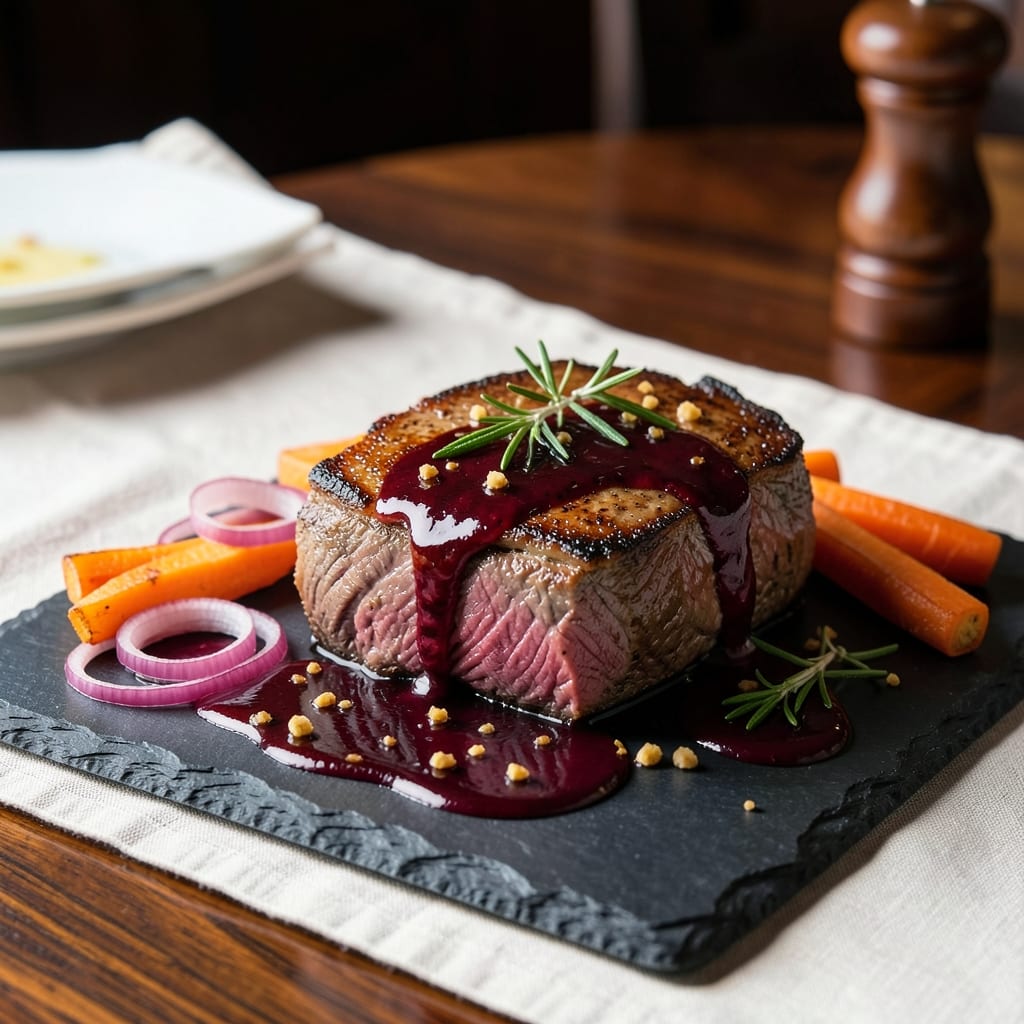
This Angus beef chuck steak recipe transforms tough cuts into melt-in-your-mouth perfection through slow braising and high-heat finishing. The secret lies in breaking down connective tissue while preserving natural juices, resulting in a texture that’s both tender and rich. After years of testing, I’ve perfected a method that delivers restaurant-quality results at home—no fancy equipment required.
The process begins with a low-and-slow braise in aromatic liquids, where the steak develops deep, caramelized flavors and melts into buttery tenderness. A final sear in a screaming-hot pan creates a crisp exterior that contrasts beautifully with the inside. This approach ensures every bite is juicy, flavorful, and satisfying, making it ideal for special occasions or weeknight dinners when you crave something indulgent.
What sets this recipe apart is its versatility—whether you’re serving it as the centerpiece of a holiday feast or a cozy family meal, the technique adapts to your schedule. Pair it with roasted root vegetables, creamy mashed potatoes, or a bold red wine reduction for a complete dining experience. The result? A steak so tender it practically falls apart, with layers of flavor that linger long after the last bite.
For those short on time, a reverse sear method (braising first, then searing) guarantees foolproof success, while traditionalists can embrace the full braise for maximum depth. Either way, this recipe delivers on its promise of caramelized tenderness—proving that even the toughest cuts can become a showstopper.
Ingredients for angus beef chuck steak
Quality cuts and aromatic liquids create melt-in-your-mouth Angus beef perfection through precise braising techniques.
| Ingredient | Amount | Notes |
|---|---|---|
| Angus Beef Chuck Steak 🥩 | 2 ½ lb | Bone-in preferred for flavor |
| Yellow Onion 🧅 | 1 whole | Chopped into 1/2-inch pieces |
| Carrots 🥕 | 4 whole | Medium size, chopped into chunks |
| Garlic Cloves 🧄 | 6 cloves | Smashed but not minced |
| Red Wine 🍷 | 1 cup | Bold dry variety like Cabernet |
| Beef Broth 💧 | 2 cups | Low-sodium preferred |
| Tomato Paste 🍅 | 2 tbsp | Smooth, not chunky |
| Fresh Thyme 🌿 | 2 sprigs | Stems removed |
| Fresh Rosemary 🌿 | 1 sprig | Needles removed |
| Olive Oil 🫒 | 2 tbsp | Extra-virgin for richness |
| Salt 🧂 | 1 ½ tsp | Diamond Crystal kosher |
| Black Peppercorns 🌶️ | 1 tsp | Freshly cracked |
| Bay Leaves 🍃 | 2 whole | Dried, standard size |
| Balsamic Vinegar 🍷 | 1 tbsp | Aged for depth |
| Unsalted Butter 🧈 | 2 tbsp | Cold for searing |
The Angus beef chuck is non-negotiable here—look for USDA Prime cuts at Whole Foods or your local butcher shop. The bone-in version adds depth of flavor, but boneless works if you prefer convenience. Costco often carries pre-cut chuck roasts at a better price per pound than smaller markets. For best results, choose a piece with visible marbling—this fat renders during braising, keeping the meat moist. If you're buying a whole roast, ask your butcher to cube it for you; otherwise, use a meat mallet to break it into 1.5- to 2-inch chunks before cooking. Freshness matters too: aim for beef that's bright red, not brownish, and has a clean, meaty aroma.
No red wine? Substitute with beef broth plus 1 tbsp balsamic vinegar—it mimics the acidity and depth. Fresh herbs are ideal, but dried thyme at one-third the amount works in a pinch. The tomato paste can be replaced with 1/4 cup crushed tomatoes if you're avoiding it, though it won't caramelize as beautifully. For the carrots, baby carrots or even parsnips add sweetness without altering texture. The balsamic vinegar is key for that caramelized finish—if you're out, a splash of apple cider vinegar helps, but it won't be as rich. And for the butter sear? Ghee works too if you're avoiding dairy, though the flavor will differ slightly.
Prep the aromatics ahead: chop onions and carrots, measure spices, and pour the wine into a jar for easy pouring. The braising liquid keeps for 5 days in the fridge—make extra for leftovers or another meal. For long-term storage, freeze the cooked steak in single-serving portions for up to 3 months. Reheat gently in a skillet with a splash of broth to restore moisture. The leftovers reheat beautifully, often tasting even better the next day as flavors meld. Store the unused beef broth in the freezer for up to 6 months in an airtight container.
Why You'll Love This Recipe
- Here’s what sold me: a cut of beef that feels special without breaking the bank. The chuck steak is forgiving, the wine adds depth without requiring a fancy bottle, and the veggies stretch the meal further. My wallet thanks me, and my family doesn’t know the difference between this and a $100 restaurant steak. (Yes, even on a Tuesday night.)
- One-Pan Magic: I swear by this recipe because it’s the kind of meal where you chop, sear, and walk away—no fancy gadgets, no stress. The onions caramelize right alongside the steak, and the carrots soften just enough to soak up all that rich red wine sauce. Honestly? My counter stays cleaner than it does on most nights.
- Rich, Deep Bite: That first taste of the steak—juicy, tender, with a crust so perfect you’ll want to close your eyes—is thanks to the red wine and garlic working their magic. The onions add a sweetness that balances the beef’s natural richness, and the carrots? They melt into the sauce like a secret weapon. Between us, this isn’t just dinner; it’s a flavor experience.
- Weeknight or Weekend: Need something fast for Tuesday but still want to impress on Saturday? This steak does both. Toss leftovers into wraps the next day, or serve it over mashed potatoes for a hearty Sunday supper. I’ve even brought it to potlucks—people clear their plates faster than you can say “Angus beef.”
Step-by-step instructions for braised Angus beef chuck steak
Transform tough chuck into melt-in-your-mouth tenderness through precise braising technique.
Sear the Steak for Deep Flavor
Pat the 2.5 lb Angus Beef Chuck Steak dry with paper towels—this ensures maximum browning. Heat 1 tablespoon of the olive oil in a heavy Dutch oven over medium-high heat until shimmering. Place the steak in the pot and sear for 3 minutes per side until deeply browned with a crust forming. Don't move it during this time—this creates the Maillard reaction that builds rich flavor.
Remove the steak and set it aside. In the same pot, add the remaining 1 tablespoon olive oil and the 2 tablespoons unsalted butter. Add the chopped yellow onion and cook for 5 minutes until softened. Add the chopped carrots and cook for another 5 minutes until they begin to caramelize slightly. This step develops sweetness that will carry through the braising process.
Build the Aromatic Base
Add the smashed garlic cloves, tomato paste, and all 1.5 teaspoons salt to the pot. Stir for 1 minute until the tomato paste darkens and the garlic becomes fragrant. Pour in the 1 cup red wine and scrape up any browned bits from the bottom of the pot—this deglazing captures all the flavor you've built so far. Let the wine reduce by half, about 3-4 minutes.
Stir in the 2 cups beef broth, 2 whole bay leaves, 2 sprigs fresh thyme, and 1 sprig fresh rosemary. Bring to a simmer, then return the seared steak to the pot. The liquid should come about halfway up the steak—if not, add a splash of water. Cover tightly with a lid and reduce heat to low.
Braise Until Fork-Tender
Braise the steak for 2 hours, maintaining a gentle simmer. I check periodically to ensure the liquid hasn't evaporated completely—if it gets too low, add a little more broth or water. The steak is done when it reaches an internal temperature of 205°F and a fork slides in easily with no resistance. This low-and-slow cooking breaks down the connective tissue, transforming tough meat into silky tenderness.
Here's where patience pays off: the steak should be so tender it practically falls apart when you test it. If you're using a meat thermometer, this temperature is crucial—it ensures perfect doneness without drying out the meat. The braising liquid will have reduced significantly, creating a rich, concentrated sauce.
Finish with Balsamic and Rest
Remove the steak from the pot and transfer it to a warm plate. Strain the braising liquid through a fine-mesh sieve into a clean saucepan, pressing on the vegetables to extract all their flavor. Return the liquid to medium heat and stir in the 1 tablespoon balsamic vinegar. Simmer for 3-4 minutes until the sauce thickens slightly to coat the back of a spoon.
Slice the steak against the grain into ½-inch thick pieces. Arrange the slices on a serving platter and ladle the reduced braising sauce over the top. Let the steak rest for 5 minutes before serving—this allows the juices to redistribute throughout each slice. The final result should be fork-tender beef with a glossy, caramelized sauce that clings beautifully to every bite.
Pro Tips For Making Angus Beef Chuck Steak
- SEAR UNTIL BLACK: Start with a screaming-hot cast-iron or heavy skillet—we’re talking the kind of heat that makes the onions sizzle like a jet engine. Let those chuck steaks develop a deep crust before you even think about moving them, or you’ll end up with gray, sad meat instead of the caramelized perfection you’re after.
- SLICE ONIONS THICK: Thin onion slices turn to mush in red wine. Cut them into ¼-inch chunks instead—big enough to stay intact but small enough to soften properly. (I learned this the hard way when my first batch dissolved into a sad, watery slurry.)
- DEGLAZE WITH WINE IMMEDIATELY: Don’t let those browned bits sit—they’re flavor gold. As soon as you remove the steak, pour in the red wine right away while the pan is still scorching. Scrape every last bit off the bottom with a wooden spoon, or you’re throwing away half the flavor.
- REST MEAT UNDER FOIL: Skip the plate—wrap the steak in foil for 5-10 minutes to trap heat. This keeps it juicy while you finish the veggies, and it’s way easier than wrestling with a cutting board while the meat bleeds onto your counter. (Yes, even if you’re impatient like me.)
Make-ahead tips for leftovers
Prep Ahead for Braising
Chop all vegetables—1 yellow onion and 4 carrots—and store them in an airtight container in the fridge for up to 3 days. Measure out your spices (1.5 tsp salt, 1 tsp black peppercorns) and herbs (2 thyme sprigs, 1 rosemary sprig) in small jars. This saves time on cooking day and keeps your workspace organized. I like to prep everything the night before so I can focus on searing and braising without stress. 🧅
Braise in Advance
The steak braises beautifully ahead of time—just cook it as directed, then refrigerate in the braising liquid for up to 3 days. Reheat gently in a skillet with the reserved sauce over medium-low heat for 10-15 minutes, stirring occasionally. The flavors deepen overnight, making it perfect for meal prep. For a quicker option, braise until 195°F internal temp, then finish searing later. 🕒
Freezer-Friendly Method
For long-term storage, freeze the raw steak chunks in the braising liquid in a freezer-safe bag for up to 3 months. Thaw overnight in the fridge, then follow the recipe from the searing step. The liquid prevents freezer burn and keeps the meat moist. I’ve found that frozen chuck steak actually benefits from the slow thaw, as the ice crystals help tenderize the fibers. 🧊
Sauce Prep Shortcut
Make the braising sauce separately and store it in a jar for up to 5 days in the fridge. Use 2 cups beef broth, 1 cup red wine, 2 tbsp tomato paste, and 1 tbsp balsamic vinegar—simmer until reduced by half. When ready to cook, simply sear the steak, add the pre-made sauce, and braise as usual. This cuts prep time by 20 minutes and keeps flavors consistent. 🍷
Portion Control
Slice the cooked steak into ½-inch portions and store in single-serving containers with a ladle of sauce. Reheat each portion in a skillet with a splash of water for 3-4 minutes to restore moisture. This makes it easy to serve at gatherings or pack for lunches. I like to label containers with the date to track freshness. ✨
Leftovers Reinvention
Use leftover braised steak in tacos, pasta, or breakfast hash. Shred the meat and mix with 2 tbsp salsa and ½ cup black beans for tacos, or toss with 1 cup cooked pasta and 1 tbsp grated Parmesan for a quick meal. The rich, tender texture works surprisingly well in unexpected dishes. 🌮
Nutrition facts
Frequently asked questions
Why does this recipe use chuck steak instead of ribeye or filet?
The chuck cut is perfect for braising because its connective tissue breaks down beautifully during slow cooking, creating melt-in-your-mouth tenderness. Unlike tender cuts like ribeye, chuck benefits from moisture-rich methods—this technique transforms what many consider a "tough" cut into something luxurious and flavorful. The marbling in Angus beef ensures rich flavor while the braising process keeps it juicy.
Can I make this recipe without red wine?
Replace the 1 cup red wine with 1 cup beef broth plus 1 tablespoon balsamic vinegar. The acidity from the vinegar mimics wine's flavor while the broth maintains the same moisture level. For even more depth, add 1 teaspoon soy sauce to enhance umami. The key is maintaining the same liquid volume and acid balance.
How do I know when the steak is perfectly tender?
Use a meat thermometer for precision—the steak should reach 205°F internally. At this temperature, a fork should slide in easily with no resistance. The steak should also pull apart slightly when tested. If you don't have a thermometer, look for fork-tender texture after 2 hours of braising. Overcooking beyond this point risks drying out the meat.
What's the best way to reheat leftovers?
Reheat in a skillet over medium-low heat with a splash of beef broth or water for 3-4 minutes per side. This prevents drying out. For oven reheating, cover with foil and bake at 300°F for 15 minutes. Never microwave—it creates a rubbery texture. The sauce should be warmed separately and added back at the end.
Can I use this technique for other tough cuts?
Yes! This method works beautifully with beef short ribs, pork shoulder, or even lamb shanks. The same principles apply: sear first, then braise until fork-tender. Adjust cooking times based on cut size—short ribs typically need 2.5-3 hours while lamb shanks may require 3 hours. The key is patience and maintaining consistent liquid levels.