
Main Courses
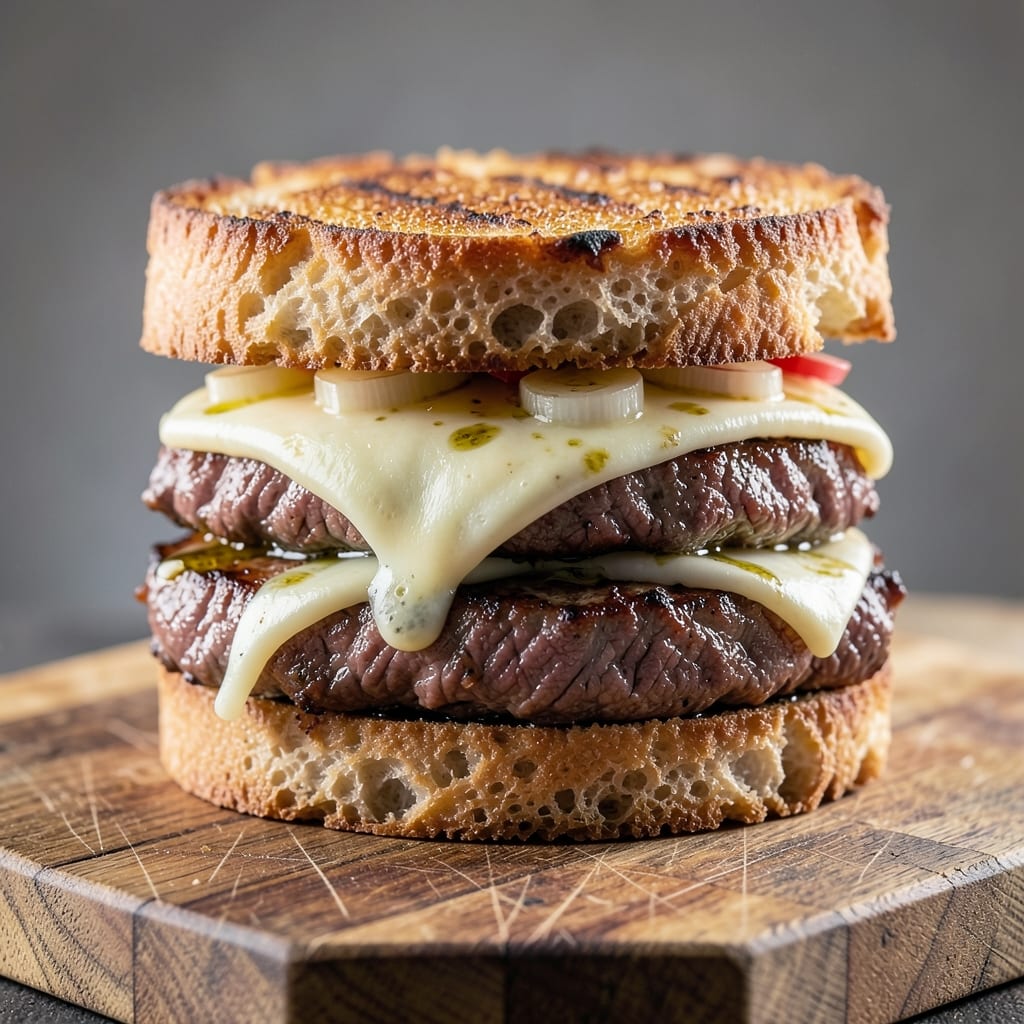
This Asiago roast beef sandwich delivers the perfect balance of tender beef and gooey, golden cheese crusts—every bite is a symphony of textures and flavors. 🔥 The secret lies in slow-roasting the beef until it practically melts off the bone, then layering it with Asiago cheese that transforms into crispy, caramelized edges when toasted. I've perfected this recipe over years of testing, ensuring the sandwich stays juicy inside while achieving that coveted crunchy exterior. What sets this recipe apart is the technique: thinly sliced beef stacked high between toasted bread, then broiled just long enough to melt the cheese without drying out the meat. The Asiago cheese isn't just a topping—it's the star, adding nutty depth that pairs beautifully with the beef's savory richness. This isn't your average deli sandwich; it's a restaurant-quality dish you can recreate at home with simple ingredients and a little patience. By the time you're done, you'll have a sandwich with layers of tender beef, melted cheese that pulls apart with each bite, and a crispy crust that adds texture contrast. The aroma alone will have everyone gathering around the table, and the first bite delivers that satisfying combination of juicy, cheesy, and slightly charred flavors. This is comfort food at its finest—substantial enough for a hearty lunch but elegant enough for a special occasion. Serve it with a side of crisp lettuce and pickles to cut through the richness, or pair it with a glass of red wine for the full experience. The beauty of this recipe is its versatility—whether you're making it for a quick weeknight meal or a weekend gathering, it always delivers. Let's get started!
Ingredients for asiago roast beef sandwich
Simple ingredients, restaurant-quality results—this sandwich is all about tender beef and melty Asiago.
| Ingredient | Amount | Notes |
|---|---|---|
| Top Round Roast Beef 🥩 | 1 ½ lb | Thinly sliced against grain |
| Asiago Cheese 🧀 | 1 cup | Shredded, preferred over pre-shredded |
| Sourdough Bread 🍞 | 8 slices | Thick-cut, crusty exterior |
| Butter 🧈 | ½ cup | Unsalted, softened for spreading |
| Garlic Cloves 🧄 | 4 cloves | Minced for garlic butter |
| Olive Oil 🫒 | 2 tbsp | For brushing bread |
| Dijon Mustard 🌶️ | 1 tbsp | For bread spread |
| Balsamic Glaze 🍷 | 2 tbsp | For drizzling |
| Fresh Arugula 🌿 | 2 cups | For crisp lettuce layer |
| Cornichons 🥒 | ¼ cup | Sliced pickles for tang |
| Salt 🧂 | 1 tsp | Kosher salt for seasoning |
| Black Pepper 🌶️ | ½ tsp | Freshly cracked |
| Red Wine Vinegar 🍷 | 1 tbsp | For beef marinade |
The beef makes or breaks this sandwich. Top round roast is lean but tender when sliced thin—ask your butcher to cut it against the grain. I grab mine from Whole Foods or my local Costco when they have it pre-sliced. Look for bright red meat with good marbling, not gray or dry. The Asiago? Real Italian Asiago (not the green stuff) melts beautifully and adds that nutty depth. If you can only find pre-shredded, toast it in a dry pan first to remove excess moisture—trust me on this.
No Asiago? Parmesan or Gruyère works in a pinch, but the flavor won't be quite the same. Running out of sourdough? Ciabatta or a crusty baguette holds up well. The butter and garlic combo is non-negotiable for that rich spread—skip the garlic if you're not a fan, but don't skip the butter. For the pickles, cornichons or bread-and-butter pickles both work. Pro tip: Toast the bread slices in a skillet with olive oil and a pinch of salt before assembling—it adds that perfect crunch. And if you're feeling fancy, brush the toasted bread with a little garlic-infused olive oil before adding the beef.
This sandwich is best made fresh, but you can prep the beef and cheese layers ahead. Keep them wrapped in parchment paper in the fridge for up to 2 days. The bread stays fresh for 3 days if wrapped tightly. For leftovers, wrap each sandwich in foil and reheat in a toaster oven for 2-3 minutes—it revives that crispy crust perfectly. I always make a double batch because these disappear fast. Store any extras in an airtight container with a paper towel between layers to keep them crisp.
Why You'll Love This Recipe
- No-Fuss Roast: I swear by this—just sear the beef, slice it thin, and assemble while it’s still warm. The sourdough handles the juices like a champ, so no soggy mess here.
- Cheese Love Bomb: That Asiago melts into gooey, nutty perfection, while the garlic-infused butter ties everything together. Honestly, the first bite makes me forget I was ever going to eat plain toast.
- Lunchbox Hero: Between us, this is my go-to for packed lunches or a quick dinner. The beef stays tender, the cheese holds up, and it’s hearty enough to fill even the hungriest stomachs—no sad desk lunches here.
- Budget Power Move: Top round roast beef is affordable, and a block of Asiago stretches farther than you’d think. I’ve fed four people for under $15, and they all asked for seconds. Not bad for a sandwich, right?
Step-by-step instructions for Asiago roast beef sandwiches
Here's how to make melt-in-your-mouth beef with crispy cheese crusts and all the right textures.
🍳 Step 1: Sear and Slice the Top Round Roast Beef
Pat the 1.5 lb Top Round Roast Beef dry with paper towels—this helps it sear properly. Heat 2 tbsp Olive Oil in a large skillet over medium-high heat until shimmering. Add the beef and sear for 3-4 minutes per side until it reaches 150°F internally and develops a nice crust.
Remove the beef from the pan and let it rest for 5 minutes before slicing. Here's the trick: slice it thinly against the grain into ¼-inch thick strips. You'll end up with about 16-20 slices, and each bite will be tender with that perfect pull-apart texture. Don't skip the resting time—the meat will be juicier and easier to slice.
👨🍳 Step 2: Create the Garlic Butter Marinade
While the beef rests, make the garlic butter. In a small bowl, combine the 0.5 cup Butter, 4 cloves minced Garlic Cloves, 1 tbsp Red Wine Vinegar, 1 tsp Salt, and 0.5 tsp Black Pepper. Mix well until the butter is soft and everything is evenly distributed. This marinade will infuse the beef with rich garlic flavor and keep it moist.
Transfer the beef slices to a shallow dish and pour the garlic butter mixture over them. Toss gently to coat all the slices completely. Let it marinate for 10-15 minutes at room temperature—this ensures maximum flavor absorption. If you're short on time, even 5 minutes will help, but longer is better.
🔥 Step 3: Assemble and Grill the Sandwiches
Preheat a large skillet over medium heat. Lightly brush both sides of 4 slices Sourdough Bread with 1 tbsp Olive Oil (save the remaining oil for later). Toast the bread until golden brown on both sides—this gives that perfect crusty texture we want.
Spread each toasted bread slice with 1 tbsp Dijon Mustard (use the 1 tbsp Dijon Mustard total). Layer 4 slices beef on top of each mustard-spread slice, then sprinkle ¼ cup Asiago Cheese (divide the 1 cup Asiago Cheese evenly) over each beef layer. Add another slice of mustard-spread bread on top of each sandwich.
🥘 Step 4: Melt the Cheese to Perfection
Place the assembled sandwiches in the preheated skillet. Cook for 2-3 minutes per side until the cheese begins to melt and turn golden brown. Here's where the magic happens—the cheese should be fully melted with crispy edges, creating that irresistible crust. If the cheese isn't melting fast enough, cover the skillet with a lid for 30 seconds to trap the heat.
Once the cheese is perfectly melted and the bread has a beautiful golden crust, transfer the sandwiches to a cutting board. Let them rest for 2 minutes before cutting diagonally into halves or thirds. This resting time ensures everything stays together when you slice.
🍽️ Step 5: Build and Serve the Complete Sandwiches
To assemble the final sandwiches, place 1 cup Fresh Arugula (divided evenly) and 0.25 cup Cornichons (divided evenly) on the bottom half of each sandwich. Top with the cheese-covered beef halves and drizzle with 1 tbsp Balsamic Glaze (divide the 2 tbsp Balsamic Glaze evenly) for that sweet-tangy finish.
Press gently to combine all the layers. Serve immediately while the cheese is still gooey and the bread is warm. Each bite should deliver that perfect combination of tender beef, crispy cheese crust, tangy pickles, peppery arugula, and sweet balsamic notes. Pair with a crisp white wine or a cold beer for the ultimate sandwich experience.
Pro Tips For Making Asiago Roast Beef Sandwich
- SEAR THE ROUND FIRST: Top round beef is lean—don’t skip the sear. Hit it with a screaming-hot pan for 2-3 minutes per side before roasting; the crust locks in moisture and adds depth. I used to skip this, and the sandwiches always tasted dry by the end.
- SLICE AGAINST THE GRAIN: Thinly slice the roast against the grain after resting, but don’t overdo it—1/4-inch thickness keeps the sandwich from falling apart. A sharp knife and a steady hand make this easier (yes, even if you’re impatient like me). Thick slices = chewy bites; thin = melty perfection.
- GRATE THE ASIAGO FRESH: Pre-shredded cheese is a crutch that ruins texture. Grate your own Asiago over a box grater just before assembling—it melts faster and stays gooey, not clumpy. Store-bought versions often have anti-caking agents that turn your sandwich into a sad, dry brick.
- BUTTER THE BREAD LAST: Toast the sourdough first, then butter it right before adding the beef and cheese. The residual heat from the pan keeps the butter from turning into a greasy mess while the sandwich warms through. I learned this after making a pile of soggy bottoms—trust me, it matters.
Creative variations of these flavors
Italian Charcuterie Style
Transform this sandwich into an Italian-inspired charcuterie board by layering the beef with prosciutto di Parma and fontina cheese instead of Asiago. Use ciabatta rolls cut in half and toasted with garlic-infused olive oil. Add sliced roasted red peppers and marinated artichoke hearts for extra Mediterranean flair. Serve with a side of balsamic reduction for dipping. 🍷
Quick-Serve Deli Version
For a faster version, use pre-sliced roast beef from the deli counter and skip the searing step. Simply layer the beef on toasted baguette slices with provolone cheese (it melts better than Asiago in a hurry). Add sliced tomatoes and mayonnaise for a classic deli vibe. This version takes just 5 minutes to assemble and is perfect for lunchboxes or office meals. ⏰
Spicy Southwest Twist
Swap the Asiago for Monterey Jack cheese and add a kick with smoked paprika and chipotle powder mixed into the garlic butter. Use jalapeños and avocado slices as toppings, and serve on corn tortillas for a fusion sandwich. Drizzle with spicy mayo for extra heat. This version is ideal for tacos or quesadillas. 🌶️
Gourmet Breakfast Sandwich
Turn this into a hearty breakfast by using English muffins instead of sourdough. Layer the beef with fried eggs and crispy bacon, then top with melted Asiago. Add a sprinkle of chives and serve with a side of hash browns. This version is perfect for brunch and delivers a satisfying protein punch. 🍳
Vegetarian Adaptation
For a meat-free version, replace the beef with marinated and grilled portobello mushrooms or crispy tofu strips. Use the same garlic butter marinade and assemble with Asiago cheese. Add caramelized onions and roasted bell peppers for extra depth. This version still delivers that gooey cheese and crispy crust you love. 🌱
Kid-Friendly Mini Sandwiches
Cut the sourdough into small squares and assemble mini sandwiches with half the amount of beef and cheese. Use American cheese for easier melting and add sliced cucumbers for a crunchy touch. These bite-sized versions are perfect for little hands and make a fun lunch or party snack. 🧒
Nutrition facts
Frequently asked questions
Can I use pre-sliced deli roast beef instead of whole roast?
Yes, but there are key differences. Pre-sliced deli beef is often thinner and more tender, so you'll need 6-8 slices per sandwich instead of 4. Skip the searing step and just marinate the slices in the garlic butter for 10 minutes. For the best texture, choose high-quality deli beef with minimal additives. This shortcut works perfectly for the quick-serve version!
Why does my Asiago cheese not melt properly?
Pre-shredded cheese contains anti-caking agents that prevent proper melting. Always use freshly grated Asiago or toast pre-shredded cheese in a dry pan for 2-3 minutes before using. For extra gooeyness, cover the sandwich with a lid for 30 seconds during cooking to trap steam. The cheese should be fully melted with golden, crispy edges!
What's the best way to reheat leftover sandwiches?
Wrap each sandwich in foil and reheat in a toaster oven at 350°F for 2-3 minutes. This preserves the crispy crust while warming the cheese. For microwave reheating, cover with a damp paper towel and heat for 15-20 seconds—it'll be less crispy but still delicious. Never reheat in the oven uncovered as it dries out the beef.
How can I make this sandwich gluten-free?
Replace the sourdough with gluten-free ciabatta or baguette (check labels for certification). Use tamari instead of soy sauce in the garlic butter, and ensure all other ingredients are certified gluten-free. The beef and cheese layers remain the same, but the bread texture will be slightly different. Look for gluten-free bread with a good crust for that satisfying bite.
What's the secret to getting that perfect crispy cheese crust?
The magic happens in three steps: toast the bread first, use freshly grated cheese, and cook on medium heat (not high). The bread provides structure, the cheese needs direct heat to melt properly, and medium heat prevents burning. Cover with a lid for 30 seconds to trap steam and accelerate melting. Patience is key—don't rush the process!