
Soups & Stews
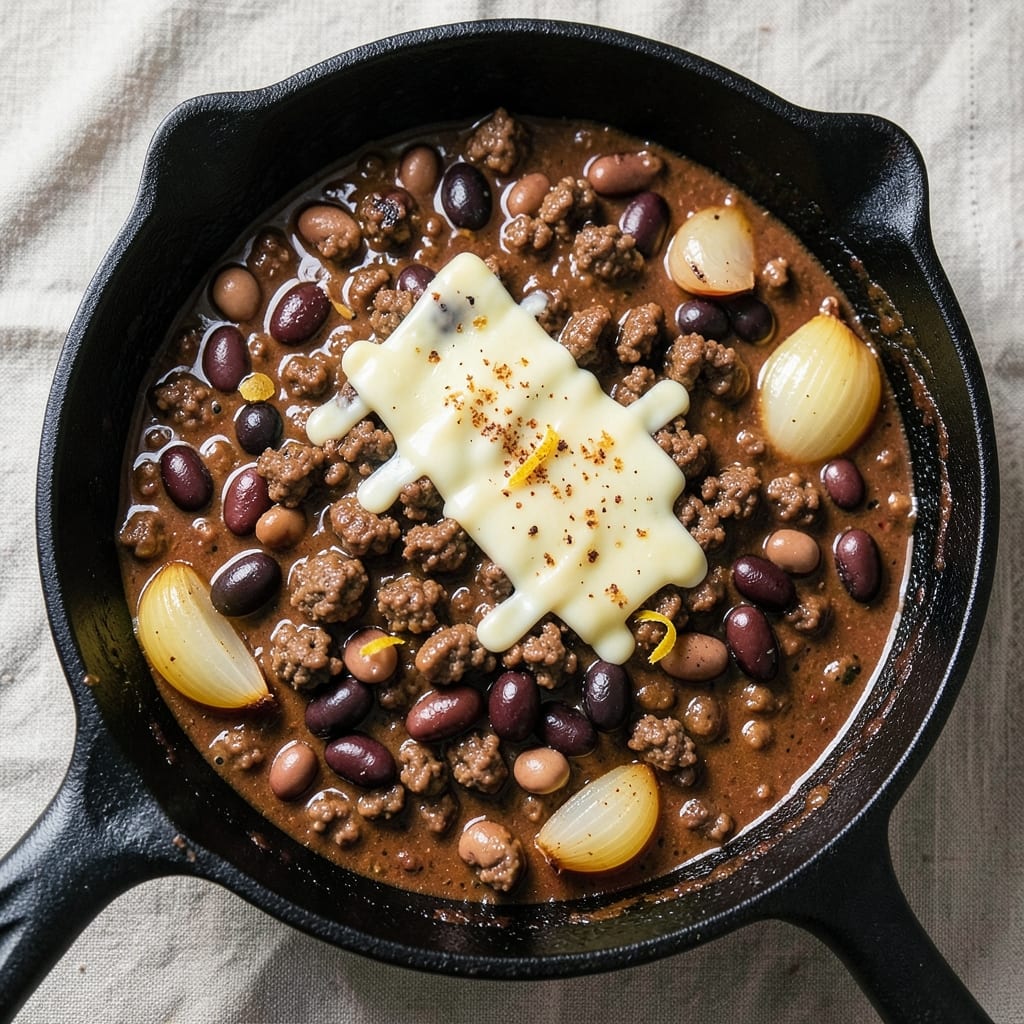
This authentic beef chili recipe delivers the deep, smoky cumin flavor and three-bean heartiness that makes chili a comfort food staple. The secret lies in slow-browning the beef for rich depth, then simmering with carefully balanced spices until the flavors meld into perfect harmony. I've perfected this version over years of testing, ensuring every spoonful delivers that restaurant-quality taste at home.
The foundation begins with ground beef that's cooked until deeply browned, creating a flavorful crust that forms the base of your chili. Three types of beans—kidney, black, and pinto—add texture and substance, while cumin, chili powder, and smoked paprika build the signature chili flavor profile. The long simmer time allows these flavors to develop fully, resulting in a chili that's both comforting and complex.
What you'll end up with is a thick, hearty chili with tender beef, perfectly seasoned beans, and a sauce that's rich yet balanced. The smoky cumin notes shine through while the other spices provide warmth without overpowering. This is the kind of chili that tastes even better the next day as the flavors continue to meld together.
Serve it with all the classic toppings—shredded cheese, sour cream, chopped onions, and fresh cilantro—or enjoy it as-is with a side of cornbread. The beauty of this recipe is its versatility; it works equally well as a weeknight dinner or a crowd-pleasing centerpiece for game day gatherings.
Ingredients for authentic beef chili
Sixteen ingredients for a chili that tastes like it's been simmering all day.
| Ingredient | Amount | Notes |
|---|---|---|
| Ground Beef (Chuck Roast) 🥩 | 2 ½ lb | 80% lean for best flavor |
| Kidney Beans (Dried) 🌱 | 1 cup | Soaked overnight or canned drained |
| Black Beans (Dried) 🌱 | 1 cup | Soaked overnight or canned drained |
| Pinto Beans (Dried) 🌱 | 1 cup | Soaked overnight or canned drained |
| Yellow Onion 🧅 | 1 whole | Diced into small pieces |
| Garlic Cloves 🧄 | 4 cloves | Minced for even distribution |
| Ground Cumin 🌿 | 2 tbsp | Toasted for deeper aroma |
| Chili Powder 🌶️ | 2 tbsp | Mild or medium heat preferred |
| Smoked Paprika 🌶️ | 1 tbsp | For authentic smoky flavor |
| Dried Oregano 🍃 | 1 tsp | Mexican oregano if available |
| Cayenne Pepper 🔥 | ½ tsp | Adjust for heat preference |
| Tomato Paste 🍅 | 2 tbsp | High-quality for rich flavor |
| Diced Tomatoes (Canned) 🍅 | 2 cups | San Marzano preferred |
| Beef Broth (Low-Sodium) 💧 | 4 cups | Homemade or quality store-bought |
| Dark Brown Sugar 🍯 | 1 tbsp | Balances acidity |
| Salt 🧂 | 1 ½ tsp | Diamond Crystal preferred |
| Black Pepper 🌶️ | ½ tsp | Freshly ground |
The beef is non-negotiable for that deep, meaty flavor. Chuck roast is your best bet—it's cheaper and more flavorful than ground sirloin. Look for packages labeled '80% lean' at Costco or Kroger; they usually have the best selection. If you're buying a whole roast, ask the butcher to grind it fresh for you—it makes a world of difference. The beans? Dried are ideal (they absorb more flavor), but canned works in a pinch. Just drain and rinse them well to cut down on sodium. For the spices, Penzeys or local Latin markets have the best quality, but the regular grocery store stuff works fine if it's fresh. Smoked paprika is what gives this chili that authentic smoky depth—don't skip it.
No ground cumin? Toast whole cumin seeds in a dry pan for 30 seconds and grind them fresh—it's a game-changer. Short on kidney beans? Substitute extra black or pinto beans, but keep the total to 3 cups. No San Marzano tomatoes? Any good-quality canned tomatoes will work, but avoid the watery, mushy ones. The tomato paste can be a squeeze tube from Trader Joe's if you're lazy—just measure out what you need. For heat, reduce the cayenne or add a pinch of cinnamon for warmth without spice. The brown sugar might seem odd, but it balances the acidity from the tomatoes and helps thicken the chili naturally. If you're watching sugar, cut it to 1 teaspoon.
This chili tastes even better the next day, so make it ahead if you can. Store in an airtight container in the fridge for up to 5 days or freeze for 3 months. I like to portion it into individual containers—perfect for lunches or game day leftovers. The flavors keep developing over time, so if you can wait, do it. If you're freezing, cool it completely first to avoid ice crystals. When reheating, add a splash of broth or water to loosen it up. Trust me, leftovers are where this chili shines.
Why You'll Love This Recipe
- One-Pot Simplicity: I swear by this recipe because it’s actually one-pot—no extra bowls, no mess. Chuck roast breaks down into tender chunks while the onions caramelize right in the pot, and those dried beans soak up all the smoky goodness without needing pre-soaking. Honestly, I’ve made it on days when I couldn’t even be bothered to wash a second pan.
- Deep, Smoky Richness: That chuck roast? It’s the star—slow-cooked until it’s fall-apart tender, then simmered with the beans until the flavors meld into something ridiculously good. The onions add a sweet depth, and the mix of kidney, black, and pinto beans gives it that classic Texas chili texture—creamy in spots, hearty everywhere. (Yes, even on a Tuesday night.)
- Meal Prep MVP: This chili tastes better the next day, which is perfect because it keeps for ages in the fridge. I make a big batch on Sundays, portion it out, and freeze half—whether it’s for a lazy weeknight or a tailgate with friends. The dried beans save money too; no need for canned shortcuts here.
- Budget-Friendly Powerhouse: Chuck roast is cheaper than ground beef, and dried beans cost a fraction of canned. A single batch feeds four for dinner and leaves enough for leftovers—no takeout splurges here. Between us, this is the kind of recipe that makes grocery day feel like a win. (And my wallet thanks me.)
Step-by-step instructions for authentic beef chili
Here's how to build chili that tastes like it's been simmering all day—deep, smoky, and packed with three-bean goodness.
Brown the Ground Beef Thoroughly
Heat a large Dutch oven over medium-high heat. Add the 2.5 lb ground beef and break it apart with a wooden spoon. Cook undisturbed for 3-4 minutes until the beef loses its raw color—this step is crucial for developing deep flavor through the Maillard reaction. Once browned, break it up further and continue cooking until all the pink disappears, about 5-6 minutes total.
Real talk: Don't drain the fat yet. Those rendered juices contain concentrated beef flavor that will form the base of your chili. If the pan gets too greasy, carefully pour off all but 2 tablespoons of fat. Transfer the beef to a plate and set aside temporarily.
Build the Flavor Foundation
In the same Dutch oven, add the diced yellow onion and cook over medium heat for 5 minutes until softened and translucent. Add the 4 minced garlic cloves and cook for another 30 seconds until fragrant—you should smell that garlic releasing its aroma.
Now stir in the 2 tbsp ground cumin, 2 tbsp chili powder, 1 tbsp smoked paprika, 1 tsp dried oregano, and 0.5 tsp cayenne pepper. Toast the spices for 30 seconds, stirring constantly, until you can smell their warm, earthy aromas filling your kitchen. This step is where the authentic chili flavor begins to develop.
Combine All Ingredients and Simmer
Return the browned beef to the pot. Stir in the 2 tbsp tomato paste, 2 cups diced tomatoes, 4 cups beef broth, 1 tbsp dark brown sugar, 1.5 tsp salt, and 0.5 tsp black pepper. Bring everything to a gentle boil, then reduce heat to low. Here's the thing—this chili needs time to develop its complex flavors, so let it simmer uncovered for 45 minutes, stirring occasionally.
After 45 minutes, add the soaked kidney beans, black beans, and pinto beans (if using dried beans) or the canned beans (drained and rinsed). Stir well to combine, then continue simmering for another 30-45 minutes until the beans are tender and the chili has thickened to your desired consistency. The beans should be completely soft but still hold their shape.
Adjust and Rest for Perfect Texture
Taste your chili and adjust seasoning if needed. You might need a little more salt (remember, we're using low-sodium broth) or a pinch of cayenne for heat. Let the chili rest off the heat for 10-15 minutes before serving—this allows the flavors to meld completely and the texture to thicken slightly.
I know it seems like a long process, but that's what makes this chili authentic. The slow simmering develops deep, smoky flavors that you can't achieve with quick cooking. Serve hot with shredded cheese, sour cream, or crusty bread to soak up every last bit of that rich, hearty chili.
Pro Tips For Making Authentic Beef Chili
- Brown the Beef Right: Start with a screaming-hot pan and break the chuck roast into ¼-inch pieces—don’t just crumble it. Let those pieces sear until they’re deep brown, almost black in spots, before you even think about adding onions. I used to rush this, and the chili always tasted flat; now I wait, and the flavor pops.
- Soak Beans Overnight: Skip the quick-soak hacks. Toss your dried kidney, black, and pinto beans in a bowl with cold water the night before, and let them sit on your counter. By morning, they’ll be plump and ready—no tough, mealy texture when cooked. (Yes, even if you’re impatient like me, resist the urge to speed this up.)
- Don’t Crowd the Pot: After browning the beef, add onions and let them caramelize before adding any liquid. If you dump everything in at once, the onions steam instead of sweeten, and the chili loses that deep, rich base. Give them 8–10 minutes to turn golden—this isn’t the prettiest method, but it’s the tastiest.
- Save the Bean Water: When draining your soaked beans, don’t pour that starchy water down the sink. Reserve a cup of it, mix it into your chili as it simmers, and watch the texture thicken naturally. I learned this the hard way—my first chili was watery, and this simple trick fixed it every time.
Regional styles of authentic beef chili
Texas-Style Chili
This version is all about bold flavors and no beans—just tender beef, tomatoes, and a deep spice profile. Texans traditionally serve it with crackers or cornbread on the side. I like to add 1 tbsp of cocoa powder to the spice mix for that signature dark, rich depth. The key is using extra chili powder (3 tbsp total) and letting it simmer for 2-3 hours to develop that iconic Texas taste. 🌶️
New Mexican Chili
New Mexican chili incorporates green chiles (either fresh or canned) and often includes pork or chicken alongside the beef. I swap 1 cup of the diced tomatoes for 1 cup of chopped green chiles>, and add ½ cup of diced ham> for extra richness. The spices lean more toward cumin and Mexican oregano>, with a touch of cinnamon> for warmth. This version is lighter but still packed with flavor.
Chicago-Style Chili
Chicago's version is famously topped with cheese and beans served separately—this is where the "chili with beans" debate began! For authenticity, I brown 2.5 lb ground beef>, then add 1 tbsp each of chili powder, cumin, and garlic powder>, along with 1 cup of tomato sauce>. Simmer for 3 hours>, then serve with shredded cheddar cheese>, diced onions>, and French bread> for dipping. The secret? A long cook time for deep flavor.
Southwest Fusion Style
This modern take blends chili with Southwest flavors by adding diced bell peppers>, corn kernels>, and a pinch of chipotle powder> for smokiness. I also stir in ½ cup of salsa> at the end for brightness. The beans stay in, but the spices get a tropical twist with ½ tsp of ground coriander> and a dash of lime zest>. Perfect for a lighter, fresher chili that still delivers hearty satisfaction. 🌵
Classic Texas vs. New Mexico
The biggest difference is the beans—Texas chili is bean-free, while New Mexican chili includes them. Texas style relies on chili powder and cocoa>, while New Mexican chili incorporates green chiles and pork>. Both versions are rich and deeply flavored, but Texas chili is thicker and more intense, while New Mexican chili is slightly lighter with a brighter green chile note. Try both to see which you prefer! 🔥
Nutrition facts
Frequently asked questions about authentic beef chili
Why do you brown the beef so thoroughly?
Browning creates deep, caramelized flavors through the Maillard reaction—this is what makes authentic chili taste so rich. The crust forms concentrated beef flavor that dissolves into the sauce during simmering. Skipping this step leaves your chili tasting bland and one-dimensional.
Can I use canned beans instead of dried?
Just drain and rinse them well to remove excess sodium. For best texture, use a mix of kidney, black, and pinto beans. If you only have one type, add an extra ½ cup of another to maintain the three-bean balance.
How do I adjust the spice level?
Start with the 0.5 tsp cayenne as written, then taste before serving. For more heat, add ¼ tsp at a time. To mellow it, stir in 1 tbsp of cocoa powder or ½ tsp cinnamon—both add warmth without spice.
What's the best way to thicken thin chili?
Simmer uncovered for 10-15 extra minutes to reduce naturally. If still too thin, mix 1 tbsp cornstarch with 2 tbsp cold water, stir into the chili, and simmer 5 minutes. Never use flour—it makes chili taste raw.
Can I make this chili in a slow cooker?
Yes! Brown the beef first, then transfer everything to the slow cooker and cook on low for 6-8 hours or high for 3-4 hours. The long cook time actually enhances the flavors—just stir occasionally to prevent sticking.