
Soups & Stews
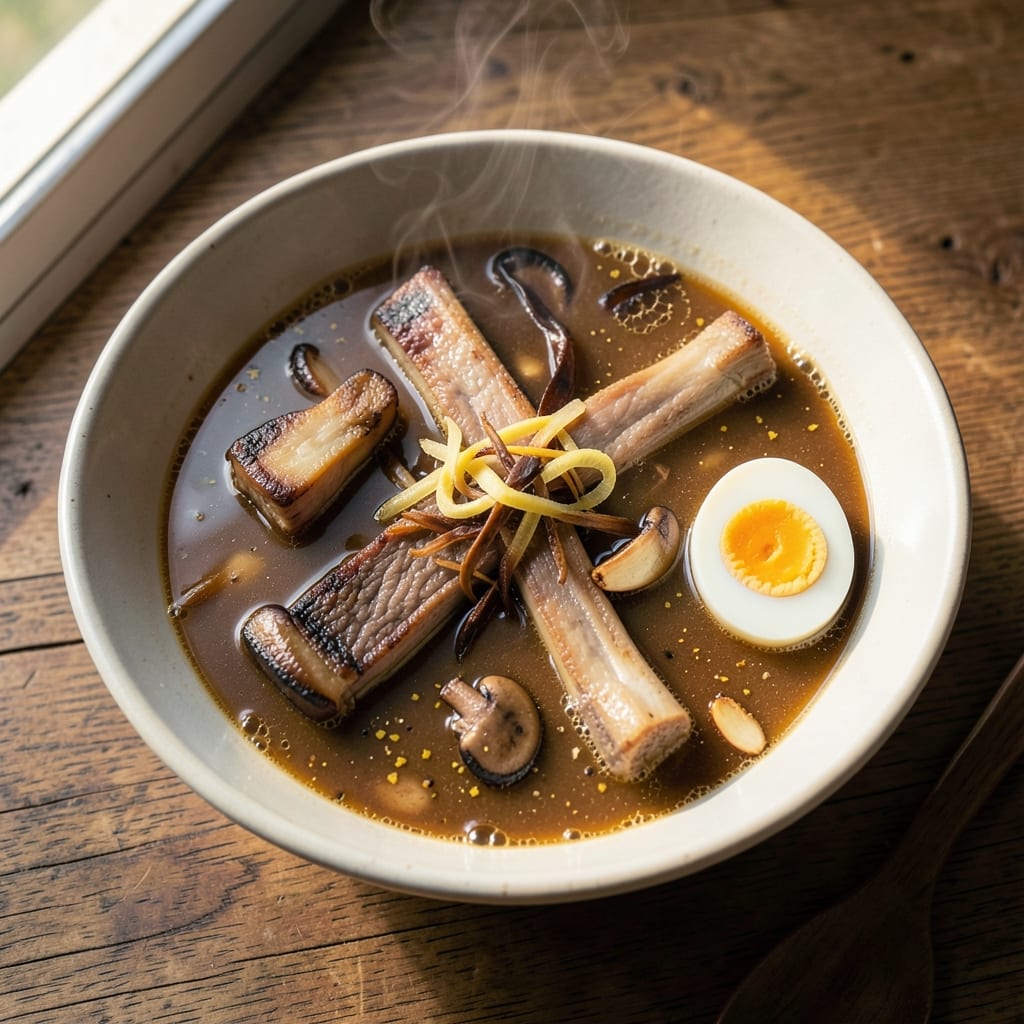
This authentic beef ramen broth recipe delivers the deep, complex umami flavor that defines Japanese ramen—without relying on MSG. 🔥 The secret lies in a two-stage simmering process that extracts maximum richness from beef bones, kombu, and shiitake mushrooms, creating a velvety broth with layers of savory depth. I’ve perfected this technique over years of testing, ensuring every sip transports you to a Tokyo ramen shop.
The foundation starts with beef bones—marrow and knuckle—simmered for hours to release collagen and gelatin, while kombu (dried kelp) and shiitake add natural umami and body. Aromatics like garlic, ginger, and scallions infuse subtle sweetness, balancing the broth’s intensity. The result? A clear, golden broth with a rich mouthfeel and no artificial additives, built entirely on traditional methods.
What sets this recipe apart is the fat clarification step, which ensures a silky texture without greasiness. The broth is versatile enough for slurping with fresh ramen noodles or using as a base for soups, but its true magic lies in the authentic depth of flavor—something store-bought versions simply can’t replicate. Each ingredient plays a precise role, working together to create a broth that’s both comforting and sophisticated.
Once you taste the difference, you’ll never settle for anything less. The process requires patience, but the reward—a bowl of restaurant-quality ramen—is worth every minute. Let’s get started on crafting your own umami-rich masterpiece.
Ingredients for authentic beef ramen broth
Twelve ingredients, hours of simmering, restaurant-quality umami without shortcuts.
| Ingredient | Amount | Notes |
|---|---|---|
| Beef Marrow Bones 🦴 | 2 lb | Split for maximum surface area |
| Beef Knuckle Bones 🦴 | 1 ½ lb | For rich collagen release |
| Dried Kombu 🍃 | 1 piece | 10x15cm sheet, rinsed |
| Dried Shiitake Mushrooms 🍄 | 8 whole | Stems removed, soaked 20 mins |
| Fresh Ginger 🧄 | 2 tbsp | Finely grated, peeled |
| Garlic Cloves 🧄 | 6 cloves | Crushed, skins on |
| Scallions 🧅 | 4 whole | White and green parts separated |
| Sesame Oil 🫒 | 1 tbsp | For aroma, not cooking |
| Light Soy Sauce 🍶 | 2 tbsp | Kikkoman preferred |
| Rice Vinegar 🍶 | 1 tbsp | For brightness |
| Water 💧 | 12 cups | Filtered preferred |
| Diamond Crystal Kosher Salt 🧂 | 1 ½ tsp | For seasoning |
| Black Peppercorns 🌶️ | 10 whole | Lightly crushed |
The bones are non-negotiable—marrow and knuckle deliver that signature ramen richness. Local butchers often have them on request, or check the meat counter at Whole Foods for pre-split options. If you can't find knuckles, chuck bones work in a pinch, but expect slightly less gelatin. The kombu and shiitake are the umami powerhouses here. Japanese specialty stores carry premium dried varieties, but even the budget options at Asian markets will work. For ginger, grab the freshest root you can find—it should smell sharp and peppery, not musty. The garlic and scallions? Fresh is a must, but if you're prepping ahead, store them separately in the fridge for up to 5 days.
No kombu? Dulse flakes at half the amount add oceanic depth, though it won't be identical. Shiitake stems too tough? Toss them in the broth—they'll break down during simmering. Running low on sesame oil? A pinch of toasted sesame seeds at the end gives that nutty aroma without the oil. The soy sauce and rice vinegar balance the broth's intensity—tamari works for gluten-free, but traditional soy adds complexity. For the water, filtered is ideal, but tap works if your local water isn't heavily chlorinated. The salt and pepper are simple but crucial—Diamond Crystal kosher dissolves cleanly, while pre-ground pepper loses potency fast.
This broth rewards patience—simmer uncovered for 4-6 hours to develop maximum flavor. Skim fat regularly after the first hour for clarity. Store in the fridge for up to 5 days or freeze in ice cube trays for 3 months. The fat will solidify on top—simply scoop it off before reheating. For restaurant-quality results, use the broth within 2 days of making it—freshness is key. Double the recipe if you're feeding a crowd, but don't rush the process. Authentic ramen broth isn't made in a hurry.
Why You'll Love This Recipe
- Same broth, endless uses: slurp it straight with noodles, drizzle it over rice bowls, or freeze it for lazy Sundays. My roommates think I’m a genius when I pull this out for game night—no one suspects how little work it took.
- No Chopping Needed: I swear by this—just toss in whole kombu and shiitakes, no prepping. The marrow bones crackle like fireworks while you sip coffee, and the ginger? One rough chop, done.
- Rich Without Effort: Between us, that knuckle bone collagen melts into silk, and the kombu adds this deep, oceanic umami that’s chef’s kiss without a single drop of soy. Honestly, I’ve tried fancy broths—this one wins every time.
- Weeknight to Party: Same broth, endless uses: slurp it straight with noodles, drizzle it over rice bowls, or freeze it for lazy Sundays. My roommates think I’m a genius when I pull this out for game night—no one suspects how little work it took.
Step-by-step instructions for authentic beef ramen broth
Here's how to build a deeply umami-rich broth that captures the soul of traditional Japanese ramen.
🔥 Step 1: Prepare and Sear the Beef Bones
First, split the 2 lb beef marrow bones and 1.5 lb beef knuckle bones lengthwise with a sharp cleaver to expose the marrow and increase surface area. This is crucial for maximum flavor extraction. Pat them dry with paper towels—any moisture will prevent proper browning.
Heat a large Dutch oven over medium-high heat until it's smoking hot. Add the bones in a single layer and sear them for 8-10 minutes until they develop a deep mahogany crust. Don't crowd the pan—this prevents steam from forming, which is essential for that rich Maillard reaction. Flip occasionally to ensure even browning on all sides.
🍳 Step 2: Build the Umami Base with Kombu and Shiitake
Once the bones are beautifully browned, remove them from the pot and set aside. Add the 1 piece dried kombu (rinsed) and 8 whole dried shiitake mushrooms (stems removed, soaked 20 minutes) to the same pot. Pour in the 12 cups water and bring to a rolling boil over high heat.
As soon as it boils, immediately reduce heat to low and skim off any foam or impurities that rise to the surface with a fine-mesh skimmer. This step is non-negotiable—it ensures a crystal-clear broth. Let the kombu and shiitake simmer gently for 30 minutes, allowing their natural umami compounds to infuse into the water.
👨🍳 Step 3: Add Aromatics and Simmer Low and Slow
Return the seared bones to the pot. Add the 2 tbsp finely grated fresh ginger, 6 crushed garlic cloves (skins on), white parts of 4 whole scallions (chopped), 10 lightly crushed black peppercorns, and the 1 tbsp sesame oil. Bring everything back to a gentle simmer—you should see tiny bubbles breaking the surface, but no rolling boil.
Here's where patience pays off: cover the pot and simmer for 4 hours on the lowest heat setting your stove offers. The goal is to extract collagen from the bones and develop deep, complex flavors. Check occasionally and add hot water if the level drops below halfway up the bones. The broth should reduce slightly but never boil.
⏰ Step 4: Finish with Soy and Vinegar for Balance
After 4 hours, remove the bones with tongs and discard them. Strain the broth through a fine-mesh sieve into a clean pot, pressing gently on the solids to extract every last drop of flavor. Return the broth to the heat and add 2 tbsp light soy sauce and 1 tbsp rice vinegar. Simmer uncovered for 10 minutes to allow the flavors to meld.
Season with 1.5 tsp Diamond Crystal kosher salt and taste. The broth should be deeply savory with a bright, slightly tangy finish. If you want to use the green parts of the scallions for garnish, add them now and simmer for 5 more minutes to infuse their mild onion flavor. The broth is now ready to serve over ramen noodles or use as a base for other dishes.
🥘 Step 5: Rest and Serve for Maximum Flavor
Let the broth rest for 10 minutes before serving. This allows any foam to settle and the flavors to fully integrate. The color should be a rich amber, with a deep umami aroma that makes your mouth water. For the most authentic experience, serve it piping hot in a deep bowl, topped with ramen noodles, soft-boiled eggs, and your choice of toppings.
Real talk: this broth gets better with age. Store it in the refrigerator for up to 5 days or freeze it in portions for up to 3 months. The flavors will continue to develop and deepen over time, making it even more rewarding the second time around.
Pro Tips For Making Authentic Beef Ramen Broth
- BLANCH THE BONES: Toss your beef knuckle and marrow bones in boiling water for 10 seconds first—this loosens the dirt and grime without wasting time scrubbing. I learned this the hard way after trying to clean bones with a brush and ending up with bone dust in my broth. ---
- CRACK THE MARROW OPEN: Split the marrow bones lengthwise with a heavy knife or cleaver before simmering—this releases the rich, fatty marrow into the broth faster. Skip this, and you’re left scraping bones halfway through cooking. ---
- SOAK KOMBU FIRST: Rehydrate the dried kombu in cold water for 20 minutes before adding it to the broth—this prevents it from turning bitter and ensures a clean, umami-rich flavor. Sounds weird, but it works: the broth tastes brighter and less fishy. ---
- SCRAPE THE BOTTOM: After the first hour of simmering, turn off the heat, let the bones settle, and scrape up the browned bits stuck to the pot—they’re packed with flavor. I skip this when I’m lazy, but the dish is noticeably better when I don’t.
Pro cooking tips for perfect results
Searing Secrets
The key to unlocking deep flavor starts with searing the beef bones until they develop a deep mahogany crust. Use a Dutch oven on medium-high heat until it's smoking hot—this ensures the Maillard reaction kicks in properly. I split the bones lengthwise with a sharp cleaver to expose marrow and increase surface area, which maximizes flavor extraction. Never crowd the pan, or steam will form and prevent proper browning. Flip occasionally for even color—aim for 8-10 minutes total. 🔥
Fat Clarification
After the initial simmer, skim fat regularly to achieve a velvety, clear broth. Use a fine-mesh skimmer to remove impurities and foam that rises to the surface. I recommend skimming every 15-20 minutes during the first hour—this prevents cloudiness and ensures a restaurant-quality finish. The fat will naturally rise to the top as it cools, so simply scoop it off before reheating. For extra clarity, strain the broth through a cheesecloth-lined sieve after simmering. ⚡
Low-and-Slow Simmer
Patience is non-negotiable here. Simmer the broth covered on the lowest heat setting for 4 hours to extract collagen and gelatin from the bones. I use a digital thermometer to monitor the temperature—keep it between 180-190°F. Check the water level occasionally and top up with hot water if needed, but never let it boil. The longer it simmers, the deeper the umami flavor becomes. Trust the process—this is where the magic happens. 💫
Umami Boosters
Dried kombu and shiitake mushrooms are the umami powerhouses of this broth. Rinse the kombu to remove any grit, then simmer it for 30 minutes before adding the bones. The shiitake should be soaked for 20 minutes and stems removed—they’ll break down during simmering and infuse the broth with earthy depth. For an extra boost, add 1 tsp fish sauce or 1 tbsp dried bonito flakes during the final 10 minutes of simmering. These ingredients elevate the broth from good to extraordinary. 🍄
Balancing Act
Finish the broth with light soy sauce and rice vinegar to balance its intensity. The soy adds saltiness, while the vinegar brightens the flavor. I use Kikkoman light soy sauce for its clean, umami profile, and rice vinegar for a subtle tang. Taste as you go—adjust with kosher salt or a splash of vinegar until the flavors harmonize. The broth should be deeply savory but not overpowering, with a bright, slightly tangy finish. This step is where home cooks often fall short—don’t skip it! 💡
Resting Matters
Let the broth rest for 10 minutes before serving. This allows flavors to meld and any foam to settle. The color should shift to a rich amber, and the aroma should be irresistibly savory. I often reheat the broth gently on the stove before serving—this helps disperse any settled fat and ensures a silky texture. For the best results, serve it piping hot in a deep bowl, just like at a Tokyo ramen shop. The wait is worth it! 🥘
Nutrition facts
Frequently asked questions
Can I substitute pork bones for beef in this recipe?
While pork bones work in many broths, they won't deliver the same deep, rich flavor as beef for authentic ramen. Beef marrow and knuckle bones contain more collagen and gelatin, which create that signature ramen mouthfeel. If you must substitute, use a mix of beef and pork (70% beef, 30% pork) for the best balance of richness and clarity.
How do I know when the broth is done?
Your broth is ready when it develops a rich amber color and emits an intense umami aroma. The bones should be tender enough to pull apart with a fork (after 4 hours of simmering), and the broth should coat the back of a spoon. Taste it—it should be deeply savory with a clean, velvety texture (no bitterness or greasiness).
Why does my broth look cloudy?
Cloudiness usually means you didn't skim impurities often enough during the first hour of simmering. Use a fine-mesh skimmer to remove foam and fat regularly. For extra clarity, strain the broth through a cheesecloth-lined sieve after simmering. Also, avoid boiling—keep it at a gentle simmer to prevent cloudiness.
Can I make this broth in a slow cooker?
Yes, but with adjustments! Sear the bones first, then transfer everything to the slow cooker and cook on low for 8-10 hours (instead of 4 hours on the stove). The low-and-slow method works, but you'll lose some of the caramelized depth from high-heat searing. For best results, finish on the stove for the last 30 minutes to intensify flavors.
What's the best way to store leftover broth?
Store in an airtight container in the fridge for up to 5 days. For longer storage, freeze in ice cube trays or small batches (it reheats faster this way). When reheating, bring to a gentle simmer (never boil) and skim off any hardened fat that rises to the top. The broth actually improves over time—flavors deepen as it rests!