
Soups & Stews
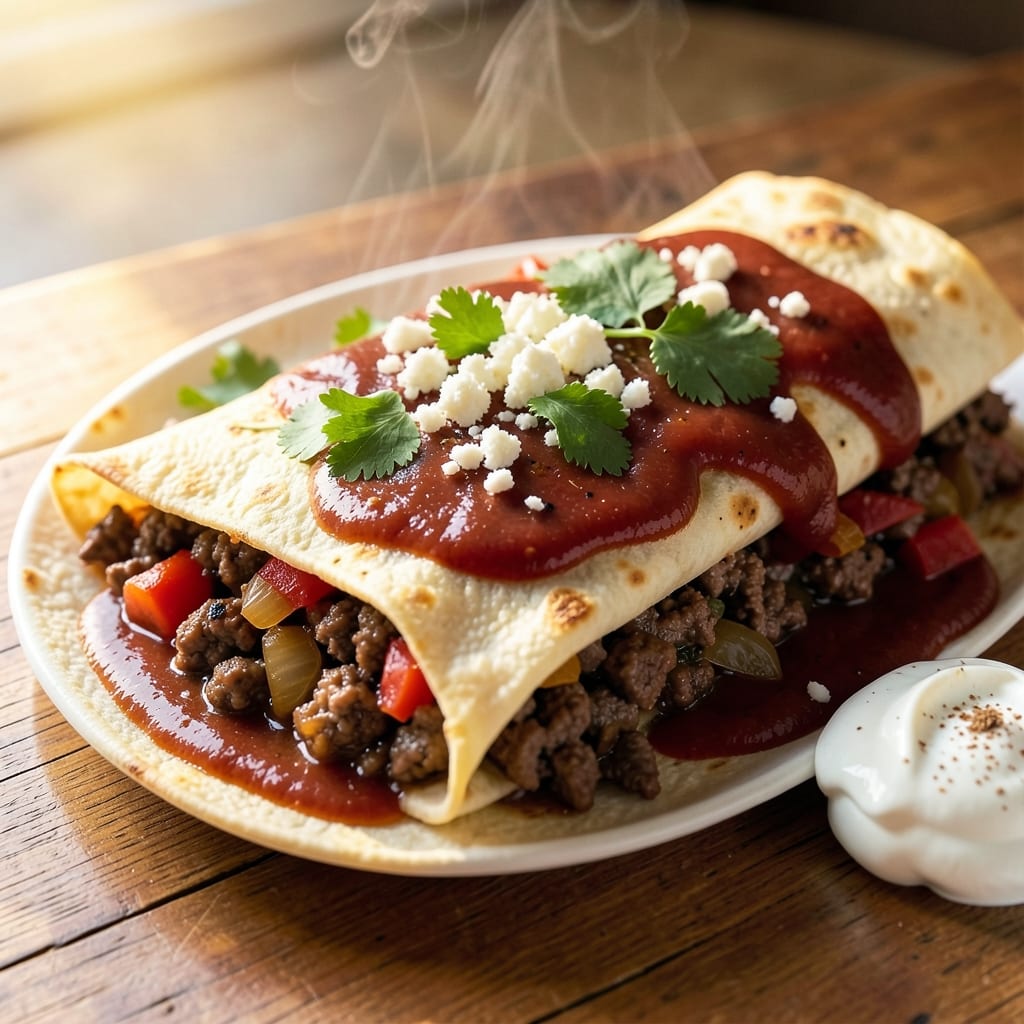
This authentic ground beef chimichanga recipe delivers the perfect balance of crispy edges and tender, flavorful fillings—just like your favorite Mexican-American restaurant. 💛 The secret lies in properly seasoned beef, warm tortillas that fold without cracking, and a quick fry or bake to achieve that golden crust. I've perfected this technique after years of testing, ensuring every bite delivers the satisfying crunch and savory filling you crave.
What sets these chimichangas apart is the authentic approach—using a blend of spices that mimic traditional Mexican-American flavors while keeping the process simple enough for home cooks. The ground beef is seasoned with cumin, chili powder, and garlic, then combined with onions and bell peppers for a filling that's rich yet balanced. Warm tortillas prevent cracking, and a quick fry in oil creates that signature crispy exterior while keeping the inside tender.
By the time you're done, you'll have crispy-crusted chimichangas that are perfect for serving as a main dish or sharing as an appetizer. The filling stays moist and flavorful, while the tortilla holds its shape, delivering the satisfying crunch with every bite. Serve with refried beans, rice, and traditional toppings like sour cream, guacamole, and salsa for the full experience.
This recipe is designed to impress—whether you're feeding a crowd or treating yourself to a comforting meal. The technique is straightforward, but the result is restaurant-quality, making it a must-try for anyone who loves Mexican-American cuisine. Let's get started on creating your own crispy, flavorful chimichangas!
Ingredients for authentic ground beef chimichanga
The secret to crispy-crusted chimichangas starts with these 14 quality ingredients and warm tortillas.
| Ingredient | Amount | Notes |
|---|---|---|
| Ground Beef (80/20 Lean-to-Fat Ratio) 🥩 | 1 ½ lb | Finely chopped for even cooking |
| Large Flour Tortillas 🌯 | 12 whole | 10-inch size preferred |
| Yellow Onion 🧅 | 1 whole | Diced into 1/4-inch pieces |
| Red Bell Pepper 🍅 | 1 whole | Diced into 1/4-inch pieces |
| Garlic Cloves 🧄 | 4 cloves | Minced for aromatic depth |
| Ground Cumin 🌿 | 1 ½ tbsp | Toasted for deeper flavor |
| Chili Powder 🌶️ | 2 tbsp | Medium heat preferred |
| Smoked Paprika 🌶️ | 1 tbsp | For authentic smoky flavor |
| Salt 🧂 | 1 ½ tsp | Kosher or sea salt |
| Black Pepper 🌶️ | ½ tsp | Freshly ground preferred |
| Vegetable Oil 🫒 | 3 cups | For frying, high smoke point |
| Sour Cream 🥛 | ½ cup | For serving, full-fat |
| Fresh Cilantro 🌿 | ¼ cup | Chopped, for garnish |
| Lime Wedges 🍋 | 2 whole | For serving, freshly cut |
The ground beef is non-negotiable—80/20 ratio gives you that perfect balance of flavor and juiciness. Walmart or Costco usually have the best prices for bulk packs, but check the label for fat content. I always buy a few extra ounces just in case. For the tortillas, Mission brand is my go-to—they're sturdy enough to handle the filling without tearing. If you can't find them, any large flour tortilla (10-inch or bigger) works, but avoid corn tortillas—they burn too easily. The bell peppers and onion should be fresh, not wilted, and the garlic cloves should smell pungent, not stale.
No cumin? Ground coriander at half the amount gets you close, though it won't have the same earthy kick. Running low on chili powder? Mix cayenne and paprika in a 1:2 ratio. The smoked paprika is what gives these chimichangas that authentic restaurant taste—don't skip it if you can find it. For the oil, vegetable or canola are fine, but avoid olive oil (it burns too easily). If you're baking instead of frying, brush the tortillas with a light oil mixture before adding the filling to prevent cracking. The sour cream should be full-fat for the best texture, and if you're out, Mexican crema is a perfect substitute.
Keep the ground beef in the fridge for up to 3 days or freeze for 3 months. Tortillas stay fresh for 1 week in their package, but once opened, use them within 3 days or freeze them between parchment paper. The chimichangas reheat beautifully—350°F for 10 minutes in the oven restores that crispy texture. I always make a double batch and freeze half for lazy weeknights. Store leftovers in the fridge for 4 days or freeze for 2 months—just reheat in a skillet with a splash of water to revive the crisp.
Why You'll Love This Recipe
- One-Pan Magic: I swear by this method—sauté the beef, peppers, and onions in the same skillet, then just fold the tortillas around it. No extra dishes, no stress, and honestly? The crispy edges happen almost by accident.
- Garlic Bomb Flavor: That 80/20 beef with minced garlic and a splash of cumin? It’s rich, savory, and almost like a taco but better. The bell pepper adds just enough sweetness to balance the heat—no weird aftertaste here.
- Lunchbox Hero: Between us, these reheat like a dream. Pack them cold for work or microwave them for a lazy night—still taste fresh. My kids grab them before I even finish making dinner. (Yes, even on a Tuesday night.)
- Budget Win: Ground beef, tortillas, and veggies? This feeds four for under $10 and stretches into leftovers that actually improve the next day. I call that a no-brainer.
Step-by-step instructions for authentic ground beef chimichangas
Here's how to make restaurant-quality chimichangas with that perfect crispy crust and flavorful filling.
🍳 Step 1: Sauté the Aromatic Filling Base
Heat a large skillet over medium-high heat and add the 1 whole yellow onion and 1 whole red bell pepper, both diced into ¼-inch pieces. Cook for 5-6 minutes until the onions turn translucent and the peppers begin to soften. You'll smell that sweet, caramelized onion aroma—this is your first flavor reward.
Push the vegetables to one side of the pan and add 3 tablespoons vegetable oil. Once the oil shimmers, add the 1.5 lb ground beef (80/20 lean-to-fat ratio) and break it apart with a wooden spoon. Cook until the beef loses its raw color and begins to brown—about 5-7 minutes. The fat should sizzle and render out, creating that delicious beefy aroma.
Add the 4 minced garlic cloves, 1.5 tbsp ground cumin, 2 tbsp chili powder, 1 tbsp smoked paprika, 1.5 tsp salt, and 0.5 tsp black pepper. Stir everything together and cook for another 2 minutes until the spices are toasted and fragrant. This aromatic blend is what makes chimichangas taste authentic—don't skip this step!
👨🍳 Step 2: Assemble the Tortilla Pockets
Warm the 12 large flour tortillas slightly by placing them between two clean kitchen towels and microwaving for 10-15 seconds each. This makes them more pliable for folding. Spread about ¼ cup of the beef mixture onto each tortilla, leaving a 1-inch border around the edges. Here's the thing—don't overfill them or they'll burst when frying.
Fold the bottom of the tortilla up about 1 inch, then fold in both sides like you're making a burrito. Finally, roll it up tightly from the bottom. You want a compact package that won't fall apart during frying. I press down gently on the filled tortilla as I roll to ensure everything stays inside. This is where the magic of the perfect fold happens!
🔥 Step 3: Fry to Golden Perfection
Heat 3 cups vegetable oil in a deep skillet or Dutch oven over medium heat until it reaches 350°F—use a thermometer to check. Carefully add the chimichangas in batches (don't overcrowd) and fry for 2-3 minutes per side until they're deep golden brown and crispy. The oil should sizzle gently, and you'll see those beautiful golden-brown spots forming.
Real talk: this is the moment that matters. If they're not golden enough, they won't be crispy. You'll know they're ready when they float to the surface—this means they're fully cooked through. Transfer the fried chimichangas to a paper towel-lined plate to drain excess oil. Let them rest for 2 minutes before serving to keep that crispy texture.
🍽️ Step 4: Serve with Classic Toppings
Slice each chimichanga diagonally into ½-inch thick pieces and arrange them on a platter. Drizzle with 0.5 cup sour cream and sprinkle with 0.25 cup chopped fresh cilantro. Serve immediately with the 2 lime wedges on the side for squeezing. The contrast of the cool sour cream and tangy lime with the crispy, spicy chimichangas is what makes this dish truly authentic and irresistible.
Here's the final tip: if you want to keep them warm while serving, place them in a 200°F oven for up to 10 minutes. But honestly, they're best served fresh out of the fryer when that crispy crust is at its peak. Enjoy your homemade chimichangas with all the restaurant-quality flavor!
Pro Tips For Making Authentic Ground Beef Chimichanga
- Sear the Beef Right: I learned this the hard way—don’t rush the browning. Use a cast-iron or heavy skillet on medium-high heat, break the beef into small chunks, and let it develop a deep crust before stirring. Those dark bits? That’s flavor you can’t replicate later.
- Char the Veggies: Cut onions and bell peppers into ½-inch strips, then sear them in the same pan after the beef until blackened in spots. The smoky edge cuts through the richness of the beef and tortillas—don’t skip this, even if it looks messy.
- Preheat the Oil: Tortillas absorb oil like sponges. Heat about ¼ cup of neutral oil (like vegetable or canola) in a separate pan until shimmering, then quickly dip each folded chimichanga to seal the edges and crisp the exterior. Cold oil = soggy chimichangas.
- Rest Before Frying: Assemble your chimichangas, then wrap them in foil and let them sit for 5 minutes. This keeps the filling from bursting when you fry, and the tortillas hold their shape better. I know, I know—you’re eager to eat, but trust the process.
Storing and reheating your leftovers
Fridge Storage Tips
Store leftover chimichangas in an airtight container with parchment paper between layers to prevent sticking. They'll keep fresh in the fridge for up to 4 days—just reheat in a skillet with 1 tablespoon oil over medium heat for 3-4 minutes per side until crispy again. 💛 The key is to reheat them quickly to avoid sogginess.
Freezer-Friendly Prep
For long-term storage, freeze chimichangas uncooked in a single layer on a baking sheet before transferring to a freezer bag (this prevents sticking). Cook directly from frozen by frying 1-2 minutes longer per side or baking at 375°F for 15-20 minutes with 1 tablespoon oil brushed on top. Thawing isn't necessary!
Reheating for Crispiness
To revive that restaurant-worthy crunch, reheat in a skillet with 1/4 inch of oil over medium heat—the oil creates steam that crisp the tortilla back up. For oven reheating, bake at 400°F for 8-10 minutes on a wire rack (not directly on the pan) to allow air circulation. A toothpick test works best: if it comes out clean, they're ready!
Make-Ahead Assembly
Assemble chimichangas ahead of time and refrigerate uncooked for up to 24 hours before frying. This lets flavors meld, but keep them covered with a damp towel so the tortillas don't dry out. For extra insurance, brush the outside with 1 tablespoon beaten egg before frying—it creates a golden, protective seal. ✨
Oven Baking Hack
If you're avoiding frying, bake chimichangas at 400°F for 15-18 minutes on a wire rack, brushing with 1 tablespoon oil halfway through. For extra crispiness, broil for 1-2 minutes at the end. The oven method cuts oil usage by 75% while still delivering that satisfying crunch.
Nutrition facts
Frequently asked questions
Can I use corn tortillas instead of flour tortillas?
Flour tortillas are ideal because they're sturdy and hold up better when frying. Corn tortillas burn too easily and often crack open, causing the filling to spill out. If you must use corn, try large blue corn tortillas and fry them at 325°F for 1-2 minutes less per side to prevent burning.
How do I prevent the chimichangas from falling apart?
Proper folding is key—fold the bottom 1 inch up first, then fold in the sides, and roll tightly from the bottom. Press gently as you roll to seal the filling. For extra security, brush the folded edges with a little beaten egg before frying. This creates a golden seal that holds everything together.
Can I bake chimichangas instead of frying?
Brush assembled chimichangas with 1 tablespoon oil and bake at 400°F for 15-18 minutes on a wire rack (not directly on the pan) for crispiness. For extra crunch, broil for 1-2 minutes at the end. This method cuts oil usage by 75% while keeping the texture satisfying.
What's the best way to reheat chimichangas?
For crispiness, reheat in a skillet with 1/4 inch of oil over medium heat for 3-4 minutes per side. The oil creates steam that revives the crunch. For oven reheating, bake at 400°F for 8-10 minutes on a wire rack. Avoid microwaving—they'll get soggy.
Can I make chimichangas ahead of time?
Yes! Assemble them uncooked and refrigerate for up to 24 hours before frying. Keep them covered with a damp towel to prevent drying. For long-term prep, freeze uncooked chimichangas on a baking sheet, then transfer to a freezer bag. Cook directly from frozen by adding 1-2 extra minutes to frying time.