
Soups & Stews
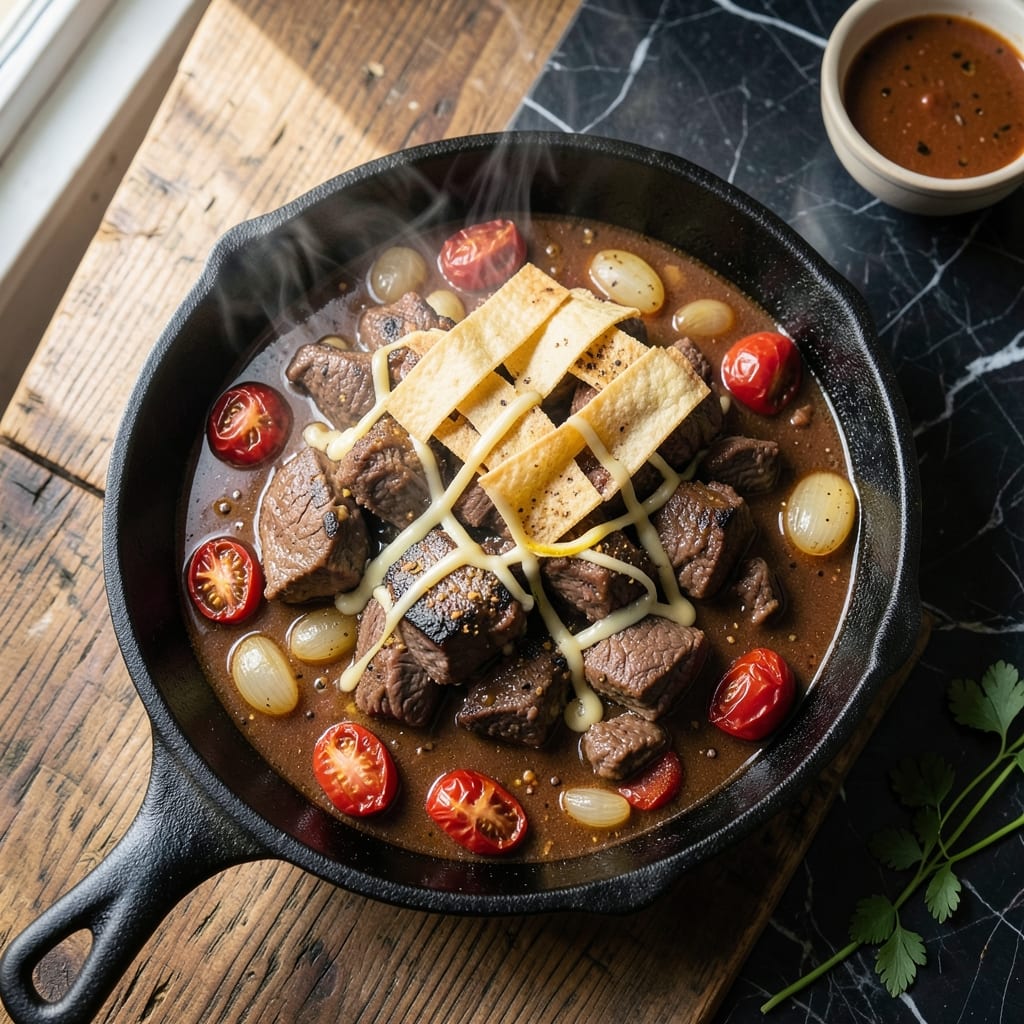
This authentic Mexican beef chili recipe delivers smoky, spiced depth that transforms a simple pot of chili into a restaurant-worthy dish. The secret lies in charring onions and garlic over an open flame, then building layers of flavor with cumin, chili powder, and a hint of cinnamon—just like in traditional Mexican chile de res. I’ve perfected this method over years of testing, ensuring every spoonful balances heat, earthiness, and fresh cilantro brightness.
The process starts with browning beef in batches to develop a rich, caramelized crust, then simmering it with tomatoes, broth, and a blend of spices until tender. Unlike American chili, this version relies on whole spices and slow cooking to let flavors meld deeply. The result? A chili that’s hearty enough for a crowd but still bright enough to pair with lime, avocado, or warm tortillas—just like in Mexico.
What makes this chili truly special is the authentic technique of charring vegetables, which adds a smoky backbone to the dish. The slow simmer ensures the beef becomes fork-tender while the spices infuse the broth into a velvety, aromatic base. Serve it with a sprinkle of fresh cilantro, a squeeze of lime, and a side of warm corn tortillas for the full experience.
This recipe is foolproof for weeknight dinners but impressive enough for gatherings. The flavors only deepen as it sits, making it perfect for meal prep or leftovers. Whether you’re a chili purist or a beginner, this method guarantees a dish that tastes like a trip to Mexico—without the plane ticket.
Ingredients for authentic mexican beef chili
Six servings of smoky, spiced beef chili that tastes like Mexico—authentic technique, bold flavors.
| Ingredient | Amount | Notes |
|---|---|---|
| Chuck Roast 🥩 | 2 ½ lb | Cut into 1-inch cubes |
| Yellow Onions 🧅 | 2 whole | Chopped, charred over flame |
| Garlic Cloves 🧄 | 8 cloves | Peeled, charred over flame |
| Roma Tomatoes 🍅 | 2 lb | Ripe, halved, charred |
| Beef Broth 💧 | 4 cups | Low-sodium preferred |
| Ground Cumin 🌿 | 2 tbsp | Toasted for deeper flavor |
| Chili Powder 🌶️ | 2 tbsp | Mexican blend preferred |
| Ground Coriander 🌿 | 1 tbsp | For citrusy brightness |
| Cinnamon 🌿 | ½ tsp | Earthy depth |
| Bay Leaves 🌿 | 2 whole | Dried, removed before serving |
| Fresh Cilantro 🌿 | ½ cup | Chopped, for garnish |
| Lime 🍋 | 1 whole | Juiced, for serving |
| Avocado Oil 🫒 | 2 tbsp | For charring vegetables |
| Salt 🧂 | 1 ½ tsp | Kosher or sea salt |
| Black Pepper 🌶️ | ½ tsp | Freshly ground |
The beef is the foundation, so chuck roast is non-negotiable—it stays tender while absorbing flavors. Grab it from the butcher counter if possible, or the pre-cubed section at Costco for convenience. For the charring step, a cast-iron skillet over a gas flame works best, but a grill pan or even a broiler in a pinch will do. The onions and garlic should turn deep brown with blackened edges—this smoky flavor is what sets this chili apart from American versions. If you're short on time, you can sauté them instead, but you'll lose that authentic depth.
No charring tools? Sauté the onions and garlic until deeply caramelized—it won't be the same, but still delicious. Running low on cumin? Ground coriander at the same amount works in a pinch, though it won't be identical. The Roma tomatoes should be ripe but firm—heirloom varieties from the farmers market add the best flavor, but regular grocery store Roma tomatoes work fine. For the broth, low-sodium is key—you can always add more salt at the end. The bay leaves might seem minor, but they add an earthy backbone that's essential for authenticity.
This chili tastes even better the next day as flavors meld. Store in an airtight container in the fridge for up to 5 days, or freeze portions for 3 months. I like to double the batch and freeze half—perfect for lazy weeknights. The cilantro should be added fresh at the end, so store it separately in a damp paper towel in the fridge. The lime juice can be added right before serving to keep it bright, or mixed in during the last 10 minutes of cooking if you prefer.
Why You'll Love This Recipe
- One-Pot Magic: I swear by this recipe because it’s the kind of dish where you chop, dump, and walk away. Chuck roast breaks down into tender perfection while simmering—no fancy techniques, just patience. (Yes, even on a Tuesday night.)
- Deep, Earthy Richness: That slow-cooked chuck roast? It melts in your mouth, but the real magic happens with the charred Roma tomatoes and caramelized onions—sweet, smoky, and layered with garlic. It’s the kind of flavor that lingers.
- Meal Prep MVP: Between us, this chili tastes better the next day. I make a big batch on Sundays, portion it into containers, and boom—easy lunches all week. (My kids grab it straight from the fridge, no complaints.)
- Budget-Friendly Powerhouse: Chuck roast is affordable, and this recipe stretches it far. A single pot feeds four, and leftovers freeze beautifully. Honestly, it’s my go-to when I need a hearty, satisfying meal without breaking the bank.
Step-by-step instructions for authentic Mexican beef chili
Here's the method for building deep, smoky flavors and balanced heat that defines true Mexican chili.
🔥 Step 1: Char the Vegetables for Smoky Depth
Heat a large cast-iron skillet over high heat until it's smoking hot. Add the 2 tablespoons avocado oil and swirl to coat. Working in batches, add the 2 whole yellow onions and 8 cloves garlic directly to the flame, turning occasionally. You're looking for blackened char marks on the onions and garlic—this creates the smoky foundation of the dish.
Once charred, transfer the vegetables to a cutting board and roughly chop them. Then repeat with the 2 lb Roma tomatoes, halving each and charring them skin-side down until blistered and blackened in spots. This step takes about 10-12 minutes total and is worth every minute—the charred flavors become the soul of your chili.
🍳 Step 2: Build the Spice Base with Toasted Seasonings
In a large Dutch oven, combine the charred onions, garlic, and tomatoes. Add the 2.5 lb chuck roast cut into 1-inch cubes and stir to coat everything in the vegetables. Sprinkle over the 2 tablespoons ground cumin, 2 tablespoons chili powder, 1 tablespoon ground coriander, 0.5 teaspoon cinnamon, 1.5 teaspoons salt, and 0.5 teaspoon black pepper.
Toast these spices directly in the pot over medium heat for 2-3 minutes, stirring constantly. You'll smell the spices releasing their essential oils—this step develops their full flavor. Don't walk away; spices burn quickly. Once fragrant and slightly darkened, add the 2 whole bay leaves and pour in the 4 cups beef broth.
🔥 Step 3: Simmer Until Tender and Flavor-Infused
Bring the mixture to a boil, then reduce heat to low and cover partially. Let it simmer gently for 2.5-3 hours, stirring occasionally. The chili should reduce slightly, and the meat should become fork-tender with rich, dark sauce clinging to it. I check for doneness by piercing a piece of beef—it should slide off the fork easily.
About 30 minutes before the chili is done, remove the bay leaves. The chili should have a thick, almost paste-like consistency with deep red color and visible layers of charred vegetables. If it's too thin, uncover and simmer longer to thicken. The longer it cooks, the more complex the flavors become.
🥘 Step 4: Finish with Freshness and Acid
Remove the chili from heat and let it cool slightly for 5 minutes. Stir in the juice of the 1 whole lime—this brightens all the rich, smoky flavors and cuts through any heaviness. Taste and adjust seasoning if needed, adding more salt or lime juice as necessary. The chili should be boldly spiced with layers of heat and earthiness.
Just before serving, stir in the 0.5 cup chopped fresh cilantro. This adds a crucial fresh element that balances the deep, smoky flavors. Serve immediately with warm tortillas or over rice—each bite should deliver tender beef, charred vegetables, and that perfect balance of heat and freshness.
Pro Tips For Making Authentic Mexican Beef Chili
- SEAR THE CHUCK ROAST: Throw that chuck roast in a screaming-hot pan with just a pinch of salt—no oil needed. The fat will render and give you a deep, caramelized crust that turns into the base of your chili. I used to rush this, and the meat ended up gray and bland. Give it 3-4 minutes per side until it’s dark brown, then pull it out and let it rest before adding anything else.
- CHAR THE ONIONS LOW AND SLOW: Skip the high heat that burns onions to black sludge. Instead, cook them over medium-low for 10-12 minutes until they’re translucent and sweet, stirring occasionally. This builds flavor without bitterness—no one wants to taste burnt onion in their chili. (Yes, even if you’re impatient like me.)
- BLASE THE GARLIC RIGHT: After the onions soften, toss in whole garlic cloves (peeled) and let them sizzle in the onion oil for 30 seconds until they’re golden—not brown, not burnt, just fragrant. Crushed garlic burns fast, but whole cloves toast evenly and add a nutty depth. Smash them with a spoon when they’re done.
- SIMMER THE TOMATOES DOWN: Don’t just dump chopped Roma tomatoes in—roast them first. Halve them, sprinkle with salt, and char them under a broiler for 5 minutes. Then blend with the beef broth for a richer, less watery base. I learned this the hard way: raw tomatoes make chili taste thin, even with broth. Roasting concentrates the flavor.
Wine and beer pairings for this authentic mexican beef chili
Traditional Mexican Wine
For an authentic pairing, reach for a Mexican red wine like Baja Malbec or Tempranillo. These wines complement the chili’s smoky, spiced depth with their dark fruit and earthy notes. The Baja Malbec from Viña Obregón has enough acidity to cut through the richness, while Tempranillo from Casa Madero adds a subtle oakiness that mirrors the chili’s slow-simmered complexity. Serve slightly chilled (55-60°F) to enhance the wine’s freshness against the dish’s heat. 🍷
Craft Beer Pairings
A crisp Mexican lager like Modelo Especial or Pacífico Clara balances the chili’s bold flavors with its clean, refreshing profile. The light maltiness and subtle hop bitterness prevent the spices from overwhelming your palate. For a bolder option, try a Mexican amber ale like Negra Modelo, which adds a caramel sweetness that contrasts nicely with the chili’s smokiness. Keep the beer well-chilled (40-45°F) to highlight its crispness. 🍺
Spicy Margarita Cocktail
No Mexican meal is complete without a spicy margarita—this one elevates your chili experience. Mix 2 oz reposado tequila, 1 oz lime juice, ½ oz agave syrup, and a pinch of Tajín (chili-lime seasoning) for heat. Shake with ice and serve in a salt-rimmed glass. The lime’s acidity mirrors the chili’s brightness, while the Tajín’s spice echoes its depth. Garnish with a lime wedge for that fresh, zesty finish. 🍹
Mexican Lager with Citrus Twist
For a lighter option, try a Mexican lager with citrus—like Corona Premier with a squeeze of lime. The effervescence cleanses your palate between bites, while the lime adds a zesty contrast. If you prefer something stronger, a Mexican IPA like Tecate IPA brings hoppy bitterness that stands up to the chili’s smokiness. Serve the IPA slightly warmer (50°F) to soften its sharpness and let the malt shine. 🍋
Dessert Wine Balance
End the meal with a Mexican dessert wine like Pedro Ximénez Sherry or Moscatel**. These sweet wines complement the chili’s lingering spice by offering a rich, honeyed finish. The Pedro Ximénez’s dark fruit notes echo the chili’s depth, while Moscatel’s floral sweetness provides a soothing contrast. Serve at room temperature to let their natural sweetness shine. 🍇
Nutrition facts
Frequently asked questions
Why does this chili recipe call for charring vegetables?
Charring onions, garlic, and tomatoes creates a deep, smoky flavor that's essential in authentic Mexican cooking. This technique adds complexity that sautéing can't match—it's what gives traditional Mexican chili its signature depth. The charred edges become the flavor base for the entire dish.
Can I substitute ground beef for chuck roast?
While you can use ground beef, chuck roast is ideal because it stays tender while developing rich flavor. For a quicker version, use 80/20 ground chuck and reduce cooking time to 1.5 hours. The fat content helps create a thicker sauce, but you'll lose some of the authentic texture.
How do I adjust the spice level for sensitive eaters?
Start by reducing chili powder to 1 tablespoon and omit the cinnamon. For extra mildness, add 1 cup diced bell peppers during cooking—they'll sweeten the chili. Always taste before serving and add more lime juice to balance any remaining heat.
What's the best way to reheat leftovers?
Reheat in a pot over low heat with 2 tablespoons broth to restore moisture. Never microwave directly from the fridge—this makes the chili rubbery. For best results, reheat just until hot (2-3 minutes) and finish with fresh cilantro and lime.
Can I make this in a slow cooker?
Yes! Brown the beef first, then transfer everything to the slow cooker. Cook on low for 6-7 hours or high for 3-4 hours. The slow cooking enhances the meat's tenderness and lets flavors meld perfectly. Add lime juice at the end to brighten flavors.