
Soups & Stews
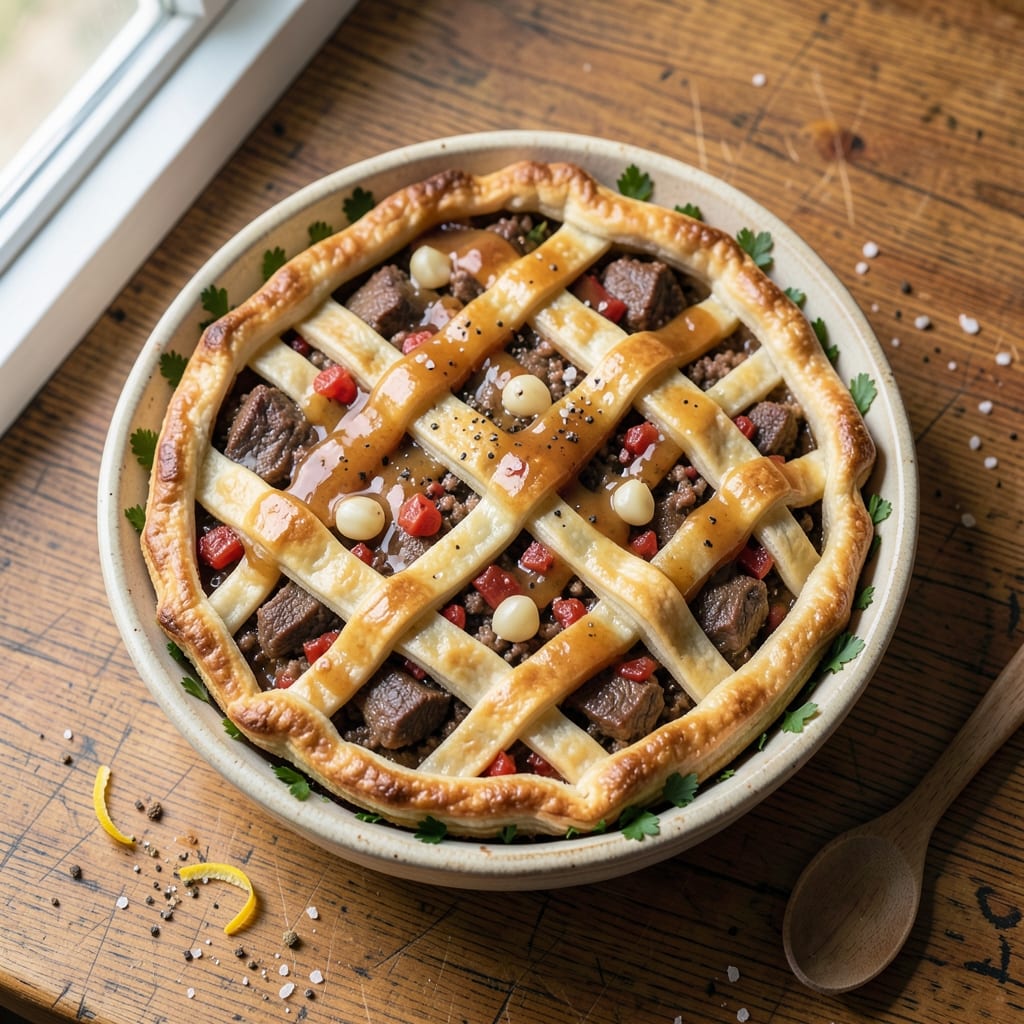
This baked beef pies recipe delivers the perfect harmony of golden, flaky crusts and rich, savory minced beef filling—every bite is a comforting embrace of home-cooked tradition. The secret lies in a crisp, layered pastry that encases tender meat seasoned with aromatic herbs and slow-cooked until deeply flavorful. I’ve perfected this recipe over years of testing, ensuring the crust stays delicate while the filling remains juicy and packed with depth.
The process begins with a simple yet foolproof dough that requires just five ingredients—flour, butter, cold water, salt, and a touch of vinegar for that signature lift. While the dough rests, the beef filling simmers with onions, garlic, Worcestershire sauce, and a blend of spices until it reaches a perfect consistency. Assembling the pies is where the magic happens: the filling is spooned into individual pastry shells, topped with a lattice crust for both beauty and structure.
Baking transforms these pies into golden, aromatic masterpieces with a crisp exterior and tender interior. The aroma alone will fill your kitchen with warmth, while the first bite delivers layers of flavor—savory meat, herby notes, and the buttery richness of the crust. These pies are ideal for family dinners, holiday gatherings, or even a cozy weeknight meal when you crave something hearty and satisfying.
Once baked, let the pies rest for 10 minutes before serving to ensure the filling sets and the crust stays sturdy. Pair them with a simple green salad, roasted vegetables, or buttery mashed potatoes to complete the meal. The leftovers keep well for up to three days, making this recipe both practical and indulgent. Let’s get started on creating these timeless, comforting pies.
Ingredients for baked beef pies
Five ingredients for the perfect flaky crust and twelve for the savory filling—simple yet transformative.
| Ingredient | Amount | Notes |
|---|---|---|
| All-Purpose Flour 🌾 | 3 ½ cups | For dough and lattice crust |
| Unsalted Butter 🧈 | 1 cup | Cold, cubed for pastry |
| Cold Water 💧 | ½ cup | Ice water preferred |
| White Vinegar 🍶 | 1 tbsp | For tender crust |
| Salt 🧂 | 1 ½ tsp | Fine sea salt |
| Ground Black Pepper 🌶️ | ½ tsp | Freshly ground |
| Yellow Onion 🧅 | 1 ½ whole | Finely diced |
| Garlic Cloves 🧄 | 4 cloves | Minced for filling |
| Ground Beef 🥩 | 1 ½ lb | 80% lean preferred |
| Worcestershire Sauce 🍶 | 1 tbsp | For umami depth |
| Dried Thyme 🌿 | 1 tsp | Or 1 tbsp fresh |
| Dried Parsley 🌿 | 1 tsp | For freshness |
| Beef Stock 💧 | ½ cup | Homemade preferred |
| Tomato Paste 🍅 | 1 tbsp | For richness |
The butter is non-negotiable for that signature flakiness—use European-style unsalted butter if possible, like Plugrá or Land O'Lakes for reliable quality. Most grocery stores carry it, but specialty shops like Whole Foods offer higher-fat options (82-86% butterfat) that yield better layers. Keep everything cold during mixing—chilled butter and ice water are key to preventing gluten development. For the beef, 80% lean ground chuck gives the best texture; pre-grinding at the store ensures even distribution of fat. If you're feeling ambitious, buy a whole chuck roast and grind it yourself for superior flavor.
No Worcestershire sauce? Soy sauce plus a pinch of sugar mimics the umami-sweet balance. Fresh thyme and parsley are ideal, but dried works at one-third the amount—just crush the dried leaves between your fingers first to release the oils. The tomato paste can be swapped for crushed sun-dried tomatoes if you prefer a chunkier texture. For the onion, yellow or red work equally well—just make sure it's finely diced so it cooks down completely. The beef stock? Homemade is best, but a good-quality store-bought version (like Kitchen Basics) works in a pinch. If you're making these ahead, the filling can be prepped and refrigerated for up to 2 days before assembling.
The dough keeps best wrapped in plastic for 2 days in the fridge or 3 months frozen between parchment paper. For the filling, store it in an airtight container for 3 days or freeze for 2 months. Fully baked pies reheat beautifully—350°F for 15 minutes restores that golden crust. I always bake an extra pie or two; they freeze wonderfully and make perfect lunches. The lattice crust is where the magic happens—cut the dough strips 1/4-inch thick for even coverage, and brush with a little extra egg wash for extra shine.
Why You'll Love This Recipe
- Five-Ingredient Magic: I swear by this crust—just flour, butter, water, vinegar, and salt. No eggs, no fuss, no waiting for dough to rise. That vinegar kick? It keeps the crust flaky without overworking it.
- Weeknight Hero: Honestly, this is my go-to when I’m too tired to think. Toss in pre-cooked beef (or even leftover roast), slap on the crust, and bake while I fold laundry. Zero guilt, all satisfaction.
- Dollar Stretch: This crust costs pennies but tastes like a bakery. Butter and flour are the stars, but the vinegar? It’s the secret that makes it shine without breaking the bank. Feed four for the price of two.
Step-by-step instructions for baked beef pies
Here's how to create perfectly flaky crusts that encase rich, savory beef filling.
Prepare the Pastry Dough
In a large bowl, combine the 3.5 cups all-purpose flour and 1.5 teaspoons salt. Cut in the 1 cup unsalted butter using a pastry cutter or your fingers until the mixture resembles coarse crumbs with pea-sized butter pieces. This texture is crucial for creating flaky layers.
Add the 0.5 cup cold water and 1 tablespoon white vinegar gradually while mixing with a fork until the dough just comes together. Avoid overmixing—just until the dough forms a shaggy mass. Turn it out onto a lightly floured surface and knead gently for 30 seconds until smooth. Wrap in plastic and refrigerate for at least 1 hour to firm up.
Make the Savory Beef Filling
In a skillet over medium heat, cook the 1.5 pounds ground beef until browned, breaking it into small pieces. Drain excess fat, leaving about 1 tablespoon for flavor. Add the 1.5 finely diced yellow onion and cook for 5 minutes until softened.
Stir in the 4 minced garlic cloves, 1 tablespoon tomato paste, 1 tablespoon Worcestershire sauce, 1 teaspoon dried thyme, 1 teaspoon dried parsley, and 0.5 teaspoon ground black pepper. Pour in the 0.5 cup beef stock and simmer for 5 minutes until the liquid reduces slightly. Let cool completely before assembling.
Roll and Assemble the Pies
Divide the chilled dough into 4 equal portions. Roll each into a 12-inch circle about 1/8-inch thick on a floured surface. Cut each circle into 8 equal wedges (like pizza slices) and arrange 4 wedges in a circle on a parchment-lined baking sheet, leaving a 1-inch border. Spoon about 1/4 of the beef filling into the center of each circle.
Fold the dough wedges up and over the filling, creating a half-moon shape. Press the edges firmly to seal, then use a fork to crimp the edges decoratively. Brush the tops with a bit of water to help them brown. Repeat with remaining dough and filling.
Bake to Golden Perfection
Preheat oven to 375°F. Bake the pies for 25-30 minutes until the crusts are deep golden brown and the filling is bubbling. For extra crispiness, broil for 1-2 minutes at the end, watching closely to prevent burning.
Let cool for 5 minutes before serving. The crusts should be light and flaky, while the filling remains moist and flavorful. Serve warm with a simple green salad or crusty bread to soak up any extra juices.
Pro Tips For Making Baked Beef Pies
- CHILL THE BUTTER FIRST: Unsalted butter straight from the fridge is your friend here—it won’t melt into a greasy mess when mixing with flour. Cut it into small cubes and let it sit in the fridge for 10 minutes before handling, or even better, pop it in the freezer for 5. Trust me, your crust will hold together like it’s supposed to, not fall apart when you roll it out.
- WORK THE FLOUR FAST: This isn’t a sourdough starter—stop mixing once the dough just comes together. Overworking it makes the crust tough, and nobody wants a beef pie with a brick base. Once you add the vinegar and water, give it 8-10 quick folds, then let it rest. Your hands will thank you later.
- DON’T SKIP THE VINEGAR REST: The white vinegar isn’t just for flavor—it’s the secret to a tender crust. After mixing, let the dough sit for at least 20 minutes before rolling. This gives the vinegar time to relax the gluten, so your crust stays soft, not chewy. (Yes, even if you’re impatient like me.)
- BAKE ON THE MIDDLE RACK: The top of your oven isn’t doing you any favors here. Place the pies on the middle rack so the crust bakes evenly and doesn’t burn before the filling’s done. If your oven runs hot, lower the temp by 10°F and give it 5-10 extra minutes. No one likes a sad, uneven pie.
Storing and reheating this dish
Refrigerator Storage
Store fully baked beef pies in an airtight container at 40°F or below for up to 3 days. The crust stays crisp best when pies cool completely before sealing. I like using glass Pyrex containers with tight lids—they preserve the golden color better than plastic. Let pies sit at room temperature for 10 minutes after baking to prevent condensation from making the crust soggy. 💫
Freezer Prep Tips
For long-term storage, freeze unbaked pies on a parchment-lined tray for 1 hour to set the shape, then transfer to freezer bags with all air removed. Label with the date—these keep for 3 months without quality loss. Thaw overnight in the fridge before baking. I always make an extra pie or two specifically for freezing—perfect for lazy weeknight dinners. ❄️
Reheating Perfection
For stovetop reheating, place pies on a skillet over medium-low heat for 10-12 minutes, covered with a lid. This method restores the crust's crispiness while keeping the filling juicy. Oven method works best for multiple pies: 350°F for 15-20 minutes until golden and bubbling. Avoid microwaving—it turns the crust rubbery. 🔥
Filling Refresh
If the filling looks dry after reheating, add 1-2 tablespoons beef stock and cover while warming. The original recipe's tomato paste and Worcestershire sauce help maintain moisture, but extra liquid ensures tender texture. I sometimes reheat just the filling separately and assemble fresh crusts for a restaurant-quality update. 💡
Crust Revival Tricks
To revive slightly soggy crusts, brush with egg wash (1 egg + 1 tbsp water) and bake at 400°F for 5-7 minutes until golden. For extra crispiness, sprinkle powdered sugar on top before baking—it caramelizes beautifully. This works especially well with pies stored for 2-3 days. The key is high heat for a short time to restore that perfect crunch. 🌟
Make-Ahead Assembly
Prepare the filling and dough separately up to 2 days ahead, then assemble pies just before baking. Store components in separate airtight containers in the fridge. This saves time while keeping everything fresh. I often do this when hosting—just assemble and bake when guests arrive for warm, homemade pies straight from the oven. 💛
Nutrition facts
Frequently asked questions
Can I use ground turkey or chicken instead of beef?
Ground turkey or chicken works beautifully, but adjust the cooking time slightly—these meats cook faster than beef. For turkey, cook for 3-4 minutes less, and for chicken, reduce by 2 minutes. The filling will be slightly lighter in color but just as flavorful. Use 1/2 teaspoon poultry seasoning instead of thyme for a more traditional twist.
How do I make these pies gluten-free?
Replace the all-purpose flour with a 1:1 gluten-free flour blend (like Bob's Red Mill) and add 1/4 teaspoon xanthan gum to improve texture. For the dough, use cold gluten-free butter or shortening and reduce water by 1 tablespoon—gluten-free doughs absorb less moisture. Chill the dough longer (2 hours) to prevent shrinking. The crust will be slightly denser but still delicious.
Why did my crust turn out tough instead of flaky?
Overworking the dough or using warm butter are the most common culprits. Keep everything cold—even your hands! Cut the butter into the flour until it resembles coarse crumbs, not a paste. Avoid overmixing after adding water, and don't skip the 1-hour chilling time. If the dough feels sticky, add just 1 tablespoon more flour and knead gently.
Can I make these pies ahead of time for a party?
Yes! Assemble the pies (unbaked) up to 24 hours ahead and refrigerate uncovered. Bake straight from the fridge, adding 5-7 minutes to the baking time. For a crowd, freeze unbaked pies on a tray for 1 hour, then transfer to bags. Bake from frozen, adding 10 minutes to the time. The secret is letting them cool completely before storing to prevent soggy crusts.
What's the best way to serve leftover beef pie filling?
Warm the filling gently in a skillet with 1 tablespoon beef stock and serve with mashed potatoes, over toasted sourdough, or stuffed into phyllo cups. For a deconstructed version, spoon the filling into small ramekins and top with a dollop of sour cream and fresh parsley. It also makes excellent filling for breakfast pies—just add a fried egg on top!