
Main Courses
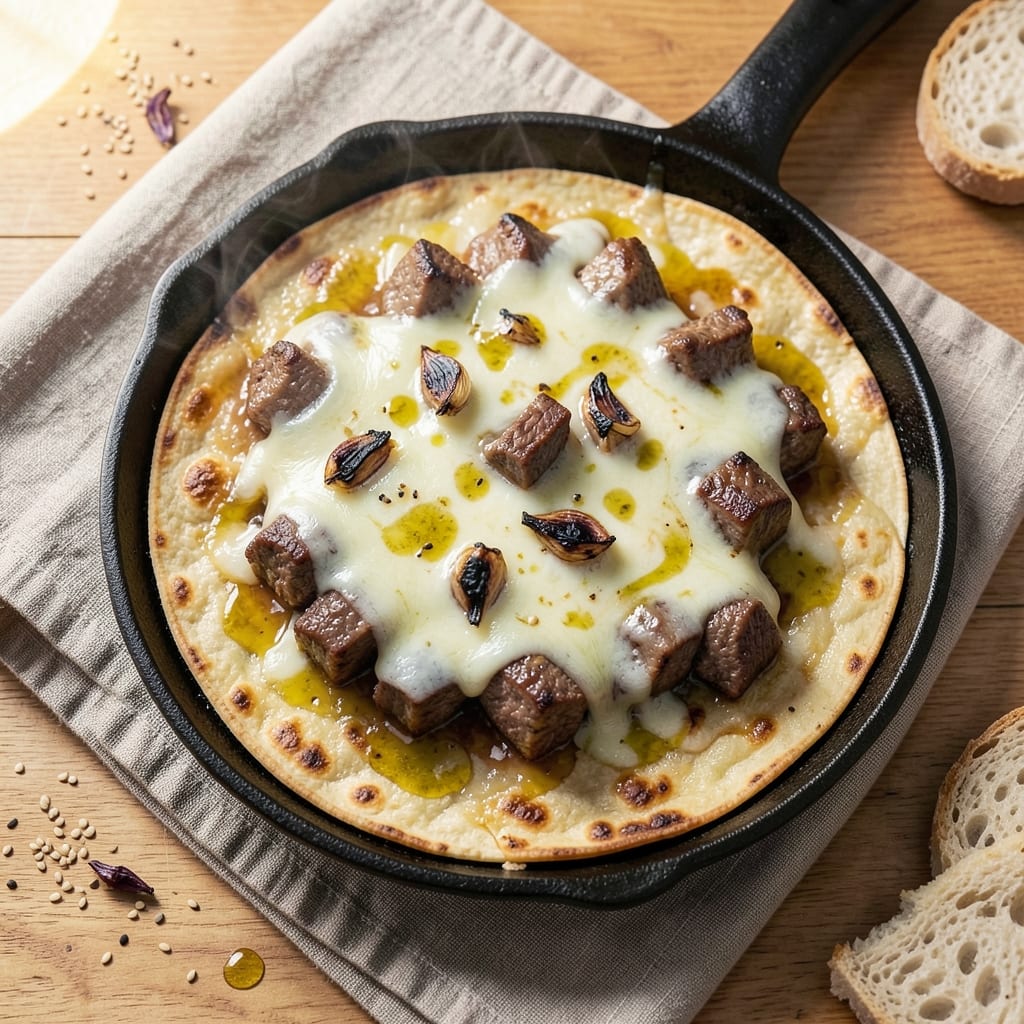
This baked beef quesadilla recipe delivers the perfect balance of crispy cheese layers and perfectly seasoned, juicy steak—no skillet required. The secret lies in browning the beef first for deep flavor, then layering it with melted cheese and tortillas for a golden, crunchy crust that holds up to every bite. I developed this method after years of testing, and it’s now my go-to for both weeknight dinners and entertaining.
The beauty of baking these quesadillas is the hands-off approach: no flipping or frying, just even heat and crispy results every time. You’ll start with tender, seasoned beef that stays juicy, then assemble everything between sturdy tortillas and cheese that melts into a creamy, stretchy blanket. The high-heat bake ensures a golden crust without sacrificing the tender interior—restaurant-quality at home.
What you’ll end up with is a stack of cheesy, meaty layers that’s crispy on the outside and gooey inside, perfect for serving with sour cream, salsa, or guacamole. The beef stays tender and flavorful, while the cheese pulls into that satisfying, stringy texture we all love. This recipe is foolproof for beginners but impressive enough for dinner guests.
Pair it with a simple side salad or roasted vegetables for a complete meal, or serve it as an appetizer with a side of chipotle mayo for dipping. The best part? Leftovers reheat beautifully—just pop them back in the oven for a crispy finish. Let’s get started on this game-changing dish!
Ingredients for baked beef quesadilla
Game-changing ingredients for crispy, cheesy quesadillas that taste like a restaurant favorite.
| Ingredient | Amount | Notes |
|---|---|---|
| Beef Chuck Roast 🥩 | 1 ½ lb | Pre-cubed, 1-inch pieces |
| Large Flour Tortillas 🌯 | 8 whole | 10-inch size, sturdy brand |
| Shredded Monterey Jack Cheese 🧀 | 4 cups | Freshly shredded, not pre-shredded |
| Cheddar Cheese 🧀 | 2 cups | Sharp cheddar, freshly grated |
| Olive Oil 🫒 | 2 tbsp | For browning beef |
| Garlic Cloves 🧄 | 4 cloves | Minced for seasoning |
| Ground Cumin 🌿 | 1 tbsp | Toasted for depth |
| Smoked Paprika 🌶️ | 1 tbsp | For smoky flavor |
| Salt 🧂 | 1 ½ tsp | Diamond Crystal preferred |
| Black Pepper 🌶️ | ½ tsp | Freshly ground |
| Sour Cream 🥛 | ½ cup | For serving |
| Salsa 🍅 | ½ cup | Medium heat preferred |
| Guacamole 🥑 | ½ cup | Fresh, for serving |
The beef is everything here—chuck roast gives that melt-in-your-mouth texture, and browning it first locks in the juices. Costco or Walmart usually have pre-cubed chuck, which saves time. If you're buying a whole roast, ask the butcher to cube it for you. The tortillas? Mission or La Tortilla Factory are my go-tos—they hold up perfectly to the cheese. Skip the soft flour tortillas; you want something sturdy that won't fall apart when stacked. For the cheese, freshly shredded is non-negotiable—pre-shredded gets gummy when melted.
No cumin? Mexican oregano at half the amount works in a pinch, but trust me on the cumin—it's what gives this dish that authentic depth. Running low on smoked paprika? Regular paprika plus a pinch of liquid smoke mimics the flavor. The cheddar and Monterey Jack combo is perfect, but pepper jack or Colby Jack both work too. If you're feeling fancy, add a sprinkle of cotija cheese on top before baking for extra crunch. And if you're making these ahead, assemble them but don't bake—they keep in the fridge for up to 2 days, ready to pop in the oven when you are.
These reheat like a dream—just pop them back in the oven at 375°F for 5-7 minutes until the cheese is bubbly again. Store leftovers wrapped in foil for 3-4 days in the fridge, or freeze for up to 3 months. Pro tip: Portion them into individual servings before freezing—they crisp up perfectly when reheated. The sour cream, salsa, and guacamole are all about serving, so grab what you like. Chipotle mayo is my personal favorite for dipping, but the classic trio works too.
Why You'll Love This Recipe
- One-Pan Magic: I swear by this trick—just toss the slow-cooked beef, tortillas, and cheese on a sheet pan. No flipping, no mess, and the oven does all the work while I sip my coffee.
- Cheese Pull Factor: That combo of Monterey Jack and cheddar? It gets stretchy and gooey in the best way—crispy outside, melty inside. My kids fight over the last slice, and honestly, I don’t blame them.
- Budget Stretch: A chuck roast is my secret for feeding the whole family without breaking the bank. Shred it once, use it twice—leftovers reheat like a dream, and the tortillas cost less than takeout.
- Weeknight Win: Between us, this is my go-to when I’m too tired to stand at the stove. Throw it in the oven, set a timer, and boom—dinner’s ready. Even on nights when I’d normally order pizza.
Step-by-step instructions for baked beef quesadilla
Here's how to build layers of tender beef and melty cheese into crispy, golden quesadillas that taste like a restaurant favorite.
Season and Brown the Beef Chuck Roast
Heat a large oven-safe skillet over medium-high heat and add the 2 tablespoons olive oil. Once shimmering, add the 1.5 lb beef chuck roast (pre-cubed into 1-inch pieces) in a single layer. Let it sear undisturbed for 3-4 minutes until deep golden brown on one side—this creates incredible flavor and texture.
Push the beef to one side of the pan and add the 4 minced garlic cloves, 1 tablespoon ground cumin, 1 tablespoon smoked paprika, 1.5 teaspoons salt, and 0.5 teaspoon black pepper. Stir for 30 seconds until fragrant, then toss the beef to coat evenly in the spices. Let it cook another 3-4 minutes until the beef reaches 160°F internally—it'll finish cooking in the oven later.
Assemble the Quesadilla Layers
Preheat your oven to 375°F while the beef browns. Place the 8 large flour tortillas on a clean work surface. Divide the browned beef evenly among them—you'll need about ¼ cup per tortilla. Sprinkle ½ cup shredded Monterey Jack cheese and ¼ cup cheddar cheese over each half of the tortilla, leaving a ½-inch border around the edges.
Fold each tortilla in half, pressing gently to create a neat rectangle. Place the assembled quesadillas seam-side down in the same skillet you used for the beef (no need to clean it—the browned bits add flavor). The skillet's residual heat will help the cheese start melting before it goes into the oven.
Bake to Crispy Perfection
Transfer the skillet to the preheated oven and bake for 12-15 minutes until the tortillas are deep golden brown and the cheese is fully melted and bubbling. You'll see the edges crisp up beautifully—this is your signal that the quesadillas are ready. If the cheese starts to brown too quickly, tent loosely with foil to prevent burning.
For extra crispiness, I like to broil for 1-2 minutes at the end, watching carefully to avoid over-browning. The cheese should be gooey inside while the tortilla develops a satisfying crunch. Let them rest for 2 minutes before serving—this prevents the cheese from oozing out when you cut them.
Serve with Fresh Toppings
Slice each quesadilla into 4 wedges and arrange on a serving platter. Drizzle with the 0.5 cup sour cream, dollop with 0.5 cup salsa, and add 0.5 cup guacamole for serving. The contrast of cool sour cream, tangy salsa, and creamy guacamole against the warm, cheesy quesadillas is pure magic.
Serve immediately while everything is hot and melty. The beef should be tender and juicy, the cheese perfectly melted, and the tortilla crispy enough to hold its shape. Each bite delivers layers of smoky, spiced beef and rich, gooey cheese—exactly what makes this dish so satisfying.
Pro Tips For Making Baked Beef Quesadilla
- SHRED BEFORE ASSEMBLING: I learned this the hard way—trying to stuff cold, unshredded chuck roast into tortillas makes a mess. Cook the beef until it’s fork-tender, then shred it while still hot with two forks. The fibers break down easier, and the cheese melts faster later.
- BRUSH TORTILLAS FIRST: Skip the greasy pan—tortillas burn before the cheese melts. Lightly brush both sides with olive oil before adding fillings, then bake at 375°F (190°C). The oil creates a crispy crust without sticking, and the cheese stays gooey.
- LAYER CHEESE LAST: Monterey Jack melts faster than cheddar, so resist the urge to mix them early. Sprinkle cheddar on the bottom half of the tortilla, add beef, then top with Monterey Jack. The cheddar acts as a barrier—no soggy bottoms, just perfect melt.
- USE A THIN LAYER OF BEAN: Yes, even if you’re skipping beans in the recipe, add a thin layer of refried beans or mashed pinto beans between the beef and cheese. It’s not just flavor—it keeps the quesadilla from falling apart when you cut it. (Trust me, I’ve dropped too many.)
Dietary considerations for this recipe
Gluten-Free Adaptations
For a gluten-free version, replace the flour tortillas with corn tortillas or certified gluten-free flour tortillas like Mission Carb Balance or Siete. These hold up well when baked and provide that classic quesadilla texture. Just be sure to check labels for hidden gluten—some brands add it as a thickener. 🌟
Dairy-Free Options
Swap the Monterey Jack and cheddar for dairy-free cheese alternatives like Violife Just Like Cheddar or Miyoko's Mozzarella. These melt beautifully and create that gooey texture you crave. If you're avoiding cheese entirely, try nutritional yeast for a cheesy flavor without dairy, or use cashew cream as a spreadable base.
Lower-Carb Version
Cut carbs by using low-carb tortillas like Mission Low Carb or Siete Grain-Free. For extra protein, add black beans or crumbled chorizo to the filling. Skip the sour cream and opt for Greek yogurt instead—it’s lower in carbs and adds a nice tang. This keeps the dish satisfying while fitting into keto-friendly plans.
Vegetarian Swap
Replace the beef with portobello mushrooms or spiced lentils for a hearty vegetarian option. Sauté the mushrooms with the same spices (cumin, smoked paprika) until tender, then layer them into the tortillas. For lentils, cook them with garlic, cumin, and a splash of beef broth for depth. The cheese and tortillas stay the same, so the texture remains familiar. 🌱
Allergen-Friendly Tips
For nut allergies, avoid cashew-based cheeses and stick to soy-free dairy-free cheeses like Follow Your Heart. If you’re sensitive to sulfites, choose freshly shredded cheese (like the Monterey Jack) over pre-shredded brands, which often contain added preservatives. Always double-check labels for hidden allergens in spices and tortillas too.
Nutrition facts
Frequently asked questions
Why do you brown the beef before baking the quesadillas?
Browning the beef first creates deep, caramelized flavors that you just can't get from raw meat. The Maillard reaction (that's the science behind browning) builds rich, savory notes that make the final dish taste restaurant-quality. Plus, it helps the beef stay juicy during baking—no dry, tough meat here!
Can I use ground beef instead of chuck roast?
Ground beef works perfectly, especially if you choose a leaner cut (85/15) and cook it just until browned (165°F). Just be careful not to overcook it—ground beef dries out faster than cubed roast. For extra flavor, add 1 teaspoon of beef broth to the pan when browning.
How do I prevent soggy tortillas when baking?
The key is using sturdy flour tortillas (like Mission or La Tortilla Factory) and not overloading them with cheese. Leave that ½-inch border around the edges to prevent oozing, and bake at 375°F—not too hot, or the tortillas will burn before the cheese melts. A quick broil at the end adds crispiness without sogginess.
What's the best way to reheat leftovers?
Pop them back in the oven at 375°F for 5-7 minutes until the cheese is bubbly and the edges are crispy again. Microwaving makes them rubbery—never do that! For extra crunch, broil for 1-2 minutes at the very end. Leftovers stay fresh for 3-4 days in the fridge or 3 months frozen.
Can I make these ahead of time?
Yes! Assemble the quesadillas (but don't bake them) and refrigerate for up to 2 days. When ready to cook, bake straight from the fridge—just add 2-3 extra minutes to the baking time. For freezing, wrap individual quesadillas tightly in foil and freeze for up to 3 months. Thaw overnight in the fridge before baking.