
Main Courses
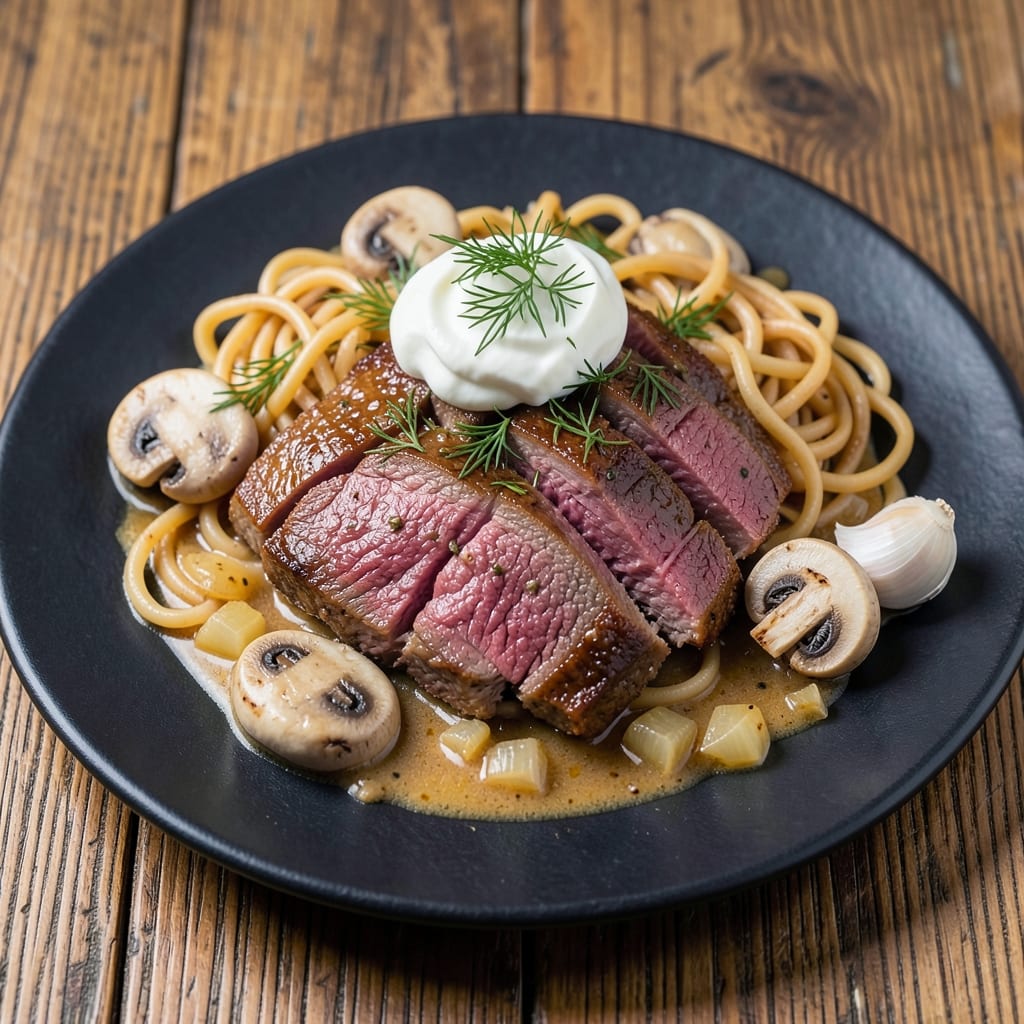
This baked beef stroganoff recipe transforms classic Russian comfort into a modern, crisp-topped masterpiece that feels like a home-cooked hug. 💛 The secret lies in baking the beef and sauce together—creating a golden, caramelized crust while keeping the inside tender and rich. I developed this version after years of perfecting the balance between creamy sour cream sauce and savory mushrooms, ensuring every bite delivers that perfect harmony of textures and flavors.
The key to this recipe is the crispy top—achieved by baking the dish uncovered for the final 15 minutes, which transforms the sauce into a luscious, slightly caramelized layer. Unlike traditional stovetop versions, this method locks in moisture while adding depth of flavor. The beef stays juicy, the mushrooms melt into the sauce, and the noodles (or potatoes) absorb just enough richness to make every forkful satisfying. It’s the kind of dish that tastes even better the next day, making it ideal for meal prep or a cozy weeknight dinner.
What makes this stroganoff truly special is how it elevates simple ingredients into something restaurant-worthy. The mushroom sauce—rich with garlic, mustard, and a touch of paprika—adds layers of umami, while the sour cream keeps it creamy without being heavy. Serve it over buttery egg noodles, roasted potatoes, or even crusty bread to soak up every last bit of that velvety sauce. This isn’t just comfort food; it’s a foolproof way to impress guests or treat yourself without spending hours in the kitchen.
The best part? This recipe delivers on all the promises: comforting, crispy, and deeply flavorful, with minimal effort. Whether you’re feeding a family or hosting dinner, this baked beef stroganoff will be the star of the meal—no takeout required. Let’s get started on creating your new favorite weeknight classic.
Ingredients for baked beef stroganoff
These 14 ingredients create a restaurant-worthy stroganoff with a crispy top and creamy sauce.
| Ingredient | Amount | Notes |
|---|---|---|
| Beef Chuck Roast 🥩 | 1 ½ lb | Pre-cubed for even cooking |
| Egg Noodles 🍝 | 12 oz | Fresh or dried, uncooked |
| White Mushrooms 🍄 | 8 oz | Sliced into even pieces |
| Yellow Onion 🧅 | 1 whole | Diced into small pieces |
| Garlic Cloves 🧄 | 4 cloves | Minced for even distribution |
| Sour Cream 🥛 | 1 cup | Full-fat for creaminess |
| Beef Broth 💧 | 1 cup | Low-sodium preferred |
| Dijon Mustard 🍯 | 1 tbsp | For tangy depth |
| Paprika 🌶️ | 1 tsp | Smoked for rich flavor |
| All-Purpose Flour 🌾 | 1 tbsp | For thickening sauce |
| Unsalted Butter 🧈 | 2 tbsp | For richness |
| Salt 🧂 | 1 tsp | Kosher or sea salt |
| Black Pepper 🌶️ | ½ tsp | Freshly ground |
| Fresh Dill 🌿 | 2 tbsp | Chopped for garnish |
The beef is the foundation, and chuck roast is your best bet for tender, flavorful cubes. Pre-cubed from the grocery store saves time, but if you’re feeling ambitious, trim and cube it yourself for better control. Look for well-marbled meat—this fat renders during baking, keeping the beef juicy. For the mushrooms, cremini or baby bella add extra earthiness, but white mushrooms work perfectly fine. The egg noodles should be fresh if possible—they hold up better to baking than dried, but either will work. If you can’t find fresh, use high-quality dried and cook them al dente before adding to the dish.
No sour cream? Greek yogurt or crème fraîche work in a pinch, though the texture will be slightly different. Swap Dijon mustard for whole-grain mustard if you prefer a stronger flavor, or omit it entirely if you’re sensitive to tang. The paprika is non-negotiable for that classic stroganoff depth, but if you’re out, smoked paprika or a pinch of cayenne can stand in. For the mushrooms, shiitake or oyster mushrooms add a meaty texture—just slice them thin. The flour is just for thickening, so if you’re gluten-free, cornstarch or arrowroot powder will do the trick. And if you’re watching calories, light butter or olive oil can replace half the butter without sacrificing flavor.
This dish tastes even better the next day, so double the batch if you’re feeding a crowd. Store leftovers in an airtight container in the fridge for up to 4 days, or freeze for 3 months. The sauce thickens as it cools, so reheat with a splash of milk or broth to loosen it. For meal prep, bake it in a 9x13-inch dish—it’s perfect for portioning into containers. The crispy top? That’s the magic—don’t skip the final 15 minutes uncovered. It’s worth the wait for that golden, caramelized finish.
Why You'll Love This Recipe
- One-Pan Magic: I swear by this recipe—just slice the chuck roast, toss it with mushrooms and onions, and let the oven do the work. No stove babysitting, no sticky pans, and honestly? The rich, caramelized beef practically melts in your mouth.
- Rich Without Effort: That deep, savory flavor comes from slow-roasting the beef until tender, then finishing with a creamy sauce that clings to every bite. The garlic and onions build layers of warmth, and between us, the first forkful makes you forget it took almost no effort.
- Weeknight to Potluck Hero: This dish works whether I’m feeding my family on a Tuesday or bringing it to a holiday gathering. Double the noodles for leftovers, or serve it over crusty bread for guests who’ll think you slaved all day. My daughter even sneaks seconds when she thinks I’m not looking.
- Budget-Friendly Feast: A single chuck roast stretches across three meals—first night with noodles, then shredded in tacos, and finally tossed into a frittata. Mushrooms and onions bulk it up cheaply, and the leftovers taste just as good reheated as they do fresh. (Yes, even on a Tuesday night.)
Step-by-step instructions for baked beef stroganoff
Here's how to create a hearty stroganoff with tender beef and a velvety mushroom sauce topped with golden, crispy noodles.
🍳 Step 1: Sear the Beef Chuck Roast
Heat a large oven-safe skillet over medium-high heat and add 2 tablespoons unsalted butter. Once the butter foams, add the 1.5 lb pre-cubed beef chuck roast in a single layer. Let it sear undisturbed for 3-4 minutes until a deep golden brown crust forms on all sides.
This initial sear locks in juices and builds rich flavor. I press down gently on the beef cubes during the first minute—this prevents them from curling and ensures even contact with the hot pan. Once browned, transfer the beef to a plate and set aside, leaving all the browned bits in the pan. These bits, called fond, will form the base of your sauce.
👨🍳 Step 2: Build the Mushroom Sauce
In the same skillet, add 1 whole yellow onion and 8 oz sliced white mushrooms. Cook for 5-6 minutes until the mushrooms release their moisture and the onions soften to translucent. Push the vegetables to one side of the pan and add 4 minced garlic cloves and 1 teaspoon paprika to the empty space, cooking for 30 seconds until fragrant.
Here's the thing—don't rush this step. The mushrooms should cook down until they release their liquid and develop a golden color. If the pan gets too dry, add 1 tablespoon beef broth to deglaze. Stir in 1 tablespoon all-purpose flour and cook for another 1 minute to remove the raw flour taste.
🥘 Step 3: Combine Sauce and Beef
Return the seared beef to the skillet and pour in the remaining 1 cup beef broth and 1 tablespoon Dijon mustard. Bring to a gentle simmer, then reduce heat to low and cover partially. Let it cook for 15-20 minutes until the beef is fork-tender and the sauce has thickened slightly. You'll see the sauce coat the back of a spoon when it's ready.
I know it seems like a long wait, but patience here ensures tender beef. If the sauce reduces too quickly, add a splash of broth. The beef should be easy to pierce with a fork, and the sauce should cling to the meat rather than pool at the bottom.
🔥 Step 4: Prepare the Noodles and Assemble
While the beef cooks, cook the 12 oz egg noodles according to package instructions until al dente. Drain and set aside. Preheat your oven's broiler to high.
Spread the cooked noodles evenly in the skillet with the beef mixture. Dollop the 1 cup sour cream evenly over the top, then sprinkle with 1 teaspoon salt and 0.5 teaspoon black pepper. The goal is to create a thick, creamy layer that will crisp beautifully.
🔥 Step 5: Bake to Crispy Perfection
Transfer the skillet to the preheated broiler and bake for 3-5 minutes until the top is golden brown and bubbling. Watch closely—you want that crispy, caramelized crust that adds texture contrast to the creamy sauce below.
Real talk: this is the moment that matters. The broiler creates that golden, crispy top while keeping the noodles underneath perfectly al dente. Once the top is beautifully browned, remove from the oven and sprinkle with 2 tablespoons chopped fresh dill. Let it rest for 2-3 minutes before serving to allow the sauce to set slightly.
Pro Tips For Making Baked Beef Stroganoff
- Sear the Chuck First: High heat for 3-4 minutes on each side—this isn’t just for flavor, it’s what keeps the beef tender when it bakes later. I used to skip this and ended up with dry, stringy meat that tasted like it belonged in a stew, not stroganoff.
- Slice Mushrooms Thin: A sharp knife and a quick chop—no need for fancy julienne. Thick slices turn mushy in the sauce, but paper-thin strips melt into the creamy base without overpowering it. (Yes, even if you’re impatient like me.)
- Don’t Overmix the Sauce: Stir just until the flour dissolves, then let it cook undisturbed for 2-3 minutes. I learned this the hard way—overworking it turns the sauce gluey, and no one wants stroganoff that clumps like a failed gravy.
- Use Cold Noodles: Toss them in at the very end, straight from the fridge. They’ll soak up the sauce perfectly without turning to mush, and you won’t end up with a watery, sad-looking dish. (Your future self will thank you.)
Essential equipment for this dish
Oven-Safe Skillet
This is your workhorse tool for this recipe—I use a 10-inch cast iron skillet like the Lodge Pre-Seasoned because it distributes heat evenly and handles the transition from stovetop to oven seamlessly. Cast iron retains heat exceptionally well, which is crucial for that golden, crispy top during broiling. If you don’t own cast iron, a heavy stainless steel skillet (like All-Clad) works well too, though it may require slightly more attention to prevent burning. 🔥
High-Quality Butter
Don’t skimp on butter here—unsalted butter with at least 82% fat content (like Plugrá or Kerrygold) makes all the difference. The fat content ensures proper browning of the beef and adds richness to the sauce. For a lighter option, I sometimes replace 1 tablespoon with olive oil, but the texture won’t be quite as luxurious. Store your butter in the fridge to maintain freshness, and let it sit at room temperature for 10-15 minutes before using to avoid splattering.
Measuring Tools
Precision matters when it comes to the sauce—a digital kitchen scale (like the OXO Good Grips) is my go-to for weighing ingredients like mushrooms and beef, but a stainless steel measuring cup set (like Farberware) works perfectly fine for liquids. For spices, I use a small spice scoop (like Penzeys Spice Scoops) to ensure consistent measurements—1 teaspoon of paprika can make or break the flavor profile. A fine-mesh strainer also comes in handy if you want to remove any large mushroom pieces for a smoother sauce. ✨
Broiler Pan Handle
Here’s a pro tip: If your skillet doesn’t have oven-safe handles, use silicon oven mitts or heat-resistant gloves (like Oven Mitts Pro) when transferring it in and out of the oven. The broiler gets hotter than expected, so protection is key. I also recommend placing the skillet on a wire rack (if your oven has one) to allow heat to circulate underneath, ensuring even browning. This small adjustment prevents soggy noodles and guarantees that crispy top we’re all after. 💡
Fresh Dill and Knife Set
Fresh dill adds a bright, herbal finish to this dish, so having a sharp chef’s knife (like Wüsthof Ikon) and a cutting board (I love Teakhaus bamboo) is essential for chopping it finely. A microplane also works well for zesting lemon if you want to add a touch of acidity. If fresh dill isn’t available, dried dill (about 1 teaspoon) can substitute, but it won’t have the same vibrant flavor. Store fresh dill in a damp paper towel inside a ziplock bag in the fridge to keep it fresh for up to 5 days.
Nutrition facts
Frequently asked questions
Can I use ground beef instead of cubed beef chuck roast?
Ground beef works in a pinch, but the texture will be different. For best results, use 80/20 ground chuck and brown it thoroughly to develop flavor. The fat content helps keep the sauce rich, but you’ll lose that tender, melt-in-your-mouth quality of cubed beef. If you proceed, reduce the cooking time to 10-12 minutes after adding the sauce.
Why does my stroganoff sauce turn out too thin?
The sauce may be too thin if you didn’t cook the flour long enough or if the beef released too much liquid. Always cook the flour for 1 full minute to remove the raw taste, and if needed, mix 1 tablespoon cornstarch with 1 tablespoon cold water, then stir it into the sauce at the end. Simmer for 2-3 minutes until thickened.
How can I make this recipe gluten-free?
Swap the egg noodles for gluten-free pasta (like brown rice or chickpea noodles) and replace the all-purpose flour with cornstarch or arrowroot powder. For extra richness, use a gluten-free beef broth and ensure your sour cream is labeled gluten-free. The texture will be slightly different, but the flavor remains just as delicious.
What’s the best way to reheat leftovers?
Reheat leftovers in a skillet over medium-low heat, adding 1-2 tablespoons beef broth or water to loosen the sauce. Cover and warm for 3-5 minutes, stirring occasionally. Avoid microwaving—it can make the noodles mushy. For a crispy top, broil for 1-2 minutes at the end.
Can I make this ahead of time?
Assemble the dish (without broiling) up to 24 hours ahead and refrigerate. When ready to serve, bake at 375°F for 20-25 minutes until the top is golden. The flavors deepen overnight, making it even more delicious. For freezing, bake the dish, let it cool, then store in an airtight container for up to 3 months. Thaw overnight in the fridge before reheating.