
Soups & Stews
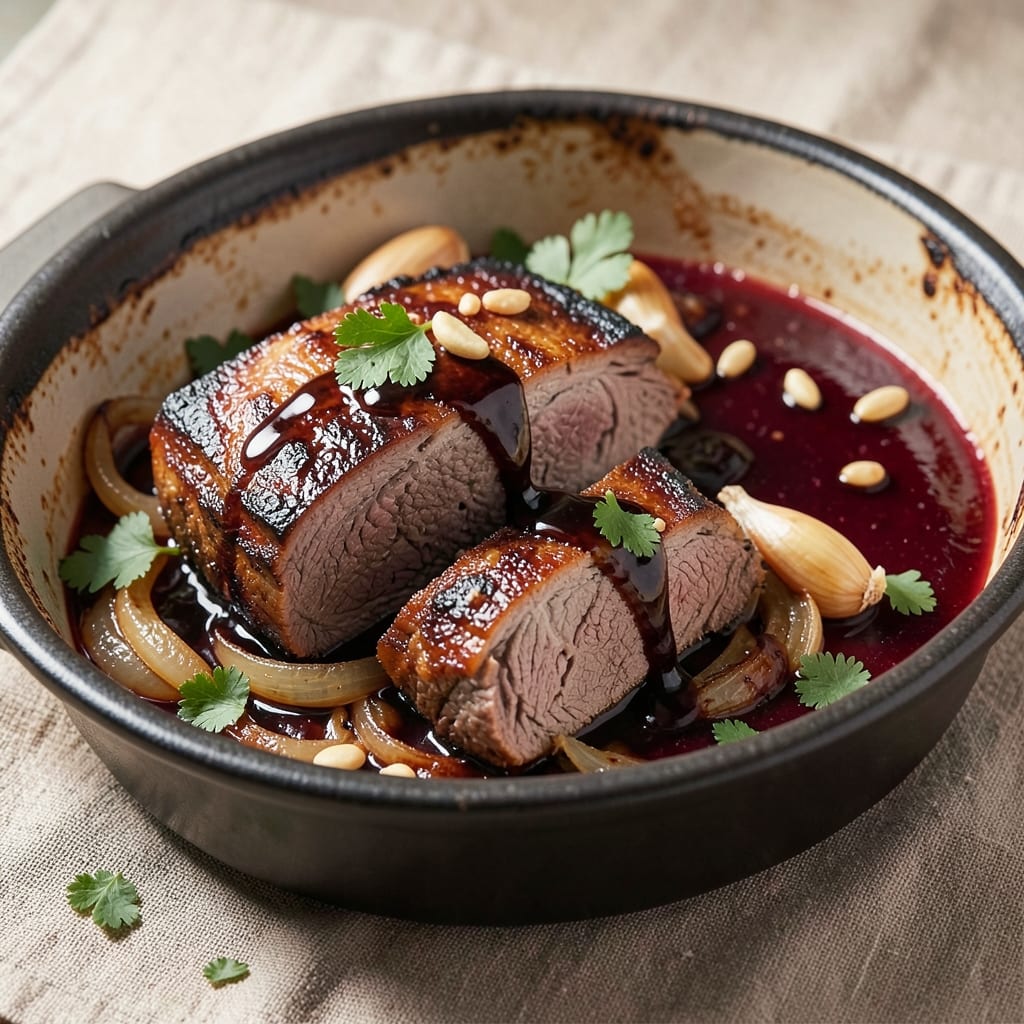
This balsamic braised beef recipe transforms tough cuts into melt-in-your-mouth perfection through slow cooking and rich reduction. The deep red wine and balsamic vinegar create a sauce that locks in flavor while tenderizing the meat—ideal for chilly evenings when you crave hearty, restaurant-quality comfort. Professional chefs swear by this method for its ability to elevate simple ingredients into something extraordinary.
The secret lies in proper searing and degreasing before braising at 325°F for 3 hours, allowing the beef to become fork-tender while the sauce develops complex layers of flavor. This technique works particularly well with chuck roast or short ribs, where collagen breaks down into velvety texture. The sauce should reduce until syrupy, coating every bite with its deep, tangy sweetness.
By the time you serve this dish, you'll have perfectly braised beef with a glossy, rich sauce that clings beautifully to each slice. The aroma alone will have everyone anticipating dinner, while the first bite delivers that perfect balance of tender meat and bold, balanced sauce. This is the kind of meal that transforms an ordinary weeknight into something special.
Pair with creamy polenta or roasted root vegetables to complete the meal, and serve with a bold red wine like Cabernet Sauvignon to complement the sauce's depth. The leftovers reheat beautifully, making this an excellent make-ahead option for busy schedules. Let's get started on this timeless classic.
Ingredients for balsamic braised beef
The perfect blend of rich red wine and aged balsamic transforms tough beef into restaurant-quality tenderness.
| Ingredient | Amount | Notes |
|---|---|---|
| Chuck Roast 🥩 | 3 lb | Bone-in preferred for flavor |
| Dry Red Wine 🍷 | 1 ½ cups | Bold variety like Cabernet Sauvignon |
| Balsamic Vinegar 🍶 | ½ cup | Aged for richer flavor profile |
| Beef Broth 💧 | 2 cups | Low-sodium preferred for balance |
| Garlic Cloves 🧄 | 6 cloves | Peeled and smashed for aroma |
| Yellow Onion 🧅 | 1 whole | Medium size, sliced evenly |
| Carrots 🥕 | 2 medium | Peeled and sliced into rounds |
| Tomato Paste 🍅 | 2 tbsp | Smooth consistency preferred |
| Fresh Thyme 🌿 | 2 sprigs | Or 1 tsp dried thyme |
| Olive Oil 🫒 | 2 tbsp | Extra-virgin for searing |
| All-Purpose Flour 🌾 | 2 tbsp | For dusting beef |
| Kosher Salt 🧂 | 2 tsp | Diamond Crystal preferred |
| Freshly Ground Black Pepper 🌶️ | 1 tsp | For seasoning beef |
| Fresh Rosemary 🌿 | 1 sprig | For aromatic depth |
The beef cut is critical here—chuck roast delivers the best texture and flavor. Look for well-marbled pieces at Costco or your local butcher shop, as the fat renders beautifully during braising. If you can't find chuck, short ribs work equally well. The wine should be bold and dry—Cabernet Sauvignon or Merlot are ideal choices. For the balsamic, opt for aged varieties like Giovanni Rossi or Balsamic Vinegar of Modena—their deeper flavor profiles elevate the sauce significantly. Fresh thyme and rosemary should be vibrant green, indicating peak freshness.
No red wine? Substitute with beef broth and a splash of balsamic vinegar, though the depth won't be identical. For the carrots, baby carrots or parsnips work just as well if you're in a pinch. If tomato paste feels like overkill, skip it entirely—the wine and balsamic provide enough acidity. For the flour, cornstarch can be used as a 1:1 substitute if you're avoiding gluten. The garlic and onion can be pre-minced to save time, but fresh is always better. If you're using dried herbs, remember to use one-third the amount of fresh.
This dish tastes even better the next day as flavors meld together. Store in an airtight container in the refrigerator for up to 5 days, or freeze for 3 months for convenience. The sauce thickens as it cools, so you may need to add a splash of broth when reheating. For meal prep, portion into individual containers—each serving reheats beautifully. The beef will become more tender with each reheat, making it perfect for lunches throughout the week.
Why You'll Love This Recipe
- One-Pan Magic: I swear by this recipe—just sear the chuck roast, toss in the wine and balsamic, then walk away. The slow simmer does all the work while you sip that same red wine you’re cooking with. (Honestly, the best part is not standing over the stove.)
- Wine & Vinegar Magic: That tangy-sweet balsamic glaze cutting through the richness of the beef? It’s the kind of flavor combo that makes you pause mid-bite. The garlic and wine deepen as it braises, turning a simple roast into something restaurant-worthy—without the fuss.
- Leftovers That Beg for More: This dish only gets better the next day, and my freezer is packed with portions because reheating it is that good. I’ll make a double batch on Sundays, then pull it out for quick lunches or throw it in sandwiches—no one ever complains about seconds.
- Budget-Friendly Feast: Chuck roast is my wallet’s best friend—cheap, hearty, and packed with flavor. A bottle of wine and a splash of balsamic turn it into a meal that feels special, not expensive. Between us, this is how I feed a crowd without breaking the bank.
Step-by-step instructions for balsamic braised beef
Master this technique and you'll transform tough chuck roast into melt-in-your-mouth perfection.
Sear the Chuck Roast for Deep Flavor
Pat the 3 lb chuck roast completely dry with paper towels—this ensures maximum browning. Heat 2 tbsp olive oil in a heavy Dutch oven over medium-high heat until shimmering. Place the roast in the pot and sear on all sides for 4-5 minutes per side until it develops a deep, golden-brown crust. This step is crucial—it locks in flavors through the Maillard reaction.
While the roast sears, remove it from the pot and set it aside. Add 6 cloves garlic cloves and 1 whole yellow onion (sliced evenly) to the same pot, cooking for 3-4 minutes until the garlic turns golden and the onions soften. This aromatic base forms the flavor foundation for your braise. Don't rush this step—proper searing creates the rich, caramelized depth that defines this dish.
Create the Balsamic-Wine Reduction
Return the seared chuck roast to the pot. Sprinkle 2 tbsp all-purpose flour evenly over the surface, then add 1.5 cups dry red wine (Cabernet Sauvignon works best). Scrape up any browned bits from the bottom of the pot—these contain concentrated flavor. Let the mixture simmer for 5 minutes until the wine reduces by half and coats the back of a spoon.
Add 0.5 cup balsamic vinegar and 2 cups beef broth, stirring to combine. The vinegar will mellow as it cooks, adding sweetness and complexity. Bring the mixture to a gentle simmer, then add 2 tbsp tomato paste, 2 sprigs fresh thyme, 1 sprig fresh rosemary, 2 tsp kosher salt, and 1 tsp freshly ground black pepper. The liquid should come about halfway up the roast—this ensures even cooking and maximum tenderness.
Braise Until Fork-Tender
Cover the Dutch oven with a tight-fitting lid and transfer it to a 325°F oven. Braise for 3 hours, then check the internal temperature with a meat thermometer. The beef should register 195-200°F—this is the sweet spot for melt-in-your-mouth tenderness. If it's not quite there, add ¼ cup hot water to the pot (to maintain moisture) and continue braising for another 30-60 minutes.
Here's the key: The long, slow cook time breaks down collagen in the meat, transforming it into gelatin that makes each bite impossibly tender. The wine and balsamic reduction will thicken slightly as it cooks, creating a glossy sauce that clings beautifully to the beef. Resist the urge to peek—every time you lift the lid, you lose valuable heat and moisture.
Rest and Finish
Remove the braised beef from the oven and let it rest for 15-20 minutes before serving. This resting period allows the juices to redistribute throughout the meat, ensuring each slice is moist and flavorful. Skim any excess fat from the surface of the braising liquid if desired—though I prefer to leave it for added richness.
Slice the beef against the grain into ¼-inch thick pieces. The meat should pull apart easily with minimal resistance, and the sauce should coat each slice beautifully. Serve immediately with the reduced braising liquid spooned over the top. The dish should have a perfect balance of sweet, tangy, and savory flavors, with the deep red wine reduction shining through.
Pro Tips For Making Balsamic Braised Beef
- Sear the Roast Hard: The chuck roast needs a deep, dark crust to hold up through hours of braising—don’t be shy with the oil or the time. After patting it dry, sear it on all sides until it’s got that caramelized armor, then let it rest 5 minutes before adding liquid. I used to rush this, and the meat would turn out mushy instead of tender.
- Deglaze with Wine Immediately: As soon as you pull the roast out, pour that red wine right into the hot pan—no waiting. Scrape up every browned bit stuck to the bottom with a wooden spoon while it bubbles. This isn’t just for flavor; it’s where half the depth of your sauce comes from. (Yes, even if you’re impatient like me.)
- Simmer, Don’t Boil: Once the liquid hits the pot, keep the heat low enough that you’re barely seeing bubbles—just a few tiny ones breaking the surface. Boiling will turn your braising liquid into a thin, flavorless broth, and you’ll end up with tough meat. This is the thing that matters most after the sear.
- Reduce the Balsamic Last: Add the balsamic vinegar only in the final 15 minutes of cooking. It’s acidic enough to cut through the richness, but if you toss it in too early, it’ll just disappear into the broth. Save it for when you want that glossy, tangy sheen on top—it makes all the difference in presentation and taste.
Serving suggestions for this balsamic braised beef
Polenta Perfection
Creamy polenta is the ultimate canvas for this rich braised beef. Cook 1 cup polenta in 4 cups boiling water with ½ tsp salt and 1 tbsp butter, stirring constantly for 15-20 minutes until thick and smooth. The mild sweetness of polenta contrasts beautifully with the tangy balsamic sauce, while its creamy texture soaks up every drop. For extra indulgence, stir in ¼ cup grated Parmesan cheese at the end. 💛
Roasted Root Vegetables
Toss 2 cups diced carrots, 1 cup parsnips, and 1 cup sweet potatoes with 2 tbsp olive oil, 1 tsp thyme, and ½ tsp salt. Roast at 400°F for 30-35 minutes until caramelized and tender. The natural sweetness of these vegetables complements the beef's savory depth while adding vibrant color to your plate. I love adding a sprinkle of fresh rosemary before serving for an aromatic finish.
Crusty Bread Service
No braised beef meal is complete without warm, crusty bread to mop up the sauce. Toast a baguette or ciabatta until golden and crisp, then serve with garlic butter for dipping. The bread's texture provides a satisfying contrast to the tender beef, while the garlic butter enhances the dish's overall flavor profile. For an extra touch, sprinkle flaky sea salt over the bread before serving.
Simple Green Salad
A bright green salad balances the richness of the beef. Toss 4 cups mixed greens with 1 tbsp balsamic vinaigrette (made with 2 tbsp olive oil, 1 tbsp balsamic vinegar, and 1 tsp Dijon mustard). Add ¼ cup sliced almonds for crunch and ¼ cup crumbled goat cheese for creaminess. The acidity of the vinaigrette cuts through the richness, while the textures create a perfect bite.
Wine Pairing Essentials
For the ultimate pairing, serve with a bold Cabernet Sauvignon or Merlot—both complement the dish's rich flavors. The tannins in red wine help cleanse your palate between bites, while the fruit notes enhance the beef's natural depth. If you prefer white wine, a full-bodied Chardonnay with oak aging can also work beautifully. For non-alcoholic options, try a sparkling cranberry juice or ginger beer to refresh your palate.
Garnish Like a Pro
Elevate your presentation with fresh garnishes. Sprinkle chopped parsley over the beef for a pop of color and freshness, or add toasted pine nuts for crunch. A drizzle of aged balsamic glaze (reduced from ¼ cup balsamic vinegar simmered for 5 minutes) adds a glossy finish. These small touches make the dish feel restaurant-worthy while keeping the flavors balanced. ✨
Nutrition facts
Frequently asked questions about balsamic braised beef
Can I use a slow cooker instead of an oven? Transfer the seared beef and braising liquid to a slow cooker and cook on low for 8 hours or high for 5-6 hours. The texture will be slightly different but still delicious. Just
What's the best cut of beef for this recipe?
The ideal cuts are chuck roast or short ribs—both have excellent marbling that renders beautifully during braising. Bottom round works too but may be slightly less tender. Avoid lean cuts like sirloin, as they won't become fork-tender with this method. Your local butcher can help identify well-marbled pieces.
Why did my sauce turn out too thin?
This usually happens when the liquid wasn't reduced enough during braising. For a thicker sauce, simmer the beef uncovered for 10-15 minutes at the end to reduce the liquid. You can also mix 1 tbsp cornstarch with 2 tbsp cold water and stir it into the sauce at the end—it'll thicken instantly. The sauce should coat the back of a spoon when done.
Can I make this dish ahead of time?
This recipe actually tastes better the next day! Store in an airtight container in the fridge for up to 5 days, or freeze for 3 months. When reheating, add a splash of beef broth to restore moisture. The flavors deepen as the sauce continues reducing, making leftovers even more flavorful. Perfect for meal prep!
What if I don't have red wine?
No problem! Substitute with 2 cups beef broth plus 2 tbsp balsamic vinegar for acidity. For extra depth, add 1 tsp soy sauce or 1 tbsp tomato paste. While not identical, this version will still be delicious. The key is maintaining the balance of sweet, tangy, and savory flavors.