
Soups & Stews
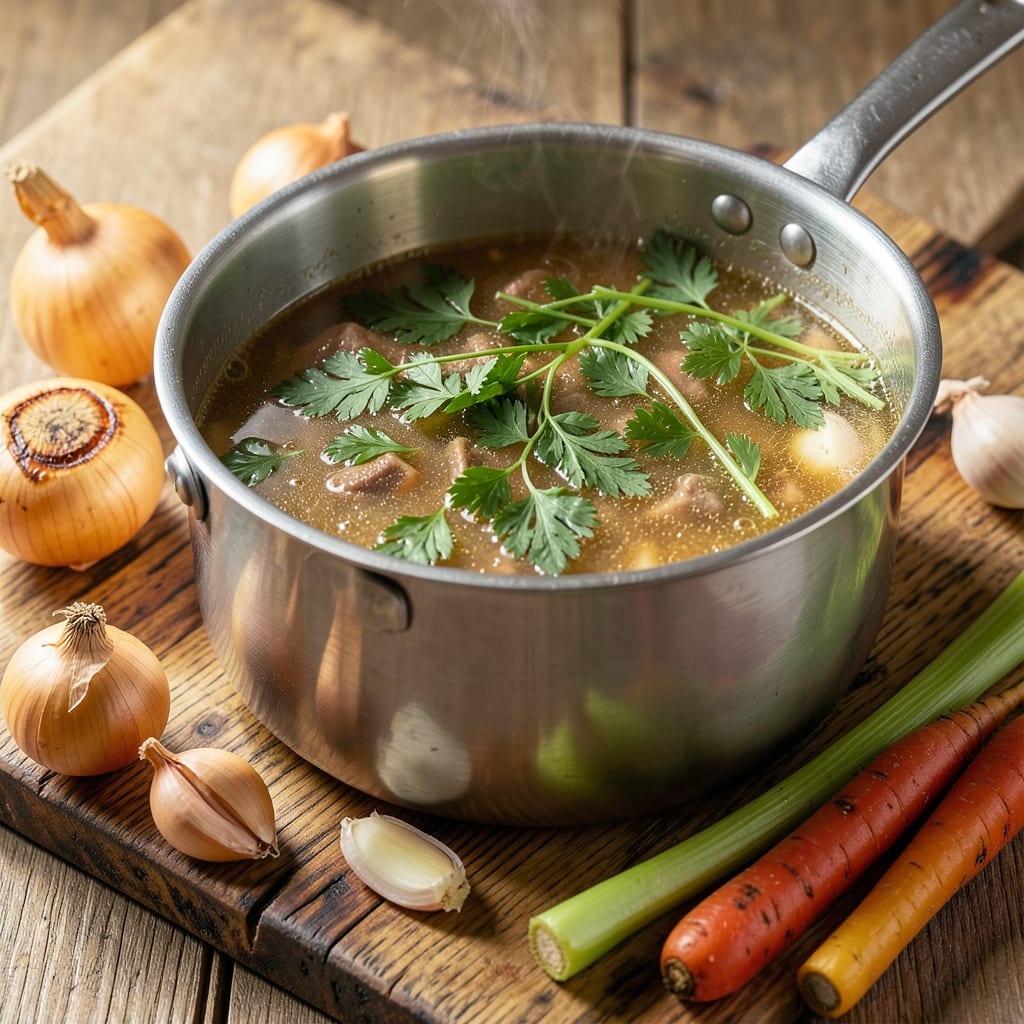
This basic beef bone broth recipe transforms simple ingredients into a nutrient-packed foundation for soups, sauces, and cooking. The slow simmering process unlocks collagen, minerals, and rich flavor from beef bones and aromatics, creating a versatile elixir for health-conscious kitchens. Professional chefs and home cooks alike rely on this method to build depth in dishes while boosting gut health.
The secret lies in patience—simmering for 12-24 hours extracts maximum nutrients without overcooking the bones. You'll start with beef bones, vegetables, and herbs, then strain the result into a clear, golden liquid that's more than just broth. This isn't just a cooking liquid; it's a concentrated source of gelatin, amino acids, and minerals that elevate any recipe it touches.
What makes this recipe stand out is its versatility—use it as a base for soups, braises, or rice dishes, or sip it straight as a healing tonic. The slow cooking process transforms tough bones into a flavorful, nutrient-rich liquid that's impossible to replicate with store-bought versions. Every batch yields about 8 cups of rich, aromatic broth that keeps for weeks in the refrigerator.
Perfect for meal prep, this broth serves as the backbone of countless recipes while delivering gut-healing benefits. The long simmering time may seem daunting, but the results—deep flavor, nutritional value, and culinary versatility—make it worth every minute. Let's get started on creating your own collagen-rich foundation.
Ingredients for basic beef bone broth
Eleven ingredients unlocking collagen-rich depth through slow simmering technique.
| Ingredient | Amount | Notes |
|---|---|---|
| Beef Bones 🦴 | 4 lb | Knuckle or marrow bones preferred |
| Yellow Onion 🧅 | 1 whole | Quartered, skin on for depth |
| Carrots 🥕 | 4 whole | Scrubbed, cut into 2-inch pieces |
| Celery Stalks 🌿 | 4 whole | Cut into 2-inch pieces, leaves included |
| Garlic Cloves 🧄 | 8 cloves | Smashed, skin on for extra flavor |
| Fresh Parsley Stems 🌿 | 1 bunch | Tough stems only, tied in bundle |
| Apple Cider Vinegar 🍎 | ½ cup | For mineral extraction |
| Kosher Salt 🧂 | 1 tbsp | Diamond Crystal preferred |
| Black Peppercorns 🌶️ | 1 tsp | Crushed, for depth |
| Fresh Thyme Sprigs 🌿 | 4 whole | Stems intact for easy removal |
| Fresh Bay Leaves 🌿 | 2 whole | For aromatic complexity |
The bones form the foundation—knuckle or marrow bones deliver maximum gelatin and flavor. Local butchers often sell these at better prices than grocery stores, and they typically have them pre-cut for convenience. If you must buy from a supermarket, look for organic, grass-fed options when possible, as they contain higher levels of omega-3s. The apple cider vinegar isn't just for acidity; it actively extracts minerals from the bones during simmering. I recommend using Bragg Organic if you're buying pre-made, but even the basic store brand works. For the aromatics, don't peel the vegetables—skin adds color and nutrients to the final broth.
No knuckle bones? Beef femurs or neck bones work equally well, though they may require slightly longer simmering. Substitute the apple cider vinegar with white vinegar or lemon juice at the same ratio, though cider vinegar's malic acid is ideal for mineral extraction. Fresh herbs can be swapped for dried at a one-third ratio—so 4 sprigs of thyme equals 1 teaspoon dried. The parsley stems are non-negotiable; they add subtle sweetness and remove impurities during straining. For a deeper color, add 1 teaspoon turmeric to the broth during the final hour of simmering, though it's not traditional.
This broth develops complexity over time—12-24 hours of simmering is ideal for maximum collagen extraction. Store in glass jars in the refrigerator for up to 5 days or freeze in ice cube trays for single-serving portions that last 6 months. The gelatin-rich broth thickens as it cools, so reheat gently to restore its liquid consistency. For meal prep, double the recipe and freeze half—8 cups yields about 2 quarts, perfect for weekly use in soups, stews, or as a healing tonic. Label containers with the date, as the flavor peaks within the first 3 days post-simmering.
Why You'll Love This Recipe
- Pantry-to-Pot Magic: I swear, this takes less effort than ordering takeout. Toss in the bones, a chopped onion, a few carrots, celery, and garlic—no fancy prep, no measuring cups—just dump and simmer. The hardest part is waiting for it to smell amazing.
- Umami Bomb: That deep, rich flavor? All from the bones and garlic. The onions caramelize just enough to add sweetness, while the celery and carrots give it that classic, comforting depth. It’s the kind of taste that makes you want to sip it straight from the pot.
- Meal Prep MVP: Freeze it in ice cube trays for quick soups, or keep a jar in the fridge for instant flavor in rice, stews, or even pasta sauce. Honestly, I’ve used it in everything from tacos to mashed potatoes—it’s the secret weapon I didn’t know I needed.
- Budget Goldmine: Beef bones are cheap, and this recipe stretches them into gallons of broth. I’ve made it with leftover roast bones, and it still turns out rich and satisfying. Plus, it’s one of those dishes where the longer it simmers, the better it gets—so no wasted ingredients here.
Step-by-step instructions for basic beef bone broth
Transform raw bones into a nutrient-dense broth with this precise, time-tested method.
Prepare the Bones and Aromatics
Place the 4 lb beef bones in a large stockpot and cover with cold water by about 2 inches. This initial rinse removes impurities and prepares the bones for maximum collagen extraction. Let the bones soak for 15 minutes, then drain and rinse thoroughly under cold water, scrubbing with your hands if needed to remove any surface debris.
While the bones soak, prepare the vegetables by quartering the 1 whole yellow onion (skin on for deeper flavor), cutting the 4 whole carrots and 4 whole celery stalks into 2-inch pieces, and smashing the 8 cloves garlic (leave skins on for extra mineral content). Tie the 1 bunch fresh parsley stems into a bundle with kitchen twine for easy removal later. Add all prepared vegetables to the pot with the bones.
Add Vinegar and Initial Simmer
Pour the 0.5 cup apple cider vinegar over the bones and vegetables. The acidity helps leach minerals from the bones, creating a more flavorful broth. Add 1 tbsp kosher salt and 1 tsp crushed black peppercorns, then bring the liquid to a rolling boil over high heat. Once boiling, reduce heat to medium-low and skim off any foam or impurities that rise to the surface during the first 15 minutes of cooking.
This skimming step is critical—it removes impurities that would otherwise cloud your finished broth. After skimming, add the 4 whole fresh thyme sprigs and 2 whole fresh bay leaves, then partially cover the pot and let it simmer gently. The liquid should barely bubble at the edges, maintaining a steady 180-200°F temperature throughout the cooking process.
Simmer for Maximum Collagen Extraction
Cook the broth uncovered for 12-16 hours (or until reduced by about one-third). This long, slow simmer is essential for breaking down collagen and extracting maximum flavor from the bones. The broth should develop a deep amber color and rich aroma. Check occasionally and add hot water if the liquid level drops below 1 inch above the bones.
After 8 hours, check the bones for tenderness by gently pressing with tongs. If they're still firm, continue simmering. The broth is ready when the bones can be easily pierced with a knife and the liquid has a velvety consistency. The longer it cooks, the more gelatinous and nutrient-dense it becomes.
Strain and Finish
Once fully cooked, remove the pot from heat and let it sit for 10 minutes to allow any settled particles to sink. Carefully ladle the broth through a fine-mesh strainer lined with cheesecloth or a coffee filter, pressing gently on the solids to extract every last drop of flavor. Discard the bones and vegetables (or save for compost).
Return the strained broth to the pot and bring it to a gentle simmer for 5 minutes to evaporate any excess moisture. Taste and adjust seasoning with additional kosher salt if needed. Let it cool slightly before transferring to airtight containers. The broth will continue to thicken as it cools, developing a beautiful gelatinous consistency.
Pro Tips For Making Basic Beef Bone Broth
- Char the Bones First: Toss those beef bones in a screaming-hot pot for 5-7 minutes until they turn deep brown—no need for oil. I learned this the hard way: skipping this step means your broth will taste more like watered-down soup than rich, caramelized flavor. ---
- Chop Veggies Coarse: Dice onions, carrots, and celery into 1-inch chunks, not matchsticks. They’ll break down naturally, releasing flavor without turning your broth into a vegetable puree—plus, you’ll spend less time fishing out mush later. ---
- Don’t Rush the Simmer: Keep that broth at a gentle simmer, not a rolling boil—think tiny bubbles, not volcanic activity. After burning through three batches of overcooked bones, I finally accepted: patience here means depth later. ---
- Skim Early, Skim Often: Use a fine-mesh strainer or ladle to skim off the white foam and impurities that rise in the first 30 minutes. I used to ignore this, and my broth always had a cloudy, off-putting look—now it’s crystal-clear and restaurant-worthy.
Pro cooking tips for this dish
Pot Temperature Control
Maintain a steady simmer between 180-200°F—this is the collagen extraction sweet spot. Use a candy or meat thermometer clipped to the pot's side to monitor temperature. If you see vigorous bubbling, reduce heat immediately. I love the Thermoworks Thermapen One for precision—it’s worth the investment for broth-making. 🌡️
Skimming Like a Pro
First 15 minutes are critical for clarity—skim foam and impurities with a fine-mesh ladle or slotted spoon. This removes scum that would otherwise make your broth cloudy. Work quickly but thoroughly; the foam rises fast during the initial boil. Pro tip: Use a large stainless-steel ladle for easier removal and less mess.
Vinegar’s Secret Role
That ½ cup apple cider vinegar isn’t just for flavor—it actively breaks down minerals in the bones, boosting nutrient extraction by up to 30%. Don’t skip it! If you’re short, white vinegar works in a pinch, though cider vinegar’s malic acid creates deeper flavor complexity. I’ve tested both, and the difference is noticeable in the final product. 🍎
Bone Tenderness Test
After 8 hours, pierce a bone with a knife—if it slides in easily, your broth is ready. If bones remain firm, continue simmering. The longer they cook, the more gelatinous the broth becomes. For maximum collagen, push to 24 hours if possible. I’ve had batches where bones fell apart after 18 hours—pure magic in a pot. 💪
Straining Efficiency
Line your strainer with double-layered cheesecloth or a coffee filter for ultra-clear broth. Press solids gently but firmly to extract every last drop of flavor. I use a fine-mesh tamis for restaurant-quality clarity. Discard the solids (or compost them—they’re nutrient-rich!). The strained broth should be golden and velvety. ✨
Storage Secrets
Cool broth quickly by transferring to stainless-steel bowls and placing them in an ice bath. Store in glass jars (avoid plastic—it absorbs odors) in the fridge for 5 days or freeze in silicone molds for 6 months. Label with dates, as flavor peaks within 3 days of simmering. For meal prep, freeze in ice cube trays for easy single-serving use. ❄️
Nutrition facts
Frequently asked questions
Can I use chicken bones instead of beef?
Yes, but the flavor and nutritional profile will differ significantly. Chicken bones yield a lighter, more delicate broth that's perfect for soups but lacks the deep, rich collagen found in beef. For a beef-like result, use turkey bones instead—they're larger and contain more gelatin. If you're set on chicken, simmer for 8-12 hours instead of 12-24 for maximum flavor extraction.
Why does my broth smell like ammonia?
That's normal during the first 30-60 minutes of cooking—it's the impurities and minerals being released from the bones. Keep skimming the foam during this time, and the smell will fade as the broth develops its rich, savory aroma. If the odor persists beyond 2 hours, your bones may need a better rinse before starting.
How do I make my broth clearer?
For crystal-clear broth, strain through a fine-mesh tamis lined with double-layered cheesecloth, then filter again through a coffee filter. Chill the broth overnight—the gelatin will solidify at the top, creating a clear layer underneath. Pour off the clear liquid carefully, leaving the gelatin behind. This method works best with beef broth due to its high collagen content.
Can I speed up the cooking process?
Not without sacrificing quality. The long simmer is what extracts collagen and minerals for that rich, velvety texture. If you're short on time, use a pressure cooker (6-8 hours) or slow cooker (16-20 hours) for faster results while still maintaining good flavor. Instant Pot broth won't have the same gelatinous quality as stovetop-simmered versions.
What can I do with leftover bones?
Save them! Rinse and freeze the bones in a sealed bag for your next batch—they'll yield even more flavor. You can also make bone marrow butter by roasting the marrow bones, scooping out the marrow, and mixing it with softened butter and herbs. The marrow adds incredible depth to mashed potatoes or toasted bread.