
Main Courses
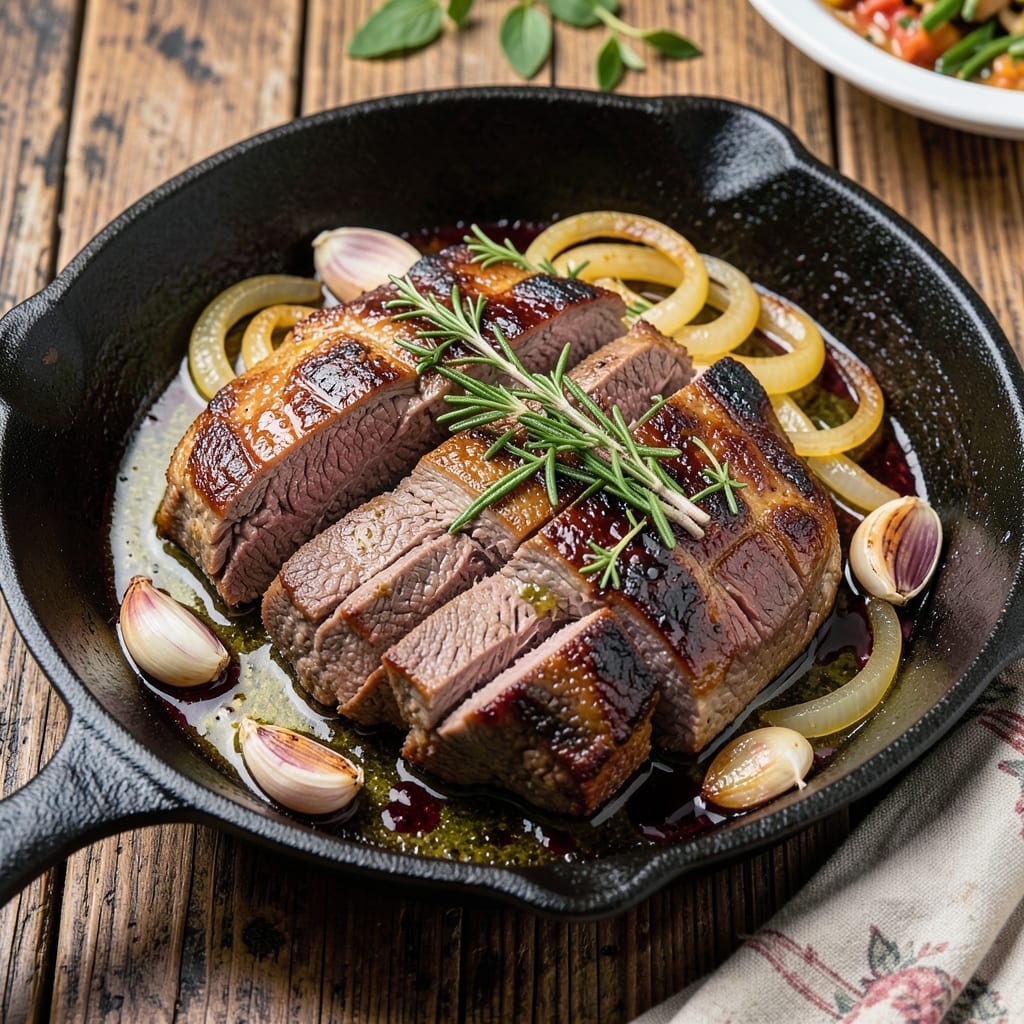
This beef a casa recipe transforms tough cuts into melt-in-your-mouth perfection with a slow-braised approach that builds deep, savory flavors. The secret lies in garlic, herbs, and a touch of umami-rich broth that tenderizes the meat while creating a rich sauce—exactly what makes Italian home cooking so irresistible. What starts as simple ingredients becomes a restaurant-worthy dish with minimal effort, proving that the best meals often require patience rather than complexity.
The process begins with a 30-minute sear to develop a flavorful crust on the beef, followed by a slow 3-hour braise that breaks down connective tissue into silky tenderness. While the beef simmers, the aromatics—garlic, rosemary, and thyme—infuse the sauce with layers of herbal brightness and savory depth. This technique ensures every bite delivers both texture and flavor, making it ideal for feeding a crowd or meal prepping for the week.
By the time you plate this dish, you’ll have fork-tender beef swimming in a glossy, herb-infused sauce that clings to every strand of pasta or slice of crusty bread. The result is hearty, comforting, and packed with the kind of umami richness that turns weeknight dinners into special occasions. Serve it with polenta or crusty bread to soak up every last drop of that flavorful sauce—because in Italian home cooking, nothing goes to waste.
This recipe isn’t just about the beef; it’s about the harmony of techniques that elevate simple ingredients into something extraordinary. The slow braising method ensures maximum tenderness, while the garlic-herb blend adds a bright, aromatic finish that balances the richness. Whether you’re cooking for family or treating yourself, this dish delivers the kind of satisfaction that comes from a meal made with care—and a little patience.
Ingredients for beef a casa
Simple ingredients that transform into restaurant-quality beef with deep umami flavor.
| Ingredient | Amount | Notes |
|---|---|---|
| Chuck Roast 🥩 | 2 lb | Well-marbled for tenderness |
| Extra-Virgin Olive Oil 🫒 | 2 tbsp | For searing beef |
| Yellow Onion 🧅 | 1 whole | Diced, medium size |
| Fresh Rosemary 🌿 | ¼ cup | Chopped, stems removed |
| Fresh Thyme 🌿 | ¼ cup | Leaves only, stems removed |
| Garlic Cloves 🧄 | 6 cloves | Peeled, lightly crushed |
| Beef Broth 💧 | 2 cups | Low-sodium preferred |
| Dry Red Wine 🍷 | ½ cup | Bold variety like Cabernet |
| Tomato Paste 🍅 | 2 tbsp | Smooth, not chunky |
| Diamond Crystal Kosher Salt 🧂 | 1 ½ tsp | For seasoning and broth |
| Freshly Ground Black Pepper 🌶️ | 1 tsp | Coarsely ground |
| Crusty Bread 🍞 | 4 slices | For serving, any variety |
| Polenta 🌾 | 1 ½ cups | Cooked, for serving |
The chuck roast is non-negotiable here—its marbling ensures fork-tender results. Look for well-marbled cuts at Whole Foods or your butcher's counter, where they can trim excess fat for you. If buying pre-cut, check for even-sized pieces. Penzeys or McCormick for the herbs—fresh is ideal, but dried works at one-third the amount if needed. Garlic should be firm and free of sprouts; Costco sells great bulk cloves. The beef broth matters too—Swanson or Pacific Foods low-sodium versions work best without adding extra salt later.
No red wine? Beef broth with a splash of balsamic vinegar delivers similar depth. Fresh herbs can be swapped for dried—just reduce to one-third the amount (so 1 tsp dried thyme instead of 0.25 cup fresh). For the tomato paste, Trader Joe's squeeze tubes are perfect—they keep for months and make measuring foolproof. The polenta can be instant or stone-ground; Goya or Bob's Red Mill are reliable brands. If you're short on time, pre-cook the polenta ahead—it reheats beautifully.
Store the braised beef in its sauce for up to 5 days in the fridge—it actually tastes better the next day as flavors meld. The sauce thickens when chilled, so add a splash of broth when reheating. Polenta keeps for 3 days in the fridge or 1 month frozen. For meal prep, portion the beef and sauce into containers, then reheat with a splash of water or broth. The crusty bread stays fresh for 3 days wrapped in a paper bag—toss it in the oven at 350°F for 5 minutes to revive if it gets stale.
Why You'll Love This Recipe
- One-Pan Magic: I swear by this—just sear the chuck roast in olive oil, toss in sliced onion and herbs, and let the oven do the work. No chopping boards, no extra pots, just pure, easy cleanup.
- Herb-Packed Perfection: That rosemary and thyme? They cling to the beef like a cozy blanket, turning tough chuck into melt-in-your-mouth goodness. Honestly, the aroma alone makes my kitchen smell like a Tuscan bistro.
- Leftovers That Beg for More: This recipe makes enough for lunches all week—shred it for sandwiches, slice it for salads, or just reheat it straight from the fridge. My kids actually ask for it, which is basically a parenting win.
- Budget-Friendly Feast: A chuck roast is cheap, but it feels fancy—especially when you brown it first for that deep, caramelized flavor. Between us, this is how I stretch my grocery budget without sacrificing taste.
Step-by-step instructions for slow-braised beef with garlic-herb umami
Master this technique for melt-in-your-mouth beef that develops deep flavor through slow cooking.
Sear the Chuck Roast for Deep Flavor
Pat the 2 lb chuck roast thoroughly dry with paper towels—this ensures maximum browning. Heat a heavy Dutch oven over medium-high heat until very hot, then add the 2 tbsp extra-virgin olive oil. Once shimmering, place the roast in the pan and sear for 4 minutes per side until deeply browned. I press down gently on the roast during the first minute to prevent curling and ensure even contact with the pan.
Remove the roast and set it aside. The goal here is to develop a rich, caramelized crust that will form the flavor base for your braise. If the oil starts smoking excessively, reduce heat slightly—you want golden brown, not burnt. This step creates that fundamental umami foundation that separates good braised beef from exceptional.
Build the Herb and Wine Base
In the same Dutch oven, add the 1 whole yellow onion (diced) and cook for 5 minutes until softened and lightly golden. Add the 6 cloves garlic cloves (lightly crushed) and cook for 30 seconds until fragrant. Here's where the aromatics transform into flavor—don't rush this step or you'll miss the development of those essential volatile compounds.
Deglaze the pan with the 0.5 cup dry red wine, scraping up all the browned bits from the bottom. Let it reduce by half (2-3 minutes) before adding the 2 tbsp tomato paste and stirring to combine. This wine reduction forms the velvety base of your sauce, where all the flavors will meld together. The tomato paste adds depth and helps thicken the final sauce slightly.
Layer Herbs and Broth for Maximum Flavor
Return the seared roast to the Dutch oven. Sprinkle evenly with 1.5 tsp diamond crystal kosher salt and 1 tsp freshly ground black pepper, then add the 0.25 cup fresh rosemary and 0.25 cup fresh thyme. Pour in the 2 cups beef broth, ensuring the roast is about ¾ submerged. Bring to a simmer over medium heat, then reduce to low heat—this is where patience pays off.
The herbs will infuse their aromatic oils into the liquid as it simmers gently. I cover the pot with a lid at this stage to trap steam and prevent evaporation, which helps maintain moisture in the meat. The key is maintaining a gentle simmer—not a rolling boil—which prevents the connective tissue from tightening and making the meat tough.
Braise Until Fork-Tender
Transfer the Dutch oven to a 300°F oven and braise for 3 hours. This low-and-slow cooking breaks down collagen in the meat, transforming it into gelatin that makes each bite tender. Every 45 minutes, spoon the cooking liquid over the roast to keep it moist and encourage even cooking.
After 3 hours, check for doneness by inserting a meat thermometer into the thickest part—it should read 200-205°F. If not, return to the oven for another 30-45 minutes. The meat should be fork-tender, falling apart easily when pierced. This is where the magic happens—the slow transformation of tough chuck into melt-in-your-mouth perfection.
Rest and Serve with Polenta
Remove the roast from the pot and let it rest on a cutting board for 15 minutes, tented loosely with foil. This resting period allows the juices to redistribute throughout the meat. Meanwhile, skim excess fat from the braising liquid and reduce it by half over medium heat to create a rich sauce. Strain if you prefer a smoother texture.
Slice the roast against the grain into ½-inch thick pieces. Serve with the 1.5 cups cooked polenta and the reduced sauce spooned over the top. The polenta provides a neutral canvas that lets the beef's rich flavors shine. For presentation, arrange the beef slices fanned over the polenta and drizzle with the sauce. The crusty bread is perfect for soaking up any remaining sauce.
Pro Tips For Making Beef A Casa
- SEAR THE ROAST FIRST: Chuck roast is forgiving, but a quick 3-minute sear in olive oil—before any liquid—builds flavor and color. I used to skip this and wondered why my finished beef tasted like it’d been simmered in water. High heat, serious browning—this isn’t the time to play it safe.
- SLICE THE ONION THIN: Yellow onions caramelize best when they’re paper-thin. A sharp knife and a steady hand (or a mandoline if you’re impatient) make all the difference—thick slices just sit there, soggy and underwhelming. Trust me, the effort pays off in that sweet, jammy texture.
- DON’T OVERCOOK THE HERBS: Fresh rosemary and thyme should perfume the dish, not turn to mush. Toss them in whole during the first 20 minutes of cooking, then remove and add back later—just before serving. I learned this after one disastrous batch where the herbs dissolved into the sauce like sad confetti.
- USE A MEAT THERMOMETER: Chuck roast is best at 195°F—no guessing, no stabbing with a fork. A cheap thermometer ($10) takes the stress out of timing and guarantees tender, pull-apart perfection. I used to pull it at 180°F and ended up with chewy, sad beef every time.
Serving suggestions for this recipe
Polenta Perfection
The creamy texture of polenta acts as a perfect canvas for your rich beef sauce. I like using stone-ground polenta from Bob's Red Mill because it has a slightly coarser texture that holds up better to the sauce. Cook it according to package instructions (usually a 1:4 ratio of polenta to water) and stir frequently to prevent lumps. For extra richness, stir in 1 tablespoon butter and ¼ cup grated Parmesan cheese at the end. The polenta should be thick enough to hold its shape but still creamy—like a thick porridge. 🌾
To elevate your plating, use a ring mold to shape the polenta into neat rounds before unmolding onto plates. This creates a clean base for your beef slices. For a rustic touch, serve the polenta in shallow bowls and spoon the beef and sauce directly over it. The contrast between the smooth polenta and the tender beef makes every bite satisfying.
Crusty Bread Essentials
No beef braise is complete without crusty bread to soak up the flavorful sauce. I recommend a baguette-style loaf from Breads Bakery or your local artisanal bakery. Toast the bread lightly before serving to enhance its crunch—just pop slices in a 375°F oven for 5-7 minutes until golden brown. For extra flavor, rub the toasted bread with a garlic clove or drizzle with olive oil and a sprinkle of flaky sea salt. 🍞
If you want to get creative, try making garlic bread croutons by cubing stale bread, tossing with olive oil, minced garlic, dried thyme, and Parmesan cheese, then baking at 375°F for 10-12 minutes until crispy. These add a delightful crunch to the dish and help mop up every last bit of sauce.
Garnish Like a Pro
A few well-placed garnishes can take your dish from home-cooked to restaurant-worthy. Fresh parsley leaves add a bright pop of color and freshness—just chop ¼ cup and sprinkle over the beef before serving. For a touch of acidity, add a few drops of balsamic glaze or a drizzle of high-quality extra-virgin olive oil. A pinch of freshly cracked black pepper right before serving intensifies the flavors. 🌿
If you have time, make herb butter by mixing 2 tablespoons softened butter with 1 tablespoon chopped fresh rosemary and 1 tablespoon chopped fresh thyme. Dot small pieces of this butter over the beef and polenta before serving for an extra layer of flavor. The herbs will melt slightly, infusing the dish with their aromatic oils.
Wine and Cheese Pairings
A bold Chianti Classico or Cabernet Sauvignon complements the rich, herby flavors of the beef perfectly. The tannins in red wine cut through the fat, cleansing your palate between bites. For a lighter option, try a Pinot Noir—its bright acidity balances the dish beautifully. If you’re not a wine drinker, a sparkling water with lemon keeps the meal refreshing. 🍷
For cheese lovers, serve with aged pecorino or Parmigiano-Reggiano. Their nutty, salty profiles enhance the beef’s umami notes. Avoid overly creamy cheeses like brie—they can overpower the dish. Instead, opt for something firm and flavorful that stands up to the beef’s richness.
Leftovers Reinvented
Turn tomorrow’s leftovers into today’s lunch with a few simple tweaks. Shred the beef and mix it into homemade beef sliders with brioche buns and caramelized onions. For a hearty sandwich, layer the beef between sourdough slices with provolone cheese and arugula. The sauce makes an excellent spread—just warm it slightly and spread it on the bread before assembling. 🥪
Another great idea is to use the beef in a beef and polenta stuffed bell pepper. Hollow out bell peppers, mix the beef with cooked polenta, and stuff the peppers before baking at 375°F for 20-25 minutes. Top with mozzarella cheese and broil until bubbly. This is a fantastic way to repurpose leftovers into a completely new dish while keeping the flavors intact.
Nutrition facts
Frequently asked questions
Can I use a different cut of beef instead of chuck roast?
Yes, but with adjustments! For best results, stick with well-marbled cuts like short ribs or brisket, which braise beautifully. Lean cuts like sirloin or flank steak will dry out—this recipe relies on slow cooking to tenderize tougher meat. If you must use a leaner cut, reduce cooking time to 1.5 hours and add 1 cup extra broth halfway through.
How do I know when the beef is fully tender?
The best test is the fork test—insert a fork into the thickest part and gently pull. If it separates easily with minimal resistance, it's done! For precision, use a meat thermometer: 200-205°F internal temp guarantees fork-tender results. Overcooking past this can make the meat mushy, so trust your tools rather than time alone.
Can I make this recipe in a slow cooker?
Brown the beef first in a skillet, then transfer everything to your slow cooker. Use the low setting for 6-8 hours or high for 4-5 hours. The slow cooker's gentle heat mimics the oven's braising effect perfectly. Just skip the oven transfer step—your slow cooker does all the work while you're out!
What if I don't have red wine?
No problem! Replace the wine with 2 cups beef broth plus 1 tablespoon balsamic vinegar for depth. The vinegar mimics wine's acidity, while the extra broth maintains moisture. For even more umami, add 1 teaspoon soy sauce or Worcestershire sauce to the braising liquid. The flavor won't be identical, but it'll still be delicious!
How do I store and reheat leftovers?
Store in an airtight container with the sauce for up to 5 days in the fridge. To reheat, warm in a saucepan over medium-low heat with 1-2 tablespoons broth or water until bubbly. For best texture, avoid microwaving—it can make the beef dry. The sauce will thicken when chilled, so add liquid when reheating.