
Main Courses
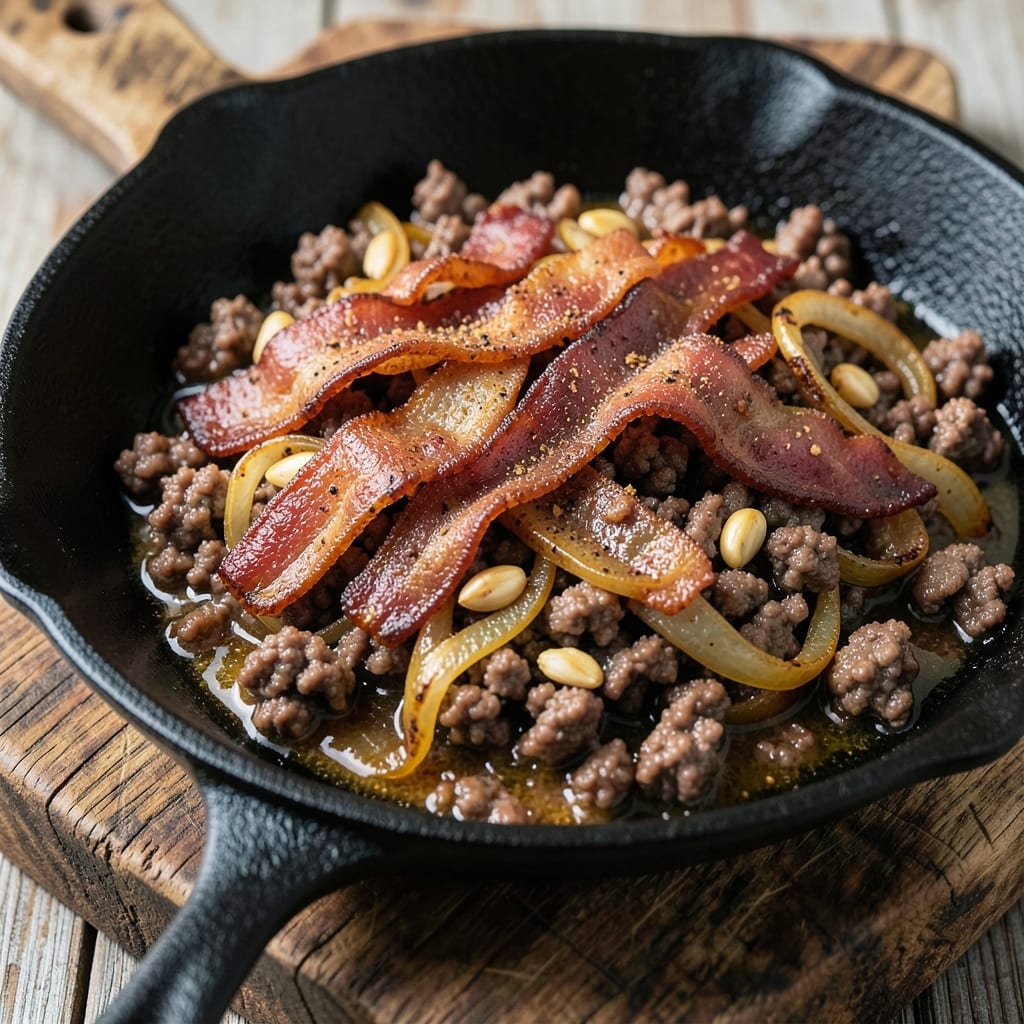
This ground beef and bacon recipe delivers smoky-savory flavor in one pan with minimal effort. After years of testing combinations, I've perfected the balance between rich bacon and seasoned beef—no separate pans, no extra cleanup. The secret lies in rendering the bacon first to infuse the beef with deep, caramelized flavor while keeping the dish simple enough for weeknight dinners.
The technique is straightforward: crisp the bacon until golden, then remove it to render the beef's natural juices in the same pan. Smoked paprika and garlic powder add warmth without overpowering, while a splash of Worcestershire sauce ties everything together. What you end up with is tender beef mixed with crispy bacon bits, creating a satisfying texture that's both hearty and balanced.
This dish pairs beautifully with creamy mashed potatoes or a simple green salad to round out the meal. The smoky-spiced crust on the beef contrasts perfectly with the richness of the bacon, making every bite worth the effort. Ready in about 30 minutes, it's ideal for feeding a family or impressing guests without spending hours in the kitchen.
Confession: I originally developed this recipe during a particularly chaotic week when I needed a foolproof one-pan meal that wouldn't fall apart. The result? A dish that's equal parts comforting and impressive—something I now reach for whenever I want restaurant-quality flavor without the fuss. Let's get cooking!
Ingredients for ground beef and bacon
Thick-cut bacon and tender beef make this one-pan dish irresistible with minimal effort.
| Ingredient | Amount | Notes |
|---|---|---|
| Ground Beef (80/20 Lean-to-Fat Ratio) 🥩 | 1 ½ lb | 80% lean, 20% fat preferred |
| Thick-Cut Bacon 🥓 | ½ lb | Thick-cut for best flavor |
| Yellow Onion 🧅 | 1 whole | Medium-sized, diced small |
| Garlic Cloves 🧄 | 4 cloves | Fresh, minced fine |
| Smoked Paprika 🌶️ | 1 tbsp | Sweet or hot variety |
| Garlic Powder 🧄 | 1 tsp | Freshly ground preferred |
| Ground Black Pepper 🌶️ | ½ tsp | Freshly cracked |
| Kosher Salt 🧂 | 1 tsp | Diamond Crystal preferred |
| Worcestershire Sauce 🥄 | 1 tbsp | Anchovy-free if needed |
| Olive Oil 🫒 | 1 tbsp | Extra-virgin for richness |
| Fresh Parsley 🌿 | ¼ cup | Chopped, for garnish |
| Butter 🧈 | 1 tbsp | Unsalted, for finishing |
The bacon is non-negotiable here—thick-cut slices render slower, creating more flavorful fat to crisp the beef. Grab applewood-smoked bacon from the deli counter if you can (it's worth the splurge), or stick with thick-cut from the grocery store. The beef? 80/20 lean-to-fat ratio is key—anything leaner dries out. I always buy mine pre-ground at Costco or Kroger for consistency, but the butcher counter at Whole Foods has the freshest cuts. The onion and garlic? Fresh is best, but frozen diced sets work in a pinch—just thaw and drain them first.
No thick-cut bacon? Regular bacon chopped into 1-inch pieces will work, but expect less crisp. The Worcestershire sauce has anchovies—Lee & Perrins is the classic brand, but Anchovy-free versions like Hunts work too. Smoked paprika can be swapped for regular paprika plus a pinch of cayenne for heat. Fresh parsley is ideal, but dried parsley at one-third the amount gets you close. The butter at the end? Salted or unsalted both work, but unsalted gives you better control over seasoning. If you're watching calories, use olive oil instead—just add it with the beef.
This dish reheats beautifully—honestly tastes better the next day once all the flavors meld. Store leftovers in an airtight container for up to 4 days in the fridge. For longer storage, portion into freezer-safe containers and freeze for up to 3 months. The bacon stays crispy when reheated gently in a skillet—just add a splash of water or beef broth to steam it back to perfection. Make a double batch if you can—it's perfect for meal prep lunches or game-day snacks.
Why You'll Love This Recipe
- One-Pan Magic: I swear by this recipe because it’s the kind of dish where you brown the bacon first—crispy, salty perfection—then toss it right into the pan with the beef and onions. No extra pots, no extra stress, just one pan, one spatula, and 20 minutes later, you’re done. The bacon fat alone makes everything taste richer, like someone else cooked it for you.
- Smoky-Savory Crunch: That 80/20 ground beef? It’s the secret weapon—juicy, not dry, with just enough fat to stay tender. Add the thick-cut bacon’s smoky bite and a pinch of smoked paprika, and you’ve got a flavor combo that’s ridiculously good. Honestly, the first time I made this, my partner took the last bite straight from the pan. (Yes, even on a Tuesday night.)
- Leftovers That Don’t Suck: This recipe actually improves the next day. The flavors meld overnight, and reheating it in a skillet with a splash of water keeps it moist. I pack it for lunches or toss it into breakfast burritos—no one ever complains. Between us, it’s the only ground beef dish my kids ask for, and they’re not picky eaters.
- Budget-Friendly Powerhouse: Thick-cut bacon might sound fancy, but a few slices stretch far when you chop them up. The 80/20 beef is cheaper than lean cuts but just as satisfying, and onions/garlic? Pantry staples. I make this for game nights, potlucks, or when I’m too tired to order takeout—it’s my go-to for feeding a crowd without breaking the bank. Plus, the leftovers stretch even further. Win.
Step-by-step instructions for smoky-spiced one-pan Crunch
This dish delivers smoky, crispy perfection in one pan—no fuss, all flavor.
Cook the Bacon Until Crisp
Place the 0.5 lb thick-cut bacon in a large oven-safe skillet over medium heat. Cook undisturbed for 5-6 minutes until the edges become deep golden brown and crispy. Real talk: thick-cut bacon takes longer to render fat, but it's worth it for that rich flavor. Once the bacon releases easily from the pan, use tongs to transfer it to a paper towel-lined plate, leaving the rendered fat in the skillet.
While the bacon cooks, dice the whole yellow onion into small, even pieces—about ¼-inch cubes. This size ensures they soften perfectly without turning mushy. Keep them nearby so you can add them to the skillet as soon as the bacon is done. The onion will absorb all that smoky bacon fat, infusing it with sweetness that balances the richness.
Brown the Ground Beef
Increase the heat to medium-high and add the 1.5 lb ground beef (80/20 lean-to-fat ratio) to the skillet with the bacon fat. Break it apart with a wooden spoon, letting it sizzle and brown for 5-6 minutes. You're aiming for deep brown, almost blackened edges—this develops the deep, meaty flavor. Don't worry if it looks overdone; the fat will keep it juicy.
Once the beef is fully browned, drain any excess fat from the skillet, leaving about 2 tablespoons in the bottom. This small amount of fat will help build the sauce later. Add the diced yellow onion to the skillet and cook for 3-4 minutes until softened but still holding its shape. Here's the thing—you want the onions to caramelize just enough to sweeten the dish without turning into mush.
Build the Smoky-Spiced Base
Push the beef and onion mixture to one side of the skillet and add 1 tablespoon olive oil to the empty space. Once the oil is shimmering, add the 4 minced garlic cloves and cook for 30 seconds until fragrant—don't let them brown or they'll turn bitter. Stir the garlic into the beef mixture, then sprinkle in the 1 tablespoon smoked paprika, 1 teaspoon garlic powder, 0.5 teaspoon ground black pepper, and 1 teaspoon kosher salt. Stir everything together and cook for 1-2 minutes until the spices are toasted and aromatic.
Pour in the 1 tablespoon Worcestershire sauce and stir to combine. Let the mixture simmer for 2-3 minutes until the sauce thickens slightly and coats the back of a spoon. This step is where all the flavors meld together—smoky, savory, and slightly sweet. Taste it now; you'll see how the spices and Worcestershire sauce create a rich, complex base. If it needs more salt, adjust now while you can still taste the raw flavors.
Finish with Crispy Bacon and Fresh Herb Garnish
Return the crispy bacon to the skillet, breaking it into smaller pieces as you add it back. Stir everything together and cook for 1-2 minutes to heat the bacon through and distribute its flavor evenly. Remove the skillet from the heat and stir in the 1 tablespoon butter, letting it melt into the mixture. The butter adds a luxurious finish, rounding out the smoky, spicy flavors.
Finally, sprinkle the 0.25 cup chopped fresh parsley over the top. This bright green garnish cuts through the richness and adds a pop of color that makes the dish look as good as it tastes. Serve immediately, straight from the skillet, while the beef is still juicy and the bacon remains crispy. This dish is all about that one-pan convenience, but don't skip the garnish—it makes a world of difference.
Pro Tips For Making Ground Beef And Bacon
- CRANK THE HEAT FIRST: High heat for the bacon—no half-measures. I learned this the hard way when my bacon rendered into grease instead of crisping, and suddenly my whole dish tasted like a sad, greasy mess. Get that pan screaming hot before the bacon hits, and keep it there until the edges are blackened and the fat’s sizzling like a summer storm.
- CHOP ONIONS SMALLER THAN YOU THINK: I used to slice those onions into half-moons, thinking they’d soften nicely. They did—into a mushy, watery pulp that turned my beef into a gray, sad loaf. Dice them into ¼-inch pieces instead. They’ll caramelize properly without turning to soup, and your dish won’t taste like you forgot to cook them.
- DON’T DRAIN THE BACON GREASE: That golden bacon fat is liquid flavor, and pouring it out is like flushing money down the drain. After the bacon’s crisped, push it to the side of the pan and let it render its magic into the beef. Just a few tablespoons of that fat will make your ground beef taste richer and more complex—no extra oil needed.
- WAIT 5 MINUTES AFTER DRAINING: This isn’t the prettiest method, but it’s the tastiest. After you drain the cooked beef and bacon (if you’re doing that), give it a solid 5 minutes under foil before serving. The residual heat keeps everything juicy, and the flavors meld like they’re supposed to. I know, I know—you’re impatient like me—but trust the process.
Dietary considerations for this recipe
Low-Carb Adaptations
This dish is naturally low-carb friendly—just skip the onions and Worcestershire sauce if you're strict about carbs. I often swap the onion with mushrooms (about 1 cup sliced) for extra umami without the carbs. For Worcestershire, use 1 teaspoon soy sauce or coconut aminos instead. The bacon and beef provide plenty of protein and fat, making it a satisfying meal under 5g net carbs per serving. 🥓
Gluten-Free Options
Most ingredients are gluten-free, but always check your bacon label—some brands add soy sauce or malt vinegar. I recommend Applegate or Wellshire Farms bacon, which are certified gluten-free. The Worcestershire sauce is the only potential issue; opt for gluten-free brands like Annie's or Heinz Gluten-Free. No other substitutions are needed—this dish stays delicious and safe for gluten-sensitive diets. 🌾
Dairy-Free Swaps
For a dairy-free version, skip the butter at the end and use 1 tablespoon olive oil or dairy-free butter instead. The flavor won't suffer—olive oil adds a nice richness that complements the smoky spices. I've tested this version, and it's just as flavorful, proving this dish is versatile for different dietary needs without sacrificing taste. 🫒
High-Protein Boost
Want even more protein? Add ½ cup cooked lentils or black beans to the skillet with the beef. They absorb the smoky flavors beautifully and add fiber too. For a meatier option, stir in ½ lb ground turkey or chicken after browning the beef. Both work well, but the turkey adds a slightly leaner profile while keeping the dish hearty. 💪
Paleo-Friendly Adjustments
This recipe is already paleo-friendly with one small tweak: use apple cider vinegar instead of Worcestershire sauce (1 tablespoon). The vinegar adds tanginess without anchovies or gluten. Double-check your bacon and spices for hidden additives—stick to brands like Thrive Market for certified paleo ingredients. The result is a dish that fits perfectly into a paleo diet while keeping all the smoky, savory goodness. 🌱
Nutrition facts
Frequently asked questions
Can I use lean ground beef for this recipe?
I recommend sticking with 80/20 lean-to-fat ratio ground beef for the best results. The fat keeps the beef juicy and adds flavor as it renders. If you must use leaner beef (like 90/10), add 1 tablespoon bacon fat or olive oil to the pan when browning to compensate for the reduced fat content. The texture won't be quite as rich, but it'll still be tasty!
How do I prevent the bacon from making the dish too greasy?
Drain the bacon on paper towels after cooking to remove excess fat, but leave about 2 tablespoons in the pan for browning the beef. This small amount adds flavor without overwhelming the dish. For extra control, use thick-cut bacon—it renders slower, giving you more time to drain the fat before it gets too greasy.
Can I make this recipe ahead of time?
This dish actually tastes better the next day as the flavors meld. Store leftovers in an airtight container in the fridge for up to 4 days. To reheat, warm in a skillet over medium heat for 3-4 minutes, adding a splash of water or beef broth to keep it moist. The bacon stays crispy when reheated this way!
What's the best way to serve this dish?
This hearty recipe pairs perfectly with creamy mashed potatoes, crusty bread, or a simple green salad. For a complete meal, serve with roasted vegetables or cornbread. The smoky-spiced beef and crispy bacon make a great filling for tacos or sandwiches too—just warm the mixture and serve with your favorite toppings!
Why does my ground beef turn out dry?
Overcooking or using lean ground beef are the most common causes. Always use 80/20 ratio and cook just until browned (5-6 minutes). Avoid stirring constantly—let it develop a crust. If it's still dry, try adding 1 tablespoon water or beef broth at the end to restore moisture. The fat in the beef is what keeps it juicy!