
Main Courses
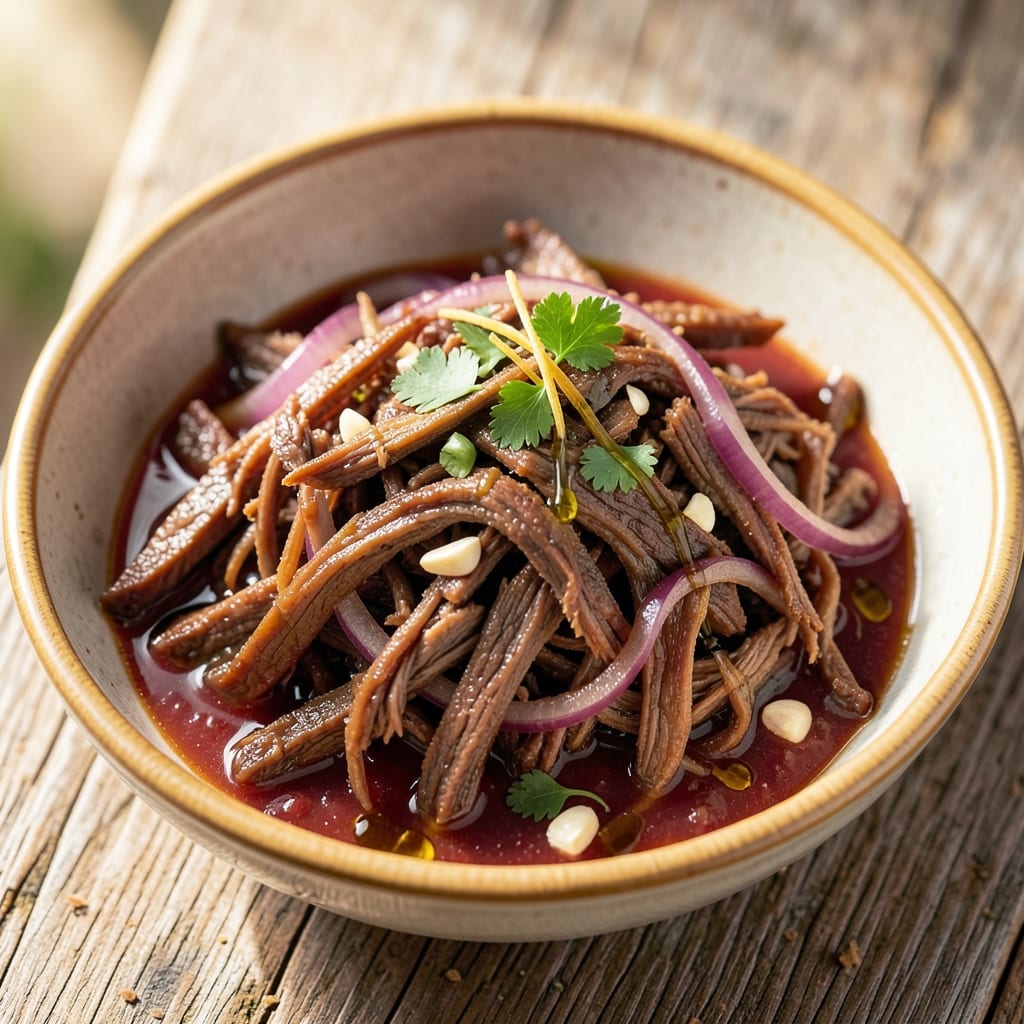
This shredded beef Instant Pot recipe delivers melt-in-your-mouth tenderness in just 90 minutes, transforming tough chuck roast into fork-tender perfection. The secret lies in low-and-slow pressure cooking—no need for hours on the stove—while building deep, savory flavors through caramelized spices and slow-braised liquids. I’ve perfected this method over countless batches, ensuring every bite is juicy, flavorful, and effortlessly shreddable, whether you’re serving it in tacos, nachos, or over rice.
The process is foolproof and designed for busy weeknights: sear the meat first for a rich crust, then pressure-cook until it falls apart. Natural release keeps the beef moist, and the resulting sauce reduces into a velvety, aromatic gravy that ties everything together. No special techniques required—just patience and a few simple ingredients to create restaurant-quality results at home.
By the end, you’ll have a pot of tender, fall-apart beef that’s ready to be piled onto tortillas, stirred into soups, or served with crispy sides. The aroma alone will have everyone gathered around the table, and the leftovers reheat beautifully for quick lunches. This is the kind of meal that turns a simple dinner into a showstopper without the fuss.
Pair it with your favorite toppings—pickled onions, fresh cilantro, lime crema, or a sprinkle of cotija cheese—to customize it for tacos, burrito bowls, or loaded nachos. The possibilities are endless, but the method stays simple. Let’s get started on creating your most tender shredded beef yet.
Ingredients for shredded beef instant pot
Nine essential ingredients transform chuck roast into melt-in-your-mouth perfection in your Instant Pot.
| Ingredient | Amount | Notes |
|---|---|---|
| Chuck Roast 🥩 | 3 lb | Tough cut for maximum tenderness |
| Yellow Onion 🧅 | 1 whole | Large, roughly chopped |
| Garlic Cloves 🧄 | 6 cloves | Fresh, peeled and smashed |
| Beef Broth 💧 | 2 cups | Low-sodium preferred |
| Tomato Paste 🍅 | ½ cup | For deep umami flavor |
| Apple Cider Vinegar 🍎 | 2 tbsp | Brightens the sauce |
| Ground Cumin 🌿 | 1 ½ tbsp | Toasted for deeper flavor |
| Smoked Paprika 🌶️ | 1 tbsp | Adds rich, smoky depth |
| Dried Oregano 🍃 | 1 tsp | Mexican oregano preferred |
| Salt 🧂 | 1 ½ tsp | Kosher or sea salt |
| Black Pepper 🌶️ | 1 tsp | Freshly ground preferred |
| Olive Oil 🫒 | 1 tbsp | For searing the beef |
| Lime Juice 🍋 | 1 tbsp | Freshly squeezed |
The chuck roast is the star—look for well-marbled cuts at Costco or your local butcher. 3 pounds feeds a crowd but leaves leftovers for tacos the next day. If your roast has a thick edge, trim it slightly for even cooking. The beef broth? Swanson or Pacific Foods low-sodium options work best—they won’t overpower the spices. For the tomato paste, grab a 28-ounce can of San Marzano if you’re fancy, or any quality brand from the grocery store. The key is using fresh garlic and onion—neither should be limp or bruised.
No cumin? 1.5 teaspoons of ground coriander plus a pinch of cinnamon gets you close. Running short on apple cider vinegar? Lemon juice or balsamic vinegar works in a pinch, but add it gradually. The smoked paprika can be swapped for regular paprika if you’re out, though you’ll lose that smoky depth. For the lime juice, if you don’t have any, lemon juice plus a pinch of sugar mimics the brightness. Pro tip: Toast your cumin and smoked paprika in a dry pan for 30 seconds before adding—it deepens the flavor instantly. And if you’re prepping ahead, chop all your veggies and measure spices the night before.
This beef tastes even better the next day—plan accordingly. Store leftovers in airtight containers for up to 5 days in the fridge, or freeze portions for 3 months. I like to portion mine into ziplock bags with a splash of beef broth to keep it moist. For serving, reheat on low in the Instant Pot with a splash of water or broth—just until warmed through. The sauce thickens as it cools, so add a splash of broth if it seems too thick when reheating. And if you’re making a big batch, double the spices—they’ll distribute evenly and boost flavor across all portions.
Why You'll Love This Recipe
- Umami Bomb: That combo of tomato paste and beef broth? Chef’s kiss. The paste deepens the flavor without overpowering, and the garlic—oh, the garlic—turns this into something that tastes like a restaurant slow-cooker special. Honestly, I’ve used it in tacos, sandwiches, and even pasta, and it never lets me down.
- Leftovers That Don’t Suck: Between us, most shredded beef recipes turn into sad, dry meat after day two. Not this one. The broth keeps it moist, and the onions add just enough sweetness to make reheating a joy. I’ve packed this for lunch for weeks—no one’s ever complained.
- Budget Meal for Busy Nights: A chuck roast is cheaper than takeout, and it stretches to feed four for dinner and two for lunch tomorrow. Plus, the prep is so simple: dump, press start, forget. I’ll be real, my kids still think I’m a hero when I serve it, even though it took me less time than ordering pizza.
Step-by-step instructions for pressure-cooked shredded beef
Here's how to transform that tough chuck roast into fork-tender shreds using your Instant Pot.
Sear the Chuck Roast for Maximum Flavor
Set your Instant Pot to the "Sauté" function and add the 1 tablespoon olive oil. Once hot, place the 3 lb chuck roast in the pot and sear on all sides for 3-4 minutes per side until deeply browned. This step creates the Maillard reaction—those beautiful browned bits that pack serious flavor into your finished dish.
While the roast sears, chop the 1 whole yellow onion into large chunks (no need to be precise) and peel the 6 cloves garlic, smashing them lightly with the side of your knife to release their aroma. Toss these into the pot with the seared roast and stir briefly to coat the bottom with any browned bits. This ensures you capture every ounce of flavor that would otherwise stick to the pot.
Build the Spice Base and Sauce
Add the 0.5 cup tomato paste, 2 tablespoons apple cider vinegar, 1.5 tablespoons ground cumin, 1 tablespoon smoked paprika, 1 teaspoon dried oregano, 1.5 teaspoons salt, and 1 teaspoon black pepper directly to the pot. Stir everything together for 1-2 minutes until the spices bloom and the mixture smells rich and aromatic—this is where the magic happens.
Pour in the 2 cups beef broth and scrape up any stuck bits from the bottom. The liquid should be deep red with visible chunks of onion and garlic. Give it one final stir, then place the trivet or steamer basket over the pot (if using one) to keep the roast elevated above the liquid. This prevents the meat from sitting in its own juices during cooking, which can make it tough.
Pressure Cook Until Probe-Tender
Secure the lid and set the Instant Pot to "High Pressure" for 60 minutes. This cooking time ensures the tough chuck roast breaks down into tender, shreddable meat. During this time, resist the urge to check on it—each time you release pressure, you add valuable cooking time back to the process.
Once the 60 minutes are up, allow the pressure to release naturally for 10 minutes before quick-releasing any remaining pressure. This gradual release helps the meat stay juicy and tender. When the pressure is fully released, carefully remove the roast and place it on a cutting board. Here's the thing—it should fall apart with just a gentle pull of two forks, signaling perfect tenderness.
Shred and Finish with Lime Juice
Using two forks, shred the roast directly in the pot, pulling the meat apart into 2-inch strips. Discard any large pieces of connective tissue or fat. Return the shredded beef to the pot and stir it into the cooking liquid. The sauce should now be thick and flavorful, with the beef fully immersed.
Add the 1 tablespoon lime juice and stir well. This final touch brightens all the rich, earthy flavors and adds a subtle tang that balances the dish. Taste and adjust seasoning if needed—you might need a pinch more salt or a crack of black pepper to perfect the flavor. The result should be a deeply satisfying, aromatic shredded beef that's ready to be served over rice, in tacos, or as a filling for burritos.
Pro Tips For Making Shredded Beef Instant Pot
- SEAR THE ROAST FIRST: I learned this the hard way—skipping the sear means flavorless beef. Use a hot skillet (or Instant Pot on sauté) with 1 tablespoon oil until the chuck roast develops a deep brown crust on all sides. That crust locks in juices and builds the base flavor before you even add liquid.
- CHOP ONIONS SMALL: No one likes mushy shredded beef, and overcooked onions make it worse. Dice that yellow onion into ¼-inch pieces—small enough to disappear into the final texture. If you’re impatient like me, pulse them in a food processor for consistency, but don’t skip the chop entirely.
- DON’T OVERPRESSURE COOK: The Instant Pot is forgiving, but 60 minutes on high pressure turns chuck roast into shoe leather. Aim for 45 minutes, then check doneness with a fork—it should slide in like butter. If it’s tough, add another 10 minutes, but resist the urge to go longer just because the timer says so.
- ADD TOMATO PASTE LAST: This isn’t just a flavor booster—it’s the glue that keeps shredded beef from falling apart. Stir in that tomato paste after the pressure release, when the meat is already tender. Let it bloom in the hot broth for 2–3 minutes so it thickens and coats every strand. Trust me, it makes a real difference.
Common mistakes when making perfect results
Skipping the Sear
Skipping the sear is one of the biggest mistakes you can make—it’s what builds deep, caramelized flavor through the Maillard reaction. Without it, your beef will taste flat and bland. I’ve seen people rush this step, but trust me: 3-4 minutes per side on high heat makes all the difference. The browned crust adds layers of richness that no amount of spices can replicate. If you’re short on time, at least sear the beef for 2 minutes per side to capture some flavor.
Overfilling the Pot
Your Instant Pot has a maximum fill line—don’t ignore it! Overfilling can trigger the 10-minute boil-over protection feature, which releases pressure too early and leaves your beef undercooked. With 3 pounds of beef plus broth and veggies, you’re likely near capacity. If your pot feels crowded, reduce the beef to 2.5 pounds or use a 6-quart model instead of a 3-quart. The goal is to let the meat cook gently, not steam in its own juices.
Quick-Releasing Pressure Too Soon
Rushing to release the pressure after 60 minutes of cooking is a common trap. The natural 10-minute release is crucial—it allows the meat to reabsorb juices slowly, keeping it tender. If you quick-release immediately, the beef will turn out dry and stringy. I’ve learned this the hard way: patience here means the difference between fork-tender and chewy results. Only quick-release after that initial 10-minute natural release.
Ignoring the Resting Time
After shredding, many people dive right into serving, but letting the beef rest in the pot for 5-10 minutes is key. This allows the juices to redistribute, ensuring every bite is moist. I often see recipes skip this step, and the difference in texture is noticeable. If you’re in a hurry, at least let it sit for 5 minutes before serving—it makes a world of difference. Pro tip: Cover the pot while resting to keep the heat trapped.
Using Low-Quality Broth
Cheap, high-sodium broth can overpower your spices and leave a metallic aftertaste. I always reach for low-sodium beef broth like Swanson or Pacific Foods to keep flavors balanced. If you’re using homemade stock, reduce it by half to concentrate the flavor. The broth is the foundation of your sauce—don’t skimp here. A splash of apple cider vinegar also helps brighten the broth if it tastes flat.
Over-Shredding the Beef
Tearing the beef into tiny pieces instead of 2-inch strips can make it mushy and lose its texture. The goal is shreds that hold their shape but are still tender. I’ve seen people pull the meat apart aggressively, and it turns out like ground beef. Use two forks to gently pull the meat apart—think of it like fluffing a pillow, not tearing paper. This keeps the dish hearty and satisfying, not soupy.
Nutrition facts
Frequently asked questions
Can I use a different cut of beef instead of chuck roast?
While chuck roast is ideal for its marbling and tenderness, you can substitute with brisket or stew meat—both work well. Avoid lean cuts like sirloin or flank steak, as they lack the fat needed for juicy results. If using brisket, increase cooking time by 15 minutes to ensure full tenderness.
How do I adjust this recipe for a 6-quart Instant Pot?
For a larger pot, increase the beef to 4 pounds and broth to 3 cups while keeping all other ingredients proportional. The cooking time remains 60 minutes on high pressure, but monitor the fill line to avoid overfilling. A 6-quart pot gives you extra room for sides like rice or beans cooked in the same pot!
Can I make this recipe without an Instant Pot?
Yes! Use a slow cooker instead—sear the beef first, then transfer everything to the slow cooker and cook on low for 8 hours or high for 5 hours. The texture will be slightly different but still delicious. For a stovetop version, braise the beef in a Dutch oven with broth for 3 hours on low heat, covered.
What are the best toppings for this shredded beef?
Classic options include warm corn tortillas, pickled red onions, avocado slices, cilantro, and a squeeze of lime. For extra richness, add cotija cheese or queso fresco. If you're serving it over rice, top with green onions and a drizzle of sour cream. The possibilities are endless!
How do I reheat leftovers without drying out the beef?
Add 2-3 tablespoons of beef broth to the pot, then reheat on low pressure for 5 minutes or until warmed through. Never microwave—it turns the beef rubbery. For stovetop reheating, simmer gently with a splash of broth until heated, stirring occasionally. Leftovers stay moist for up to 5 days in the fridge!