
Soups & Stews
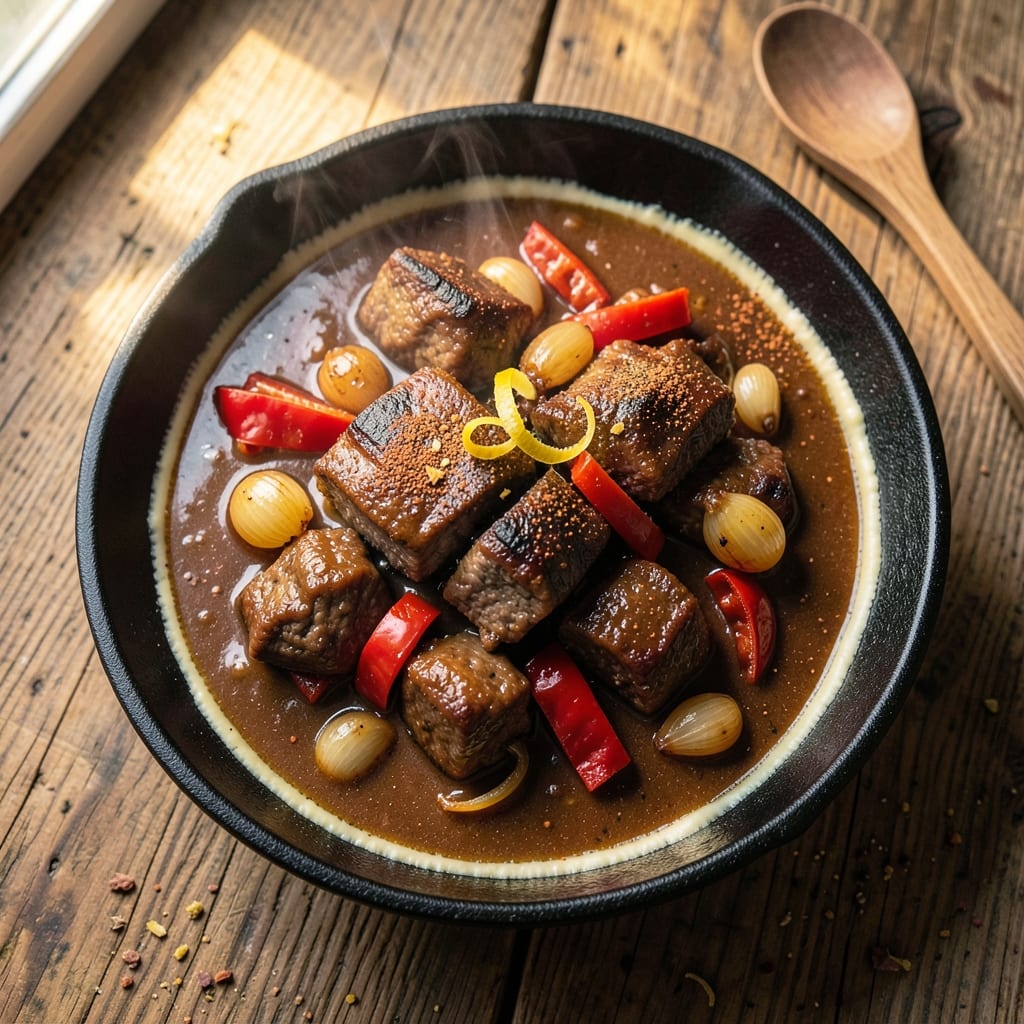
This amazing beef chili recipe transforms tough cuts of beef into melt-in-your-mouth perfection with deep, smoky flavors that linger long after the last bite. 🔥 I perfected this recipe over years of slow-cooking experiments, balancing heat, richness, and texture to create a bowl that’s both comforting and exciting. The secret? Browning the meat thoroughly and letting it simmer low and slow—no shortcuts here. What sets this chili apart is the harmony of spices: smoked paprika adds depth, chipotle brings heat, and cumin grounds everything with earthy warmth. The beef becomes fork-tender while absorbing all those flavors, creating a sauce that’s thick, velvety, and packed with umami. It’s the kind of chili that disappears in minutes, leaving everyone asking for seconds. By the time it’s done, you’ll have a pot of restaurant-quality chili with charred edges on the meat, a glossy red sauce, and a fragrance that fills your kitchen. The best part? It tastes even better the next day, making it perfect for meal prep or feeding a crowd. Serve it with all the fixings—crusty bread, sharp cheddar, and a dollop of sour cream—to let everyone customize their bowl. Let’s make this chili!
Ingredients for amazing beef chili
Six ingredients make this chili unforgettable—smoky, rich, and packed with deep flavor.
| Ingredient | Amount | Notes |
|---|---|---|
| Chuck Roast 🥩 | 2 lb | Cut into 1-inch cubes |
| Yellow Onion 🧅 | 1 whole | Diced, medium size |
| Bell Pepper 🌶️ | 1 whole | Any color, diced |
| Garlic Cloves 🧄 | 6 cloves | Minced, fresh preferred |
| Smoked Paprika 🌶️ | 2 tbsp | For deep smoky flavor |
| Ground Cumin 🌿 | 1 ½ tbsp | Toasted for richer taste |
| Chipotle Powder 🔥 | 1 tbsp | Adjust for heat preference |
| Coffee ☕ | 1 tbsp | Instant or ground |
| Tomato Paste 🍅 | ½ cup | Smooth, not chunky |
| Beef Broth 💧 | 3 cups | Low-sodium preferred |
| Black Beans 🫘 | 1 can | Drained and rinsed |
| Kosher Salt 🧂 | 1 ½ tsp | Adjust to taste |
| Ground Black Pepper 🌶️ | 1 tsp | Freshly ground |
| Olive Oil 🫒 | 2 tbsp | For browning meat |
| Fresh Cilantro 🌿 | ¼ cup | Chopped, for garnish |
The beef is where it all starts. Chuck roast is the secret—it’s tough enough to absorb all those smoky flavors and becomes melt-in-your-mouth tender. Grab it from the butcher section or pre-cubed from Costco if you’re short on time. Look for good marbling, not too lean. The onions and bell pepper? Fresh is best, but frozen works in a pinch if you’re in a hurry. Just make sure they’re diced small so they cook down evenly. Smoked paprika is non-negotiable—it’s what gives that restaurant-quality depth. Penzeys or local spice shops carry the best, but the regular grocery store stuff is fine too.
No smoked paprika? Substitute with a mix of regular paprika and liquid smoke—about half a teaspoon of liquid smoke per tablespoon of paprika. Chipotle powder too spicy? Swap for regular cayenne at half the amount. The coffee might seem odd, but it deepens the flavor—instant is fine, but freshly ground is better. Tomato paste can be thick or smooth, but avoid chunky varieties. The black beans? Any kind works, but low-sodium is best if you’re watching your salt intake. And if you’re feeling fancy, toast the cumin and spices in the pot for a few minutes—it makes a huge difference.
This chili tastes even better the next day, so make extra. Store leftovers in the fridge for up to 5 days or freeze for 3 months. I like to portion it into containers for easy lunches—just reheat with a splash of broth. The cilantro wilts fast, so add it fresh when serving. If you’re prepping ahead, freeze the chili without the cilantro and add it later. And trust me, the first bite is always the best—make sure to save some for later!
Why You'll Love This Recipe
- One-Pot Magic: I swear by this—just dump everything in one pot, let it simmer, and walk away. The chuck roast practically melts into tender perfection while you handle the rest of life.
- Smoky Depth Explosion: That smoked paprika? It’s the secret weapon—earthy, warm, and just a little bit addictive. Add the charred bell peppers and garlic, and suddenly, you’ve got restaurant-quality flavor without the fuss.
- Leftovers That Don’t Suck: Between us, most chili recipes turn into sad, watery leftovers. Not this one. The chuck stays juicy, the spices deepen overnight, and I’ve reheated this for breakfast three times this month.
- Budget-Friendly Crowd-Pleaser: A pound of chuck roast and a few pantry staples feed six for under $15. Honestly, it’s the kind of dish where even picky eaters ask for seconds—no fancy ingredients, just pure satisfaction.
Step-by-step instructions for deep-smoked beef chili
Here's how to build a chili so rich and flavorful it'll have everyone asking for seconds.
🔥 Step 1: Brown the Chuck Roast in Batches
Heat the 2 tablespoons olive oil in a large Dutch oven over medium-high heat. Cut the 2 lb chuck roast into 1-inch cubes and add them in batches—don't overcrowd the pan. You want the meat to sizzle and develop a deep brown crust.
Let each batch cook undisturbed for 3-4 minutes until golden brown on all sides. If the pan gets too crowded, transfer some to a plate and finish the next batch. This browning step is what builds the deep, meaty flavor that makes this chili amazing. Once all the meat is browned, transfer it to a plate and set aside.
🍳 Step 2: Sauté the Aromatics and Spices
In the same Dutch oven, add the diced yellow onion and diced bell pepper. Cook over medium heat for 5-6 minutes until softened and slightly caramelized. You'll know they're ready when they lose their raw edge and start to brown at the edges.
Add the 6 minced garlic cloves and cook for another 30 seconds until fragrant. Now stir in the 2 tablespoons smoked paprika, 1.5 tablespoons ground cumin, 1 tablespoon chipotle powder, and 1 tablespoon coffee. Let the spices toast for 30 seconds**—this wakes up their flavors and prevents a metallic taste.
🥘 Step 3: Build the Chili Base
Add the ½ cup tomato paste and stir to combine with the spices. Cook for 1 minute until it darkens slightly and loses its raw taste. Pour in the 3 cups beef broth and scrape up any browned bits from the bottom of the pot—this is where all the flavor hides.
Return the browned chuck roast to the pot along with 1.5 teaspoons kosher salt and 1 teaspoon ground black pepper. Bring everything to a simmer over medium heat. Here's the thing—this is where the magic happens. Let it cook uncovered for 1 hour to let the flavors meld and the meat tenderize.
⏰ Step 4: Simmer and Thicken
After the initial 1 hour, stir in the 1 can drained and rinsed black beans. Reduce the heat to low and let the chili simmer uncovered for another 1-1.5 hours. You're looking for a chili that's thick enough to coat the back of a spoon but still has a nice, hearty consistency.
If it gets too thin, uncover it and let it reduce longer. If it's too thick, add a splash of water or broth. The chili should have a rich, deep color and be tender enough that the meat pulls apart easily with a fork. Taste and adjust seasoning—you might need a little more salt or a pinch of chipotle powder for heat.
🍽️ Step 5: Finish and Serve
Once the chili reaches your desired consistency and the meat is fork-tender, remove it from heat. Let it rest for 10 minutes to allow the flavors to settle. This resting step makes a big difference in the final texture and taste.
Ladle the chili into bowls and garnish with the ¼ cup chopped fresh cilantro. Serve with crusty bread, cornbread, or over rice. The aroma alone will have everyone gathering around your table—trust me, this chili delivers on the "amazing" promise.
Pro Tips For Making Amazing Beef Chili
- SEAR THE ROAST FIRST: Chuck roast needs that deep, caramelized crust to hold up during hours of simmering—don’t skip the 5-7 minutes of high-heat searing in batches. I used to rush this, and the chili would taste flat; now I treat it like a steak, even though it’s going into a pot.
- CHOP ONIONS SMALL: Tiny dice, not chunks—think rice-sized pieces. Big onion pieces turn to mush and water down the chili. My grandmother swore by this, and she was right: you want them to melt into the meat, not sit there like sad, soggy marbles.
- ADD GARLIC LATE: Toss the minced garlic in the last 10 minutes of cooking, or it’ll burn and turn bitter. I learned this the hard way—after burning three batches, I finally figured out that garlic needs just a whisper of heat to release its flavor, not a full-blown sear.
- USE SMOKED PAPRIKA EARLY: Bloom the smoked paprika in the oil with the onions for 30 seconds—it deepens the flavor way more than just sprinkling it in later. Sounds weird, but it works: the heat wakes up the spices, and your chili gets that rich, smoky backbone from the start.
Common mistakes when making this recipe
Skipping the Browning
Skipping the browning step is the biggest flavor killer in chili. That golden crust on the meat isn't just for looks—it creates the Maillard reaction, which develops deep, meaty flavors. If you rush this step, your chili will taste more like stew than the rich, smoky masterpiece we're making. I've learned this the hard way—once, I skipped browning and ended up with chili that tasted bland no matter how many spices I added. 🔥
Adding Liquid Too Fast
Dumping all the broth in at once dilutes the flavors and prevents proper thickening. Instead, let the spices toast in the tomato paste for 1 minute before adding any liquid. This builds a flavor base that carries through the entire pot. I like to add just enough broth to deglaze the pot first, then let it reduce slightly before adding the rest. This creates a richer, more concentrated sauce.
Overcrowding the Pot
Cooking the meat in crowded batches causes steaming instead of browning. The meat needs space to develop that flavorful crust. I always work in batches—no more than 1 inch of meat in a single layer. If your pot is too small, use a skillet first to brown the meat, then transfer it to the Dutch oven for the rest of the cooking process. This ensures every piece gets properly browned.
Ignoring the Resting Time
Skipping the 10-minute rest after cooking makes the chili too soupy when served. The meat continues to release juices during this time, which helps thicken the sauce naturally. I've noticed that chili served immediately from the pot always seems thinner and less flavorful. Let it rest covered on the stove or in a warm oven during those final minutes before serving.
Using Pre-Cooked Meat
Starting with pre-cooked meat like rotisserie chicken or canned beans may seem convenient, but it changes the texture and flavor profile completely. The beef in this recipe needs to cook low and slow to become fork-tender. If you're short on time, at least use pre-cut chuck roast from the store and brown it thoroughly before simmering. The difference in texture and flavor is night and day.
Skipping the Taste Test
Never assume your chili is seasoned properly without tasting it. The flavors develop differently each time based on the meat and spices. I always taste the chili at least 30 minutes before serving and adjust with more salt, chipotle powder, or even a splash of vinegar if needed. The best chili is the one that's perfectly balanced—don't skip this crucial step! 💡
Nutrition facts
Frequently asked questions
Can I use ground beef instead of chuck roast?
You can, but the texture will be different. Ground beef works well for a quicker, meatier chili, but it won't develop the same fork-tender quality. Use 1 lb ground beef (80/20 fat ratio) and brown it thoroughly in batches, just like the chuck roast. The fat content is key for flavor—skip lean ground beef or you'll lose that rich depth.
How do I adjust the heat level?
Start with the 1 tbsp chipotle powder called for, then taste and adjust. For milder heat, reduce to ½ tbsp or swap for cayenne. Want it spicier? Add ½ tsp cayenne or a pinch of red pepper flakes. Always taste after simmering—heat builds as the chili cooks. For extra smoky heat without spice, add ½ tsp smoked sea salt instead.
Can I make this in a slow cooker?
Brown the meat first in a skillet, then transfer everything to your slow cooker. Cook on low for 6-8 hours or high for 3-4 hours. The slow cooker method actually enhances the tenderness—just stir occasionally and add a splash of broth if it gets too thick. The long cook time lets all the flavors meld beautifully.
What's the best way to reheat leftovers?
Reheat gently on the stove over low heat with a splash of beef broth to restore moisture. Never microwave directly—it makes the chili rubbery. For best results, cover and warm for 5-10 minutes, stirring occasionally. If it's too thick, add a little water or broth. The flavors actually improve overnight, so leftovers taste just as amazing!
Can I add other vegetables?
Yes! Try diced zucchini, corn, or mushrooms—they add great texture. Just add them with the beans during the final 1-1.5 hour simmer. For heartier chili, include diced potatoes (add them earlier so they cook through). Avoid leafy greens—they'll turn mushy. Always chop veggies small so they cook evenly.