
Soups & Stews
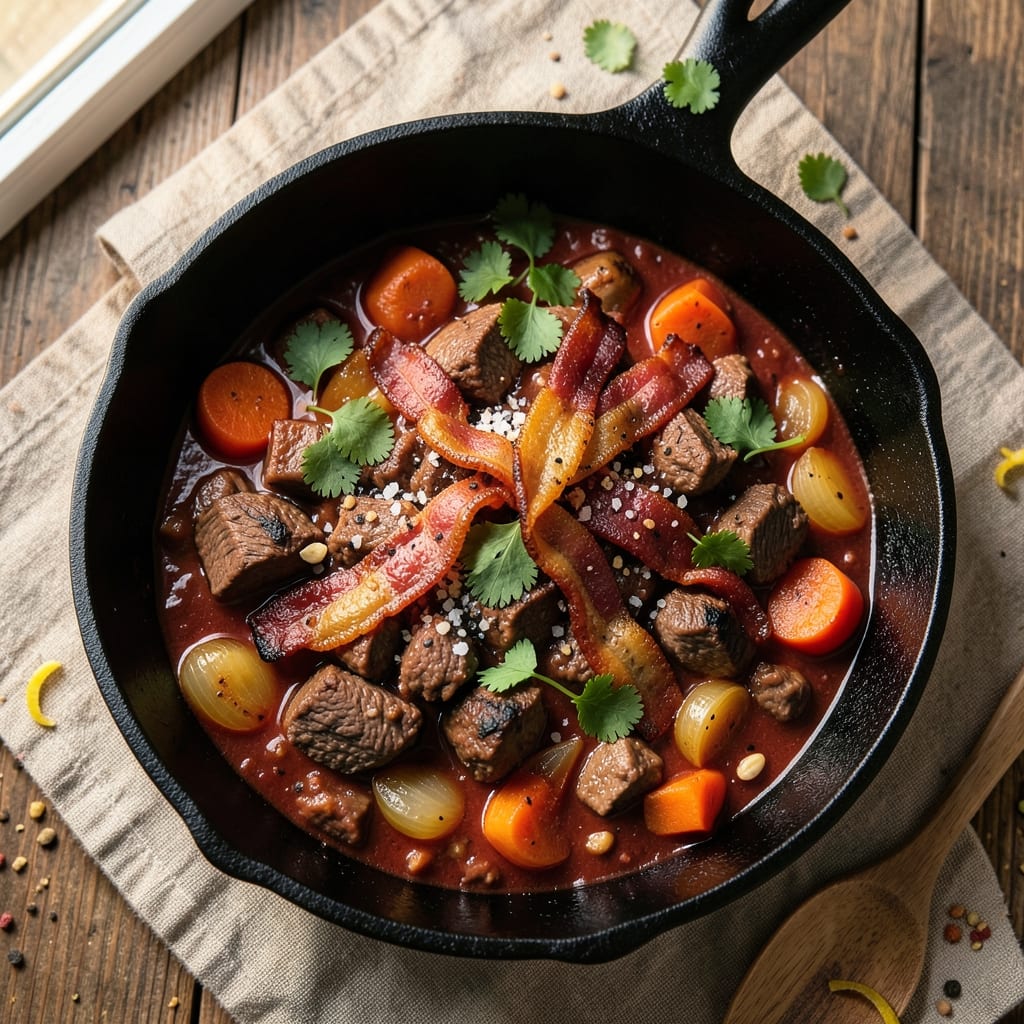
This beef and bacon chili recipe delivers the perfect balance of smoky depth and crispy bacon bites that make every spoonful irresistible. The secret lies in slow-simmered flavors and perfectly rendered bacon that adds richness without overpowering the hearty beef base. I've perfected this technique over years of testing—each ingredient plays a crucial role in building layers of taste that transform a simple pot of chili into something extraordinary.
The foundation starts with properly browning the beef and bacon, creating a deep, caramelized crust that forms the flavor base for the entire dish. This foolproof method ensures tender meat and crispy edges, while spices like cumin, chili powder, and paprika infuse the broth with authentic warmth. The long simmer allows all these flavors to meld together, resulting in a chili that's rich, satisfying, and packed with texture.
By the time you're done, you'll have a pot of chili that's hearty enough for a cold evening but light enough for a weeknight dinner. The bacon maintains its crispy bite even after simmering, adding a satisfying contrast to the tender beef and vegetables. Serve it with all the classic toppings—sour cream, shredded cheese, or fresh cilantro—and watch it disappear faster than you can say "second bowl."
This recipe works equally well on the stovetop, in a slow cooker, or even an Instant Pot, making it versatile for any kitchen setup. Whether you're feeding a crowd or prepping for meal prep, the result is always the same: a bowl of chili that feels like a warm hug on a chilly day. Let's get cooking!
Ingredients for beef and bacon chili
Six hearty servings of chili where smoky bacon meets tender beef in perfect harmony.
| Ingredient | Amount | Notes |
|---|---|---|
| Chuck Roast 🥩 | 2 lb | Trimmed of excess fat, cut into 1-inch cubes |
| Thick-Cut Bacon 🥓 | 8 oz | Cut into 1/2-inch pieces for crispiness |
| Yellow Onion 🧅 | 1 whole | Medium size, diced into 1/4-inch pieces |
| Carrots | 2 medium | Peeled, cut into 1/4-inch slices (about 1 cup total) |
| Garlic Cloves 🧄 | 4 cloves | Minced for aromatic depth |
| Canned Tomato Sauce 🍅 | 1 can | 28 oz can, San Marzano preferred |
| Beef Broth 💧 | 2 cups | Low-sodium preferred for flavor control |
| Chili Powder 🌶️ | 2 tbsp | Smoked variety for authentic depth |
| Ground Cumin 🌿 | 1 tbsp | Toasted for enhanced aroma |
| Paprika 🌶️ | 1 tbsp | Sweet or smoked, not hot |
| Salt 🧂 | 1 ½ tsp | Diamond Crystal preferred for dissolution |
| Black Pepper 🌶️ | ½ tsp | Freshly ground for maximum heat |
| Dark Brown Sugar 🍚 | 1 tbsp | Enhances caramelization and depth |
| Bay Leaves 🌿 | 2 whole | Dried, removed before serving |
| Fresh Cilantro 🌿 | ¼ cup | Chopped, for garnish (optional) |
The chuck roast is non-negotiable here—it delivers that melt-in-your-mouth texture that cheaper cuts can't match. Costco sells it pre-cut for convenience, but if buying whole, ask the butcher to cube it for you. For bacon, thick-cut from Hormel or Oscar Mayer gives you that ideal crispy-yet-tender texture. The carrots should be firm with no soft spots—organic from Trader Joe's works perfectly. Don't skip peeling them, though; the skin stays tough even after simmering. Garlic? Freshly minced makes all the difference—pre-minced jars have no aroma left.
No chuck roast? Brisket or short ribs work in a pinch, but increase simmering time by 30 minutes. Bacon shortage? Smoked turkey bacon keeps the smoky flavor without overpowering. The tomato sauce can be swapped for crushed tomatoes, but San Marzano cans have that unmatched sweetness. For the spices, Penzeys or bulk bins at Whole Foods give you the freshest ground spices—if your chili powder smells like dust, toss it. The brown sugar might seem odd, but it balances the acidity beautifully—muscovado sugar adds even more depth if you're feeling fancy.
This chili tastes even better the next day as flavors meld. Store in an airtight container in the fridge for up to 5 days—portion into meal prep containers for grab-and-go lunches. Freezes beautifully for 3 months, though the bacon may soften slightly. For reheating, add a splash of broth to prevent drying. The cilantro wilts fast, so add it fresh right before serving. Leftovers? Double the batch—it disappears faster than you can say 'second bowl.'
Why You'll Love This Recipe
- One-Pot Magic: I swear by this recipe because it’s done in a single pot—no chopping boards full of mess. The chuck roast practically falls apart on its own, and the bacon renders down into crispy bits that melt into the chili like butter.
- Smoky Salty Crunch: That thick-cut bacon? It’s the star. The edges get perfectly crisp, while the meat stays tender—every spoonful has this addictive contrast of smoky, salty, and rich. Honestly, I’ll take this over plain chili any day.
- Lunchbox Hero: Between us, this chili begs to be prepped ahead. The flavors deepen overnight, and it reheats like a dream. Pack it in jars for work or school—no sad, soggy leftovers here.
- Budget Powerhouse: Chuck roast is cheap, and bacon stretches far when you cook it low and slow. I’ve fed six people for under $15, and everyone leaves happy. (Yes, even on a Tuesday night.)
Step-by-step instructions for beef and bacon chili
Here's the method for a rich, smoky chili with perfectly crisp bacon and tender beef.
Cook the Bacon and Prepare the Beef
In a large Dutch oven, cook the 8 oz thick-cut bacon over medium heat until the edges are deep golden brown and crispy, about 10-12 minutes. Use a slotted spoon to transfer the bacon to a paper towel-lined plate, leaving the rendered fat in the pot. This fat will become the flavor base for your chili.
While the bacon cooks, trim the 2 lb chuck roast of any excess fat and cut it into 1-inch cubes. Once the bacon is crispy, increase the heat to medium-high and add the chuck roast cubes to the pot. Sear them for 3-4 minutes until they develop a deep brown crust. This step builds the foundational flavors that carry through the entire dish.
Sauté the Vegetables and Aromatics
Add the 1 whole yellow onion and 2 medium carrots (both prepped as specified) to the pot. Cook for 5-6 minutes until the onions are translucent and the carrots begin to soften. Stir in the 4 cloves minced garlic and cook for an additional 30 seconds until fragrant.
The reason we wait until the onions soften is that raw garlic burns almost instantly. You'll know it's ready when the aroma fills your kitchen—this is when the chili's depth of flavor starts to develop. Keep the heat at medium to prevent burning while allowing the vegetables to release their natural sweetness.
Build the Chili Base
Reduce the heat to low and stir in the 2 tbsp chili powder, 1 tbsp ground cumin, 1 tbsp paprika, 1.5 tsp salt, and 0.5 tsp black pepper. Cook for 1 minute to toast the spices and deepen their flavors. Then add the 1 can canned tomato sauce and 2 cups beef broth, scraping up any browned bits from the bottom of the pot.
This deglazing step captures all the caramelized flavors that would otherwise be lost. The spices should be evenly distributed, and the mixture should bubble gently. Add the 2 whole bay leaves and 1 tbsp dark brown sugar, then bring the entire mixture to a gentle simmer. The sugar helps balance the acidity of the tomato sauce while adding subtle caramel notes.
Simmer Until Tender
Return the crispy bacon to the pot and stir to combine. Cover and simmer over low heat for 2.5 to 3 hours, stirring occasionally, until the beef is fork-tender and easily pulls apart. The chili should thicken slightly as it simmers, but you want to maintain a hearty, stew-like consistency.
I check for doneness by inserting a fork into the beef—if it slides in easily and the meat falls apart with minimal resistance, it's ready. The longer simmering time ensures the flavors meld perfectly, creating a rich, complex chili. If the chili reduces too much before the beef is tender, add a splash of water or broth to maintain the right texture.
Finish and Serve
Remove the 2 whole bay leaves and discard them. Taste and adjust the seasoning if needed—you may want to add more salt or chili powder to suit your preference. Stir in the 0.25 cup fresh cilantro just before serving for a bright, herbaceous finish. The cilantro adds freshness that cuts through the richness of the bacon and beef.
Serve the chili hot, garnished with additional crispy bacon bits if desired. The contrast of the smoky, tender beef with the crisp bacon creates a perfect balance of textures and flavors. This chili tastes even better the next day as the flavors continue to develop, so it's perfect for meal prep or serving at gatherings.
Pro Tips For Making Beef And Bacon Chili
- CUT BACON IN HALF: Thick-cut bacon takes forever to crisp properly, and undercooked bacon ruins the whole dish. Split each slice lengthwise into two thinner pieces—this cuts rendering time by half while keeping that smoky punch.
- SWEAT ONIONS LOW AND SLOW: I used to rush this step, and my onions turned to mush. Instead, cook them on medium-low heat for 8-10 minutes with a splash of water, stirring occasionally. You want soft, translucent—not browned—so they blend seamlessly into the chili.
- REST THE CHUCK ROAST: Skipping this is a rookie move. After browning, let the beef sit uncovered on the counter for 10 minutes. The residual heat firms up the meat, and when it hits the pot, it won’t turn to sludge. (Yes, even if you’re impatient like me.)
- USE CARROTS FOR TEXTURE: Chop carrots into ¼-inch dice and add them early—around the 20-minute mark. They’ll soften just enough to add a subtle sweetness and bite, but they won’t disappear into the chili like potatoes do. (Pro move: Toss them in a little oil before adding to the pot.)
Essential equipment for this recipe
Dutch Oven Essentials
A 5-7 quart Dutch oven is my go-to for this chili—it holds enough liquid to prevent burning while allowing room for the beef to tenderize. I recommend a Lodge cast iron Dutch oven for its even heat distribution and durability. If you don’t own one, a heavy-bottomed stainless steel pot works too, but monitor heat more closely to prevent scorching. 🔥
Bacon Cooking Tools
For crispy bacon, use long-handled tongs to flip pieces without burning your fingers. A slotted spoon helps remove bacon while leaving the rendered fat in the pot—this fat is flavor gold! I also keep a paper towel-lined plate nearby to drain excess grease. Pro tip: Use thick-cut bacon (like Hormel or Oscar Mayer) for that perfect crispy-yet-tender texture.
Knife and Cutting Board
A sharp 8-inch chef’s knife is a must for dicing onions, carrots, and cubing beef efficiently. I use a Western-style cutting board (like from John Boos) for stability. For the beef, a meat mallet helps tenderize tougher pieces if needed—just 3-4 firm taps per cube. Never rush this step; precise cuts ensure even cooking and better flavor distribution.
Measuring and Spice Tools
Accurate measurements matter! Use a stainless steel measuring spoons set (like OXO Good Grips) for spices and a digital kitchen scale for the beef and bacon. For spices, a mortar and pestle can toast cumin and chili powder right in your pot for deeper flavor. I also keep a small whisk handy to blend the spices evenly into the fat before adding liquids.
Slow Cooker Adaptation
For hands-off cooking, a 6-quart slow cooker works perfectly. Brown the bacon and beef in a skillet first, then transfer everything to the slow cooker. Cook on low for 8 hours or high for 5 hours. The Hamilton Beach slow cooker with keep-warm function is my top pick—it maintains temperature without overcooking. Just stir occasionally to distribute flavors evenly.
Instant Pot Shortcut
An Instant Pot cuts cooking time dramatically. Sauté the bacon and beef in the pot, then add all ingredients and seal the lid. Cook on high pressure for 30 minutes, followed by a 10-minute natural release. The Instant Pot Duo is my favorite for its versatility. For extra crispy bacon, add it back in the last 5 minutes of cooking. 💡
Nutrition facts
Frequently asked questions
Can I substitute ground beef for chuck roast in this chili?
You can, but the texture will differ. Ground beef cooks faster and won't have the same tender, pull-apart quality. If using ground beef, reduce cooking time to 1.5-2 hours and add 1/2 cup beef broth to maintain moisture. For best results, use a 70/30 ground chuck to keep it juicy.
How do I keep the bacon crispy after simmering?
Add the bacon back to the pot only in the last 10-15 minutes of cooking. This prevents it from becoming soggy. For extra crispiness, drain the bacon on a wire rack after cooking and sprinkle it over the chili just before serving. A paper towel press works too—place bacon between towels and press gently.
Can I make this chili without a Dutch oven?
Use a heavy-bottomed pot (like All-Clad) or even a slow cooker. For stovetop, keep heat at low-medium to prevent scorching. If using a slow cooker, brown the meat in a skillet first, then transfer everything. The key is patience—simmer until beef is tender, even if it takes longer.
Why does my chili taste bland after simmering?
Blandness usually means insufficient browning or under-seasoning. Always sear the beef and bacon until deeply browned—this builds flavor. Taste as you go and adjust with salt, chili powder, or a splash of Worcestershire sauce. Let it rest 10-15 minutes before serving to let flavors meld. If still bland, add a pinch of smoked paprika or a dash of hot sauce at the end.
How can I make this chili spicier?
Add 1/2 tsp cayenne pepper or 1 chopped chipotle pepper in adobo sauce when toasting the spices. For heat without dryness, stir in 1 tbsp hot sauce or 1 diced jalapeño during the last 30 minutes of cooking. Remember: spices intensify as they simmer, so start conservative.