
Soups & Stews
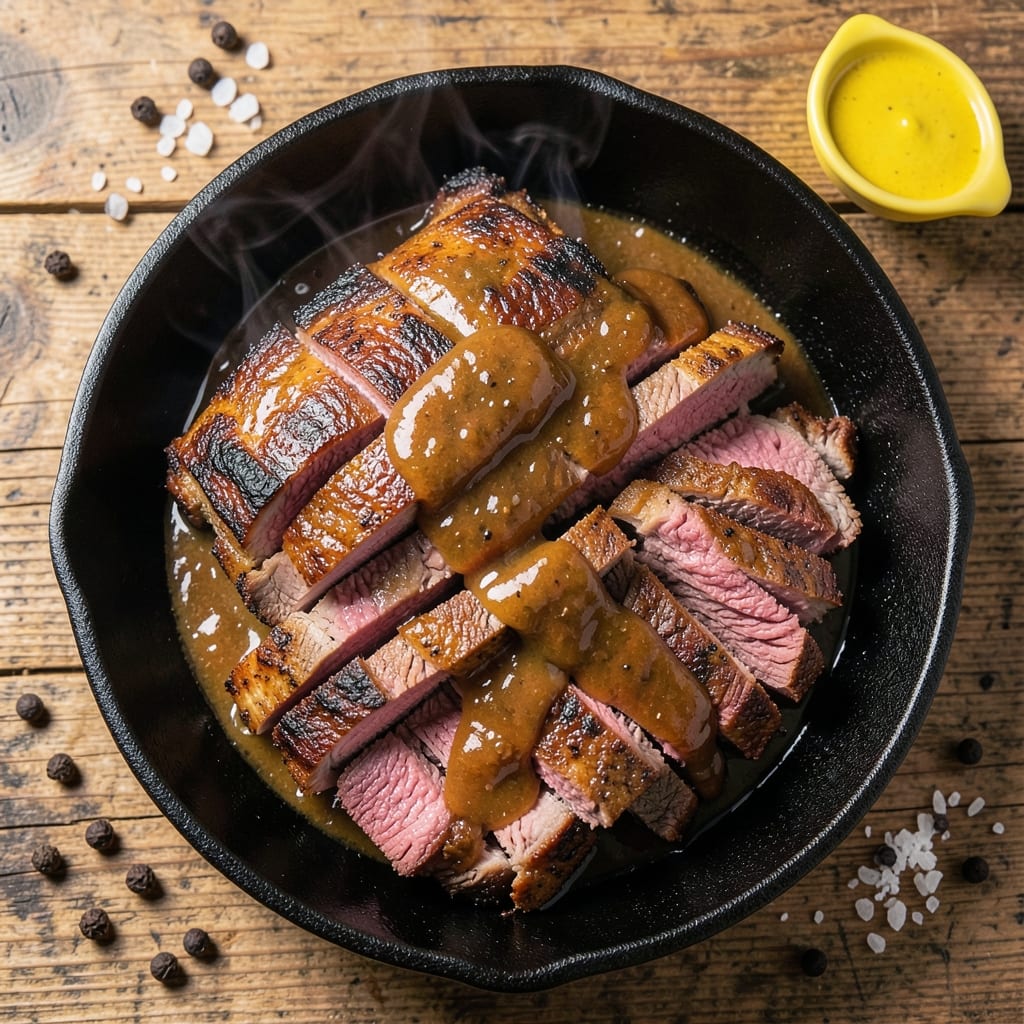
This American beef brisket recipe delivers the perfect balance of smoky bark and tender pink center that defines Texas BBQ tradition. The key lies in low-and-slow cooking at 225°F for up to 12 hours, where collagen transforms into melt-in-your-mouth texture while the outer layers develop that coveted dark crust. I've perfected this method through countless trials—each one teaching me how to avoid common pitfalls like dryness or uneven cooking.
The Texas crutch technique of wrapping the brisket in butcher paper at the halfway mark preserves moisture while allowing that essential bark to form. This approach creates the ideal contrast between crispy exterior and juicy interior that brisket enthusiasts crave. The secret sauce? Patience and precise temperature control—never letting the internal temperature exceed 203°F before resting.
What you'll end up with is a brisket so tender it practically falls apart at the touch, with layers of smoky flavor that permeate every bite. The aroma alone transforms any gathering into a true BBQ experience. Serve with classic sides like tangy coleslaw and creamy baked beans to complete the meal.
Whether you're hosting a backyard cookout or simply craving restaurant-quality brisket at home, this recipe delivers professional results with home-cook simplicity. The same techniques that work for competition-worthy brisket will work perfectly in your backyard smoker or oven.
Ingredients for american beef brisket
Six pounds of brisket and a handful of simple seasonings transform into Texas-style BBQ perfection.
| Ingredient | Amount | Notes |
|---|---|---|
| Packer Beef Brisket 🥩 | 6 lb | Whole packer cut, fat cap intact |
| Yellow Mustard 🍯 | ¼ cup | For bark development |
| Coarse Kosher Salt 🧂 | ½ cup | Diamond Crystal preferred |
| Coarse Black Pepper 🌶️ | ¼ cup | Freshly cracked preferred |
| Smoked Paprika 🌶️ | 2 tbsp | High-quality for smokiness |
| Garlic Powder 🧄 | 1 tbsp | Freshly ground preferred |
| Onion Powder 🧅 | 1 tbsp | For depth of flavor |
| Black Labeled Beef Tallow 🧈 | ¼ cup | Or substitute beef fat |
| Apple Juice 🍎 | ½ cup | For spritzing during cook |
| Butcher Paper 📄 | 1 sheet | Heavyweight, unbleached |
| Wood Chips 🌳 | 2 cups | Hickory or oak preferred |
| Water 💧 | 1 cup | For soaking wood chips |
The brisket cut is everything here. Packer cut from a reputable butcher—like Snake River Farms or your local meat counter—is non-negotiable. Look for good marbling and a thick fat cap (at least 1/4 inch). The fat renders beautifully during the cook, adding moisture and flavor. I always buy mine from Costco when I need a big batch, but for single events, the 6-pound packer cut at Whole Foods is perfect. The fat cap should be left intact—it's your insurance against dryness. If you're buying whole, trim it to about 1.5 inches thick for even cooking. That first bark? It's all about the Diamond Crystal kosher salt—its coarse texture clings to the meat and dissolves slowly, creating that perfect crust.
No yellow mustard? Dijon mustard works too, but the tanginess of yellow mustard is key for that signature brisket bark. Running out of beef tallow? Substitute with duck fat or extra virgin olive oil—just don't skip the fat entirely. The wood chips can be any hardwood (hickory, oak, pecan), but avoid fruit woods like cherry or apple—they'll overpower the beef. For spritzing, apple juice is ideal, but white grape juice or even water works in a pinch. The spices are simple but crucial: smoked paprika from Penzeys gives that authentic BBQ flavor, while the garlic and onion powders build depth. Pro tip: Toast your spices in a dry pan for 30 seconds before mixing—they'll sing more in your rub.
Brisket keeps beautifully—3-4 days in the fridge wrapped tightly in butcher paper, or up to 3 months frozen. For leftovers, slice against the grain and reheat in a 350°F oven with a splash of beef broth—it'll taste even better the second time around. I always make a double batch because the second day is when this brisket truly shines. Store any extra in vacuum-sealed bags if you're freezing, or wrap tightly in foil with a paper towel to absorb moisture. The wood chips? Save them—dry them out completely and store in an airtight container for your next cook.
Why You'll Love This Recipe
- I swear by this combo: just salt, pepper, and smoked paprika rubbed in while the brisket rests. No fancy marinades, no last-minute prep—just three ingredients, five minutes max, and that dry rub clings like it’s glued on.
- No-Fuss Seasoning: I swear by this combo: just salt, pepper, and smoked paprika rubbed in while the brisket rests. No fancy marinades, no last-minute prep—just three ingredients, five minutes max, and that dry rub clings like it’s glued on.
- Smoky-Sweet Magic: That yellow mustard isn’t just for dipping—it’s the secret. Brush it on mid-cook, and suddenly you’ve got this perfect balance of tangy, smoky depth that makes every bite feel like a hug from a Texas BBQ pit.
- Leftovers That Win: Between us, the best part? The second day. Slice it thin, pile it on toast with pickles, or toss it into tacos—it’s still rich, still tender, still ridiculously good. I’ve fed a houseful with one brisket and still had enough for lunch.
Step-by-step instructions for American beef brisket
Here's how to transform a tough cut into melt-in-your-mouth perfection with that coveted smoky bark.
Prepare the Rub and Season the Brisket
In a large bowl, combine the 0.5 cup coarse kosher salt, 0.25 cup coarse black pepper, 2 tbsp smoked paprika, 1 tbsp garlic powder, and 1 tbsp onion powder. Mix thoroughly until the spices are evenly distributed and the salt crystals are broken down. This dry rub is your flavor foundation.
Pat the 6 lb packer beef brisket completely dry with paper towels—this is critical for bark development. I like to press firmly all over, even in the cavity. Then, generously coat every surface with the rub mixture, pressing it into the meat so it adheres well. For extra adhesion, I add a thin layer of 0.25 cup yellow mustard over the rub before applying the 0.25 cup black labeled beef tallow. The mustard helps the rub stick and creates that signature Texas-style bark.
Set Up Your Smoker for Low and Slow Cooking
Soak the 2 cups wood chips in the 1 cup water for at least 30 minutes before using. This prevents flare-ups and creates steady, flavorful smoke. Once soaked, drain the wood chips and add them to your smoker, setting the temperature to 225°F. I prefer hickory or oak for that classic American brisket flavor profile.
Allow the smoker to preheat for 15-20 minutes until you see clean, blue smoke. Place the seasoned brisket fat-side up on the smoker grate. The fat cap will render down and baste the meat as it cooks, creating that beautiful crust. Close the lid and resist the urge to peek—every time you open it, you lose heat and moisture, potentially adding hours to your cook time.
Smoke Until the Stall and Wrap for Tenderness
Smoke the brisket undisturbed for 6-8 hours, or until the internal temperature reaches 165-170°F. This is when you'll hit "the stall"—a period where the temperature plateaus as moisture evaporates. Don't panic; this is normal and expected. The brisket should have a deep mahogany bark forming on the exterior.
At this point, remove the brisket from the smoker and wrap it tightly in the 1 sheet butcher paper. I like to use butcher paper instead of foil because it breathes better and helps maintain that crispy bark. Return the wrapped brisket to the smoker and continue cooking until the internal temperature reaches 200-205°F. This usually takes an additional 3-5 hours, but trust the probe test over the thermometer—you're looking for fork-tender meat.
Spritz and Finish for Maximum Moisture
About 2 hours before the brisket reaches the target temperature, start spritzing it every 45 minutes with the 0.5 cup apple juice. This keeps the meat moist and helps prevent a dry exterior. The apple juice also adds a subtle sweetness that complements the smoky flavors. Spritz generously, making sure to cover all surfaces.
Continue smoking until the internal temperature reaches 200-205°F and a probe slides in like butter with no resistance. This is the point of no return—your brisket is now tender and ready for resting. The bark should be dark and crispy, with a beautiful pink smoke ring just beneath the surface.
Rest and Slice for Juicy Perfection
Remove the brisket from the smoker and transfer it to a cutting board. Tent loosely with aluminum foil and let it rest for at least 1 hour, preferably 2 hours. This resting period allows the juices to redistribute throughout the meat, ensuring every slice is moist and flavorful. Real talk: Skipping this step is a cardinal sin—you'll end up with dry, tough meat.
Once rested, slice the brisket against the grain into ¼-inch thick slices. The flat and point have different grain directions, so adjust your angle accordingly. Serve immediately with your favorite sides, like creamy mac and cheese or classic coleslaw. Each bite should deliver a perfect balance of smoky, juicy, and tender beef with that unmistakable Texas-style bark.
Pro Tips For Making American Beef Brisket
- Trim the Fat Cap: That thick layer of fat on the brisket isn’t just for looks—it’s the flavor shield. Use a sharp knife to score it in a diamond pattern (about ¼-inch deep), then rub it with half the smoked paprika before seasoning. I learned this the hard way after my first brisket turned out dry because I ignored the fat—now it stays juicy while rendering. ---
- Mustard First, Not Last: Slather that yellow mustard on before you hit the grill or oven—it’s not just a finishing glaze. The acid cuts through the fat early, keeping the meat tender, and it caramelizes into a sticky crust that clings like glue. (Yes, even if you’re impatient like me.) ---
- Skip the Crowding: If you’re cooking on a grill or in a pan, resist the urge to stack or overlap the brisket. Heat needs to circulate, or you’ll end up with steam instead of a crust. Give it space—at least an inch between pieces—and let that smoked paprika work its magic without fighting for air. ---
- Probe Like a Pro: The point where the flat and the point meet is the real doneness test spot—not the thickest part. Aim for 195–203°F internal temp (pull at 195°F if you’re using the stall to your advantage). I used to pull it too early, and the texture was always off—now I wait, even if it means staring at that thermometer like it owes me money.
Health benefits of american beef brisket
Protein Powerhouse
Brisket delivers an impressive 40-50 grams of protein per 6-ounce serving, making it an excellent choice for muscle repair and satiety. The lean-to-fat ratio in brisket is more balanced than many other beef cuts, providing sustained energy without the heaviness. This makes it perfect for post-workout meals or high-protein meal plans. 💪
Iron for Energy
A single serving of brisket contains about 20% of your daily iron needs, which supports red blood cell production and oxygen transport throughout your body. The iron in brisket is particularly well-absorbed due to the meat's natural vitamin C content from the apple juice spritzing. This combination helps combat fatigue and keeps energy levels steady.
Zinc Boost
Brisket is rich in zinc, with one serving providing about 30% of your daily requirement. Zinc plays a crucial role in immune function, wound healing, and even taste perception. The slow cooking process actually enhances zinc availability, making this brisket recipe a nutrient-dense choice for overall health.
B Vitamin Complex
The cooking process concentrates the B vitamins in brisket, particularly B12 and niacin, which are essential for energy metabolism and nervous system function. These vitamins help convert food into energy, making brisket an excellent choice for maintaining your body's energy balance during long cooking sessions or active days.
Healthy Fats
While brisket contains fat, the slow cooking process transforms tough connective tissues into flavorful gelatin, creating a moist texture. The fat cap renders down, releasing beneficial fats that your body needs for hormone production and nutrient absorption. This makes brisket a surprisingly balanced choice when prepared properly.
Collagen Benefits
The long cooking time breaks down collagen in the connective tissue, creating gelatin that supports joint health and gut integrity. This collagen-rich broth can be used for soups or sauces, adding additional nutritional benefits to your meal. The slow transformation of collagen into gelatin is what gives brisket its signature tender texture. ✨
Nutrition facts
Frequently asked questions about American beef brisket
What's the difference between Texas-style and St. Louis-style brisket?
Texas-style brisket uses the Texas crutch technique—wrapping the meat in butcher paper at 165-170°F to retain moisture while developing bark. St. Louis-style skips wrapping, cooking the brisket completely unwrapped for a thicker bark and firmer texture. Texas-style yields more tender meat, while St. Louis-style creates a firmer bite with intense bark. Both are delicious—choose based on your texture preference!
How do I know when my brisket is done?
Use a meat thermometer to check the internal temperature—200-205°F is perfect. The probe should slide in like butter with no resistance. Also watch for a dark mahogany bark and a pink smoke ring just beneath the surface. Never rely on time alone—every brisket cooks differently!
Can I cook brisket in my oven instead of a smoker?
Preheat your oven to 225°F and use a water pan on the bottom rack to maintain moisture. Place the brisket on a rack in a roasting pan and follow the same cooking times as the smoker method. For smoke flavor, add wood chips to a smoker box or use liquid smoke (1 tsp per pound) in the spritz. The results will be just as tender!
Why did my brisket turn out dry?
Dry brisket usually happens from overcooking, skipping the wrap, or not resting properly. Always wrap at 165-170°F and rest for at least 1 hour (2 hours is better). Also check your thermometer accuracy—common probes can be off by 10°F. For extra moisture, try spritzing with apple juice every 45 minutes during the final hours of cooking.
What's the best way to slice brisket?
Slice against the grain—look for the muscle fibers running diagonally. For the flat cut, slice at a 45-degree angle to the grain. The point cut has a different grain direction, so adjust your angle accordingly. Use a sharp knife and slice into ¼-inch thick pieces for perfect texture. Never slice with the grain—it'll be tough and chewy!