
Sauces & Condiments
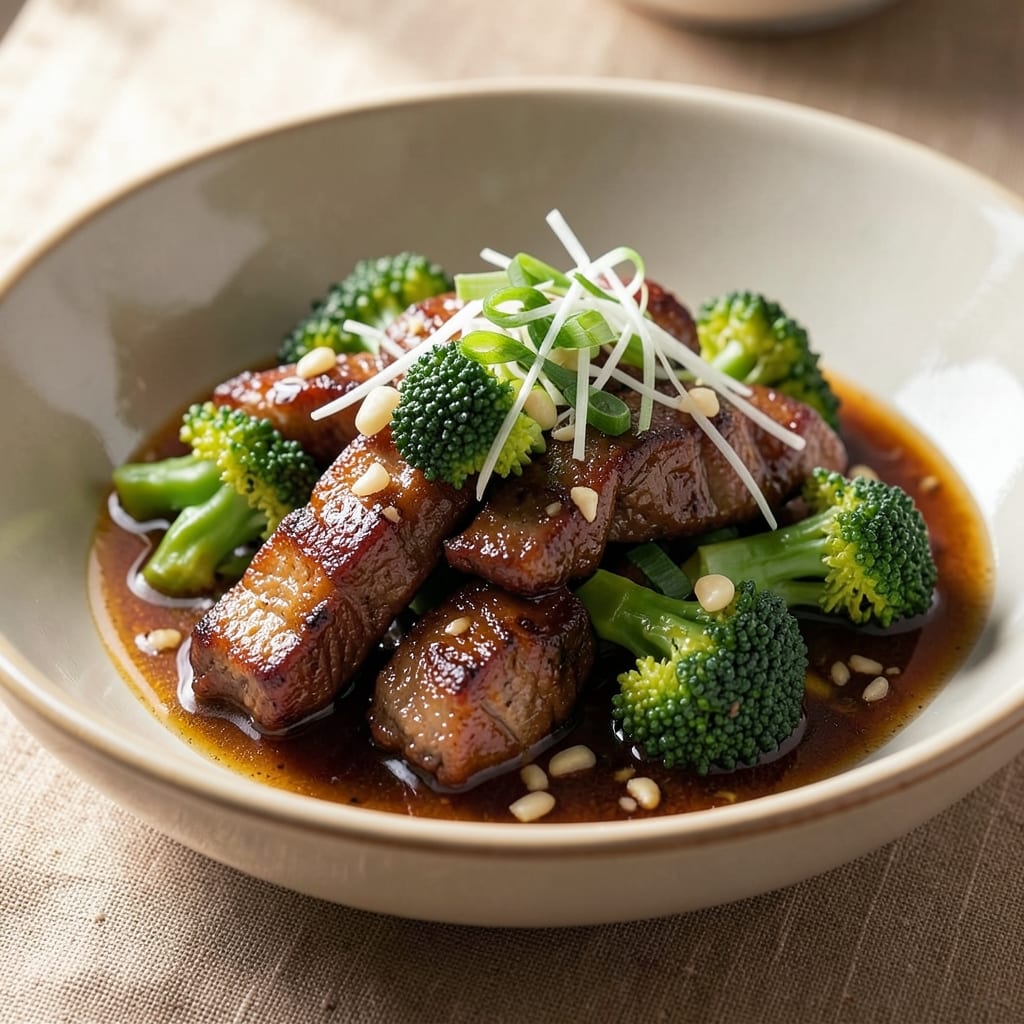
This authentic beef and broccoli sauce recipe delivers the deep umami gloss that makes every bite unforgettable—just like your favorite Chinese takeout, but better. The secret lies in balancing oyster sauce, soy sauce, and a touch of brown sugar, creating a sauce that clings to beef and broccoli like it was made for them. I’ve perfected this over years of testing, ensuring the flavors are rich, slightly sweet, and packed with that signature savory depth.
The foundation of this sauce is a simple yet powerful combination of aromatics—fresh garlic, ginger, and scallions—that build layers of flavor as they simmer. Unlike many store-bought versions, this recipe skips artificial additives, relying instead on a foolproof method that delivers restaurant-quality results in under 30 minutes. The sauce thickens beautifully, coating every ingredient for that iconic sticky-sweet finish.
What sets this sauce apart is its versatility—use it immediately over steamed beef and broccoli for an authentic meal, or store it in the fridge for up to a week. The flavors only deepen over time, making it perfect for meal prep or gifting. Whether you’re serving it with rice, noodles, or as a dipping sauce, the umami richness will elevate any dish.
No shortcuts here—just authentic flavors that stand up to scrutiny. The sauce’s balance of sweet, salty, and umami ensures it’s as delicious as it is reliable. Ready to transform your takeout cravings into a homemade masterpiece? Let’s get started.
Ingredients for authentic beef and broccoli sauce
Nine ingredients, one sauce—this is the umami bomb your takeout cravings deserve.
| Ingredient | Amount | Notes |
|---|---|---|
| Oyster Sauce 🍜 | ½ cup | High-quality, like Lee Kum Kee |
| Soy Sauce 🍶 | ⅓ cup | Light or dark preferred |
| Brown Sugar 🍯 | ¼ cup | Packed, not granulated |
| Garlic Cloves 🧄 | 6 cloves | Freshly minced, not jarred |
| Fresh Ginger 🌿 | 2 tbsp | Finely grated, peeled |
| Green Onions 🧅 | 3 whole | White and green parts separated |
| Cornstarch 🌾 | 1 tbsp | For thickening, not flour |
| Sesame Oil 🫒 | 1 tbsp | Toasted, not flavored |
| Vegetable Oil 🫒 | 2 tbsp | High smoke point preferred |
| Salt 🧂 | ½ tsp | Kosher or sea salt |
| Black Pepper 🌶️ | ¼ tsp | Freshly ground preferred |
The oyster sauce makes or breaks this. Lee Kum Kee is the gold standard—don’t skimp on quality here. Soy sauce can be light or dark, but Kikkoman or Pearl River Bridge are reliable. Brown sugar should be packed, not granulated, for that perfect caramelized depth. Fresh ginger and garlic are non-negotiable—jarred versions just won’t cut it. I always grab extra ginger at Asian markets because it keeps so well. The green onions? Use both white and green parts—white for flavor, green for garnish (don’t skip that final touch!).
No oyster sauce? Substitute with 2 tbsp fish sauce plus 1 tbsp soy sauce, but trust me, it won’t be the same. Fresh ginger too pungent? Ground ginger at half the amount works in a pinch. Cornstarch is your thickening MVP—don’t swap for flour unless you want a grainy sauce. Sesame oil adds that signature aroma, but if you’re sensitive to it, reduce to 1/2 tbsp. The vegetable oil is just for cooking—any neutral oil works, but avocado oil has the highest smoke point for safety.
This sauce gets better with time—make a double batch so you have leftovers. Store in an airtight container in the fridge for up to 1 week, or freeze for 3 months. The flavors deepen as it sits, so if you can wait, do. When reheating, add a splash of water to restore that glossy texture. Perfect for meal prep—just toss with steamed beef and broccoli when ready to eat.
Why You'll Love This Recipe
- Pantry Magic: I swear by this sauce—just oyster sauce, soy, and a pinch of brown sugar. No fancy prep, no hunting for obscure ingredients. Honestly, I keep every element in my cupboard already.
- Umami Bomb: That first bite? The garlic and ginger hit like a flavor grenade, but in the best way. The oyster sauce gives it this deep, savory punch that makes me reach for seconds.
- Leftovers That Don’t Suck: This sauce keeps like a champ—better the next day, even. I double it for stir-fries, noodles, or even a quick dumpling dip. (Yes, even on a Tuesday night.)
- Budget Stretch: A splash of soy, a spoon of oyster sauce—that’s it. No wasted ingredients, no overpriced shortcuts. My wallet and I both approve.
Step-by-step instructions for authentic beef and broccoli sauce
Let's build this rich, umami-packed sauce that clings perfectly to beef and broccoli.
Bloom the Aromatics in Oil
Heat the 2 tablespoons vegetable oil in a large skillet or wok over medium-high heat until shimmering. Add the 6 cloves minced garlic cloves and 2 tablespoons finely grated fresh ginger, stirring constantly for 30-45 seconds until fragrant but not browned. Here's the thing—ginger burns faster than garlic, so keep your eye on it. You want them to smell like a spice market, not a charred disaster.
If you notice any pieces starting to darken, immediately remove the pan from heat for 10 seconds to cool slightly. The goal is aromatic intensity, not color. These raw flavors will form the flavor foundation for the entire sauce.
Build the Sauce Base
Pour in the 0.5 cup oyster sauce and 0.33 cup soy sauce, stirring to combine with the aromatics. Let the mixture simmer for 2-3 minutes until slightly reduced by about 20%. You'll see the sauce darken slightly and thicken just a touch—this is where the umami magic begins.
Add the 0.25 cup packed brown sugar and stir until completely dissolved. The sugar will help balance the salty sauces while adding subtle caramel notes. Let this mixture cook for another 1-2 minutes until the sugar melts and the flavors meld together. This is when your kitchen should smell like a perfect storm of savory and sweet.
Thicken and Finish with Cornstarch
In a small bowl, whisk together the 1 tablespoon cornstarch with 2 tablespoons cold water until smooth. This slurry is your thickening secret weapon. Pour it into the simmering sauce while stirring constantly. The sauce will thicken dramatically within 1-2 minutes—keep stirring to prevent lumps from forming.
Remove the pan from heat and stir in the 1 tablespoon sesame oil, 0.5 teaspoon salt, and 0.25 teaspoon black pepper. The sesame oil adds that signature nutty aroma that makes this sauce authentic. Taste and adjust seasoning if needed—you might want to add a splash more soy sauce for saltiness or a touch more brown sugar for sweetness.
Incorporate the Green Onions
Separate the 3 whole green onions into white and green parts. Add just the white parts (about 2 tablespoons chopped) to the sauce and stir for 30 seconds to infuse their mild onion flavor. Remove from heat immediately—you don't want to cook the onions, just flavor the sauce.
Garnish with the remaining green parts (about 1 tablespoon chopped) just before serving. These bright green accents provide freshness that cuts through the rich sauce. The sauce should now have a glossy sheen and coat the back of a spoon smoothly. If it's too thick, whisk in 1 teaspoon hot water to reach your desired consistency.
Pro Tips For Making Authentic Beef And Broccoli Sauce
- STIR-FRY FAST: High heat is non-negotiable—get your wok or pan screaming hot before adding beef, or you’ll end up with rubbery strips instead of tender, caramelized edges. I learned this the hard way after a batch that tasted like it had been slow-cooked in sadness.
- GRATE GINGER FINE: Skip the chopping—grate the ginger with the large holes of a box grater and let it sit for 5 minutes to soften. This releases more flavor and blends smoother than minced chunks, which can turn your sauce grainy. (Yes, even if you’re impatient like me.)
- SWEAT GARLIC LOW: Add minced garlic after the beef has browned, then immediately lower the heat to medium-low. High heat burns garlic faster than you can blink, turning your sauce bitter. A few seconds at the right temp is all it needs to perfume the oil.
- SALT THE BROCCOLI: Toss florets in ½ teaspoon soy sauce before stir-frying—they’ll stay vibrant and crisp-tender instead of wilting into sad, mushy piles. I skip this when I’m lazy, but the dish is noticeably better when I don’t.
Dietary considerations for these flavors
Gluten-Free Adaptation
This sauce is naturally gluten-free if you use tamari instead of soy sauce—just swap the 0.33 cup soy sauce for the same amount of gluten-free tamari. I love San-J brand tamari because it has that deep umami flavor without any gluten. The cornstarch can also be a concern, but you can thicken the sauce using arrowroot powder instead—just use the same 1 tablespoon amount mixed with water. The texture will be slightly smoother, but just as glossy. 🌱
Vegetarian Option
For a vegetarian version, replace the 0.5 cup oyster sauce with a blend of 2 tablespoons vegetarian oyster sauce (like Annie Chun's) and 2 tablespoons hoisin sauce. The hoisin adds that sweet, tangy depth while keeping the umami profile. If you can't find vegetarian oyster sauce, 2 tablespoons soy sauce plus 1 tablespoon mushroom sauce works in a pinch. The sauce will still cling beautifully to tofu or veggie proteins. 🥑
Low-Sodium Version
To cut back on sodium, use low-sodium soy sauce (like Kikkoman Low Sodium) and reduce the salt to just 0.25 teaspoon. You can also skip the salt entirely if your low-sodium soy sauce is already well-seasoned. For extra umami without salt, add 1 teaspoon fish sauce (if not vegetarian) or 1 tablespoon coconut aminos for a milder alternative. The sauce will still pack a punch, just with less sodium. 💪
Sugar-Free Alternative
Skip the brown sugar and replace it with 0.25 cup sugar-free maple syrup or monk fruit sweetener (like Lakanto). These alternatives add sweetness without spiking your blood sugar. If you prefer a savory-only sauce, omit the sugar entirely and let the oyster and soy sauces shine. The sauce will still be rich and flavorful—just with a deeper savory focus. 🍃
Allergen-Friendly Notes
This sauce is nut-free and dairy-free by default, making it safe for most common allergies. If sesame is a concern, reduce the sesame oil to 0.5 teaspoon or omit it entirely—just know the sauce will lose its signature aroma. For soy allergies, use coconut aminos** instead of soy sauce, but be aware the flavor will be milder. Always check labels on sauces, as cross-contamination can occur. 🛡️
Nutrition facts
Frequently asked questions
Can I make this sauce without oyster sauce?
Yes, but the flavor will be different. For a substitute, mix 2 tablespoons fish sauce with 1 tablespoon soy sauce—this combo mimics oyster sauce's umami depth. If you're vegetarian, use 2 tablespoons vegetarian oyster sauce (like Annie Chun's) plus 1 tablespoon hoisin sauce for sweetness. The sauce will still work, but the authentic richness may be slightly diminished.
How do I adjust the thickness of the sauce?
The cornstarch slurry controls thickness, but you can tweak it further. If too thick, whisk in 1 teaspoon hot water at a time until smooth. Too thin? Simmer uncovered for 2-3 minutes to reduce, or add ½ teaspoon more cornstarch mixed with 1 teaspoon water. The ideal consistency should coat the back of a spoon but still flow easily.
Can I use this sauce for other proteins besides beef?
This sauce works beautifully with chicken, pork, tofu, or even shrimp. For tofu, toss it in the sauce for 5 minutes to absorb flavors. With seafood, reduce cooking time to 2-3 minutes to avoid overcooking. The sauce's balance of sweet, salty, and umami makes it versatile for any protein.
Why does my sauce taste too salty?
Oyster and soy sauces are naturally salty, so taste as you go! If needed, dilute with 1 teaspoon water or add a pinch of sugar to balance. For future batches, reduce soy sauce by 1 tablespoon or use low-sodium soy sauce. The brown sugar also helps balance saltiness—don't skip it entirely.
How long will this sauce keep in the fridge?
Store in an airtight container for up to 1 week—the flavors actually deepen over time! For longer storage, freeze in ice cube trays or small containers for up to 3 months. Thaw overnight in the fridge and stir in 1 teaspoon water to restore thickness. The sauce reheats well for stir-fries or dipping.