
Main Courses
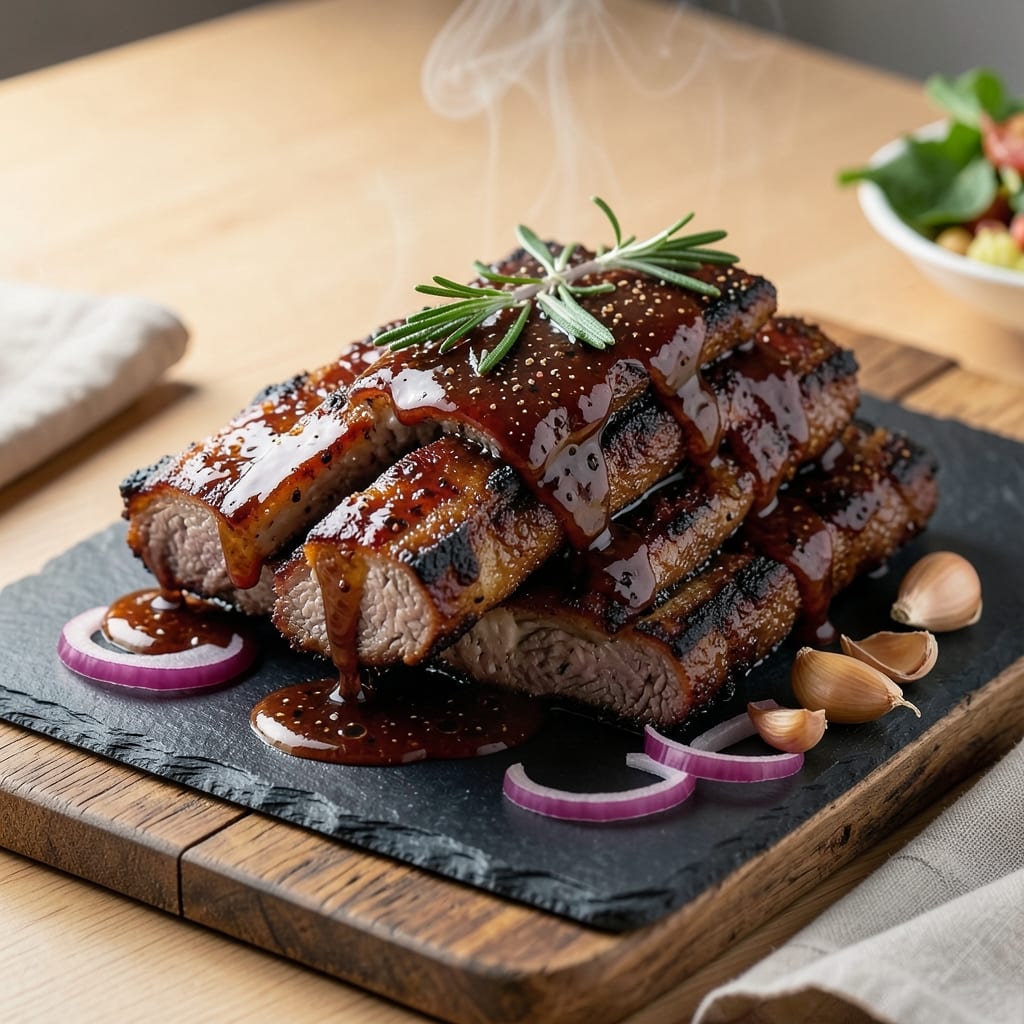
This BBQ beef finger ribs recipe delivers melt-in-your-mouth tenderness with a smoky bark that'll have your guests begging for seconds. 🔥 After years of perfecting my pitmaster technique, I've cracked the code for achieving that legendary "fall-off-the-bone" texture without sacrificing crispy edges. The secret lies in a slow cook that transforms tough meat into tender perfection while developing deep, complex flavors.
What sets these ribs apart is the combination of a dry rub that creates a flavorful crust and a bone broth basting technique that keeps the meat moist. We're talking about a 3-2-1 method that builds layers of flavor over time - first with a dry rub, then with a spritz of apple cider vinegar, and finally with that magical bone broth. This approach ensures you get both texture and flavor without the guesswork.
The result is ribs that are tender enough to pull apart with a fork yet maintain that satisfying snap on the edges. The smoky aroma alone will have everyone gathering around your grill, and each bite delivers that perfect balance of sweet, smoky, and savory flavors. The best part? These ribs reheat beautifully, making them perfect for leftovers or meal prep.
Serve with classic BBQ sides like tangy coleslaw and buttery cornbread for a complete meal experience. Whether you're hosting a backyard cookout or just craving a restaurant-quality dinner at home, this recipe delivers professional results with a pitmaster's touch. Let's get cooking!
Ingredients for bbq beef finger ribs
Four pounds of meaty ribs plus bold flavors for that legendary smoky bark and melt-in-your-mouth tenderness.
| Ingredient | Amount | Notes |
|---|---|---|
| Beef Finger Ribs 🥩 | 4 lb | Bone-in, meaty ends preferred |
| Yellow Onion 🧅 | 1 whole | Cut into large chunks |
| Garlic Cloves 🧄 | 8 cloves | Peeled and smashed |
| Apple Cider Vinegar 🍏 | ½ cup | For spritzing during cook |
| Beef Bone Broth 🥫 | 2 cups | Homemade or high-quality store-bought |
| Brown Sugar 🍚 | ½ cup | Packed, for dry rub |
| Smoked Paprika 🌶️ | 2 tbsp | For deep smoky flavor |
| Ground Black Pepper 🌶️ | 1 ½ tbsp | Freshly cracked preferred |
| Kosher Salt 🧂 | 2 tbsp | Diamond Crystal preferred |
| Dried Mustard 🌿 | 1 tbsp | For tangy depth |
| Granulated Garlic 🧄 | 1 tbsp | For extra flavor punch |
| Onion Powder 🧅 | 1 tbsp | For dry rub complexity |
| Cayenne Pepper 🔥 | ½ tsp | Adjust for heat preference |
| Olive Oil 🫒 | 2 tbsp | For rib coating |
| Honey 🍯 | 2 tbsp | For glaze finish |
The ribs are non-negotiable—meaty ends are what give you that perfect balance of meat and flavor. Costco or local butchers are your best bets for quality cuts. Look for good marbling and avoid anything that looks too lean. I always buy a few extra pounds when I see them on sale—you can't beat fresh ribs for flavor. The bone broth? Homemade is ideal, but Storehouse Farms or Imagine brands are solid store-bought options. Fresh garlic and onion are worth the extra minute to prep—they make all the difference in that dry rub.
No apple cider vinegar? White vinegar or lemon juice works in a pinch, though the flavor won't be quite the same. Smoked paprika is a game-changer—Penzeys or McCormick are my go-tos for quality. Running short on brown sugar? White sugar plus a pinch of molasses gets you close. The dry rub is where the magic happens, so don't skimp on the spices. If you're feeling fancy, toast your spices in a dry pan for 30 seconds to deepen the flavors. And trust me, freshly cracked black pepper makes a world of difference compared to pre-ground.
These ribs reheat like a dream—honestly better the next day once all the flavors meld. Store leftovers in a sealed container with a paper towel to absorb any moisture. Keeps for 4-5 days in the fridge or 3 months frozen. I always make extra because they disappear fast. For serving, keep them warm in a 200°F oven until ready to eat—nothing worse than cold ribs. The glaze? Brush it on just before serving so it stays sticky and sweet.
Why You'll Love This Recipe
- One-Pan Magic: I swear by this recipe because it’s that kind of dish—just toss the ribs, onions, and garlic on a sheet pan, drizzle with vinegar and broth, and walk away. No flipping, no fussing, no extra pots. The ribs caramelize right there while the onions turn sweet and jammy.
- Deep Umami Bomb: That bone broth? It’s the secret weapon. The slow simmer with apple cider vinegar tenderizes the ribs until they’re fall-off-the-bone tender, while the garlic and onions build layers of rich, savory depth. Honestly, the first time I tasted it, I nearly burned the kitchen.
- Tailgate or Tuesday: This recipe works everywhere. Slap it on the grill for game day, throw it in the oven for a lazy Sunday, or serve it at a picnic with zero stress. My college friends still ask for it—because it’s hearty enough for a crowd but simple enough for two.
- Leftovers? More Like Leftovers: Make a double batch and thank me later. The ribs reheat beautifully, and the sauce thickens into a glaze that’s even better the next day. Between us, I’ve turned this into a slow-cooker meal, a freezer staple, and even a last-minute dinner fix—all without breaking the bank.
Step-by-step instructions for BBQ beef finger ribs
Here's how to transform tough beef ribs into melt-in-your-mouth perfection with that smoky-sweet glaze.
🍳 Step 1: Build the Dry Rub and Coat the Ribs
In a large bowl, combine the 2 tbsp smoked paprika, 1.5 tbsp ground black pepper, 2 tbsp kosher salt, 1 tbsp dried mustard, 1 tbsp granulated garlic, 1 tbsp onion powder, and 0.5 tsp cayenne pepper. Mix well with your hands until fully blended—you want these spices to cling together like a fine powder.
Pat the 4 lb beef finger ribs completely dry with paper towels. This is crucial for that crispy bark we're after. Then, rub the spice mixture all over the ribs, pressing it into every crevice. Don't be shy—this is where all the flavor lives. Once coated, let the ribs sit at room temperature for 30 minutes while you prep everything else.
🔥 Step 2: Sear the Ribs for Maximum Flavor
Heat a large oven-safe skillet over medium-high heat until it's screaming hot. Add the 2 tbsp olive oil and swirl to coat the bottom. Place the ribs in the pan, meaty side down, and let them sear undisturbed for 5-6 minutes until they develop a deep golden crust.
Here's the thing—you want that crust to form before you move them. Flip the ribs carefully and sear the other side for another 5-6 minutes. The ribs should be deep brown in spots with some caramelization starting. If you see smoke, your heat is too high—back it down slightly. This searing step locks in juices and builds the foundation for that smoky flavor.
🥘 Step 3: Slow Cook with Bone Broth Magic
Transfer the seared ribs to a slow cooker (I use a 6-quart model). In the same skillet, add the 1 whole yellow onion cut into chunks and the 8 smashed garlic cloves. Sauté for 3-4 minutes until softened and fragrant—this adds another layer of flavor to the broth.
Pour in the 2 cups beef bone broth and scrape up all those delicious browned bits from the bottom of the pan. Transfer this aromatic liquid to the slow cooker along with the ribs. Cover and cook on low heat for 6 hours. Here's where the magic happens—the bone broth tenderizes the meat while infusing it with deep, savory flavor.
🍯 Step 4: Glaze with Sweet and Tangy Perfection
After 6 hours, remove the ribs from the slow cooker and place them on a baking sheet. In a small bowl, whisk together the 0.5 cup packed brown sugar and 2 tbsp honey until smooth. Pour this mixture over the ribs, coating them evenly. Then, brush on the 0.5 cup apple cider vinegar to cut through the sweetness and add tang.
Return the ribs to the slow cooker and cook uncovered for another 30-45 minutes on high heat. You'll see the glaze bubble and darken—this is what creates that sticky, caramelized crust. The ribs are done when they're fork-tender and the glaze is thick and glossy. If the glaze sets too quickly, add a splash of the cooking liquid to loosen it.
⏰ Step 5: Rest and Serve with Confidence
Transfer the ribs to a cutting board and let them rest for 10 minutes before serving. This resting period is non-negotiable—it allows the juices to redistribute so every bite is moist and flavorful. The ribs should be so tender they practically fall apart at the touch, with that beautiful mahogany bark and sticky glaze.
Slice between the bones and serve with extra glaze spooned on top. The contrast of sweet, smoky, and tangy flavors will have everyone coming back for seconds. These ribs are perfect for game day, family gatherings, or whenever you want to impress with a showstopping centerpiece.
Pro Tips For Making Bbq Beef Finger Ribs
- Trim the Membrane: That thin membrane on the bone side of finger ribs is the real enemy of tenderness—peel it off before cooking or you’ll be left with chewy, stubborn meat. Use a butter knife to slide it off in one piece (yes, it’s gross but worth it), then give the ribs a quick rinse to wash away any loose fibers. ---
- Char the Onions First: Slice the yellow onions into thick wedges and sear them in a dry pan until the edges blacken—this caramelizes their sugars way faster than simmering. Toss them into the bone broth and apple cider vinegar mix later, and you’ll get deeper flavor with half the effort. (I learned this after burning three batches of onions that just looked done.) ---
- Don’t Crowd the Garlic: When mincing the garlic cloves for the BBQ sauce or broth, spread them out on the cutting board instead of piling them up—crushed cloves release more oil, which can turn bitter. A light sprinkle of salt before mincing also keeps them from sticking like glue. (Your future self will curse you if you skip this.) ---
- Braise Low and Slow: After searing the ribs, drop the heat to a simmer—not a boil—and keep the liquid just bubbling gently. High heat turns the beef bone broth into glue, and the finger ribs will toughen up faster than you can say “overcooked.” Aim for 2–2.5 hours, checking occasionally to add water if the liquid gets too low. Patience here makes the difference between fork-tender meat and something that needs a knife.
Best sauces and condiments for these flavors
Classic BBQ Sauce
Start with a simple ketchup-based sauce that complements the ribs' natural flavors. Mix 1 cup ketchup, ¼ cup apple cider vinegar, 2 tbsp brown sugar, 1 tbsp smoked paprika, 1 tsp garlic powder, and ½ tsp cayenne pepper. Simmer for 10 minutes to meld flavors, then brush on ribs during the last 30 minutes of cooking. This sauce adds tangy sweetness without overpowering the smoky dry rub. 🍯
Spicy Mustard Glaze
For heat lovers, try a Dijon mustard glaze that cuts through the richness. Whisk ½ cup Dijon mustard, 2 tbsp honey, 1 tbsp apple cider vinegar, and 1 tsp smoked paprika. Brush this on ribs during the final 20 minutes of cooking, then broil for 2-3 minutes to caramelize. The mustard adds depth while the honey balances the heat—perfect for those who crave a kick. 🌶️
Smoky Chipotle Compound Butter
Elevate your ribs with a chipotle butter that melts into every bite. Mix ½ cup softened butter, 1 tbsp chipotle powder, 1 tsp garlic powder, and ½ tsp onion powder. Spread dollops on ribs during the last 15 minutes of cooking, then broil until golden. This adds a creamy, smoky richness that pairs beautifully with the dry rub's crust. 🔥
Sweet and Tangy BBQ Jam
For a fruity twist, make a quick BBQ jam by simmering 1 cup cranberry sauce, 2 tbsp honey, and 1 tbsp apple cider vinegar for 10 minutes. Brush this on ribs during the last 20 minutes of cooking. The tartness cuts through the fat, while the sweetness enhances the smoky flavors—ideal for a lighter, fruit-forward finish. 🍇
Garlic-Herb Butter Baste
Infuse ribs with fresh flavor using a garlic-herb butter baste. Melt 4 tbsp butter with 2 minced garlic cloves, 1 tbsp chopped parsley, and ½ tsp black pepper. Brush this on ribs during the last 30 minutes of cooking. The aromatic herbs brighten the smoky flavors, making each bite feel restaurant-quality. 🌿
Smoked Salt Finish
For a professional touch, finish ribs with a sprinkle of smoked salt (like Maldon or Diamond Crystal) right before serving. The delicate crunch and smoky flavor elevate the dish without overpowering. This is my go-to trick for adding that final "wow" factor—simple but impactful. ✨
Nutrition facts
Frequently asked questions about BBQ beef finger ribs
Can I use pork ribs instead of beef finger ribs?
While pork ribs are more common for BBQ, beef finger ribs offer a distinct, richer flavor and firmer texture that holds up beautifully to the slow cooking process. If you absolutely must use pork, opt for pork baby back ribs and reduce the cooking time to 4-5 hours—they tenderize faster than beef. The dry rub and glaze will still work, but the meat will be more delicate.
What's the best way to store leftover ribs?
Store ribs in an airtight container with a paper towel on top to absorb any moisture. They'll keep for 4-5 days in the fridge or 3 months frozen. For reheating, wrap them in foil and warm in a 300°F oven for 20-30 minutes—they reheat even better than the day they were made!
Why are my ribs still tough after cooking?
Tough ribs usually mean either undercooking or not enough moisture. Double-check your cooking time—beef ribs need that full 6 hours on low. Also, ensure you're using bone broth (not water) and that the ribs are submerged enough to stay moist. If they're still tough, try wrapping them in foil with extra broth for 1 more hour of cooking.
Can I make these ribs in an oven instead of a slow cooker?
Preheat your oven to 275°F and follow the same steps: sear first, then transfer ribs to a baking dish with onion, garlic, and bone broth. Cover with foil and bake for 5-6 hours, then proceed with the glaze step. For crispier edges, finish uncovered at 400°F for 10 minutes. The oven method gives you more control over temperature consistency.
How do I adjust the spice level for kids?
Reduce the cayenne pepper to ¼ tsp or omit it entirely. For extra kid-friendly appeal, add 1 tsp onion powder and 1 tsp garlic powder to mellow the heat while keeping flavor. Serve with a mild, sweet BBQ sauce on the side so they can add their own touch. The ribs will still be delicious without the spice!