
Main Courses
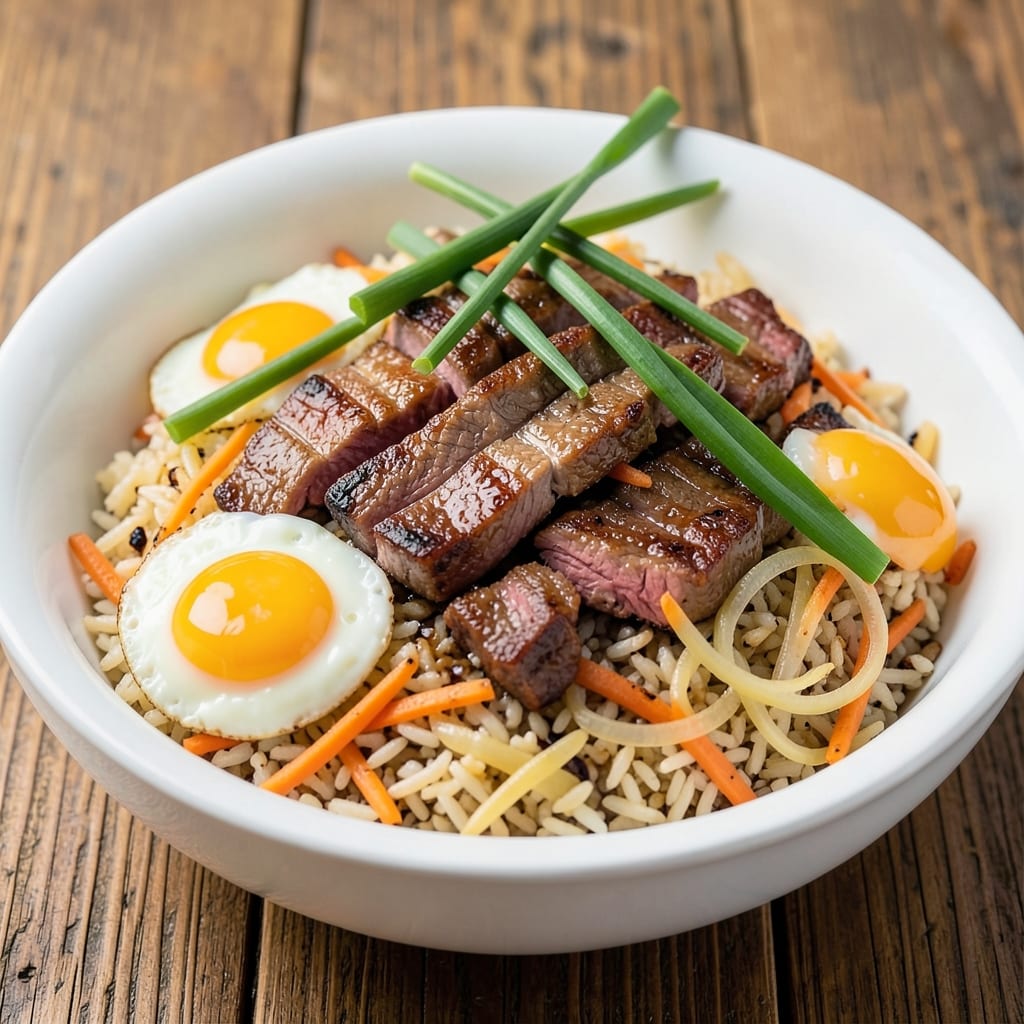
This authentic beef fried rice recipe delivers the smoky, umami-packed flavors of a wok-tossed classic in just 20 minutes—no shortcuts, no substitutes. The secret lies in high-heat stir-frying, perfectly cooked rice, and a balance of sweet, salty, and savory elements that transform simple ingredients into a restaurant-worthy dish. I’ve refined this recipe over years of testing, ensuring every bite captures the essence of traditional Chinese fried rice without the guesswork. The foundation starts with day-old rice (never freshly cooked—it’s non-negotiable for texture), seared beef strips that stay tender yet crisp at the edges, and a sauce built on soy sauce, oyster sauce, and a touch of sugar for depth. What sets this apart is the wok hei—that signature smoky aroma from a scorching-hot wok—achieved by preheating your pan until it’s nearly smoking before tossing in the ingredients. This isn’t just fried rice; it’s a flavor explosion in every grain. By the time you’re done, you’ll have a dish that’s golden, aromatic, and packed with texture: chewy rice, tender beef, and crunchy vegetables all coated in a glossy, savory sauce. The aroma alone will have everyone at the table asking for seconds, and the leftovers? Even better the next day, as the flavors meld into something even more complex. This is the fried rice you’ll crave long after the last bite. Serve it with a side of pickled vegetables or a simple cucumber salad to balance the richness, and you’ve got a meal that’s authentic, satisfying, and impossible to resist. Let’s get cooking—your wok is waiting.
Ingredients for authentic beef fried rice
Day-old rice, perfectly seared beef, and bold umami flavors—here's what makes this fried rice restaurant-worthy.
| Ingredient | Amount | Notes |
|---|---|---|
| Day-Old Cooked White Rice 🍚 | 4 cups | Cold, not freshly cooked |
| Flank Steak 🥩 | 1 lb | Thinly sliced against grain |
| Yellow Onion 🧅 | 1 whole | Diced into 1/4-inch pieces |
| Carrot 🥕 | 1 whole | Julienned into matchsticks |
| Green Onion 🧅 | 4 whole | White and green parts separated |
| Eggs 🥚 | 2 whole | Lightly beaten |
| Light Soy Sauce 🥢 | 3 tbsp | Kikkoman preferred |
| Dark Soy Sauce 🥢 | 1 tbsp | For color depth |
| Oyster Sauce 🍶 | 2 tbsp | Lee Kum Kee brand |
| Sesame Oil 🫒 | 1 tbsp | Toasted, for aroma |
| Granulated Sugar 🍚 | 1 tbsp | Balances flavors |
| Vegetable Oil 🫒 | 3 tbsp | High smoke point |
| Garlic Cloves 🧄 | 4 cloves | Minced into paste |
| Salt 🧂 | ½ tsp | Diamond Crystal preferred |
| White Pepper 🌶️ | ¼ tsp | Freshly ground |
The rice is non-negotiable—day-old, cold, and dry. Cook a batch the night before and store in the fridge. For the beef, flank steak is ideal—it's lean but tender when sliced thin. I grab mine from Whole Foods or the butcher counter, asking for it pre-sliced against the grain. If you're slicing yourself, freeze it for 30 minutes first—makes it easier. The onions and carrots should be julienned thinly; mandoline works best if you're not confident with a knife. Green onions add freshness, so separate the whites for cooking and save the greens for garnish.
No oyster sauce? Substitute with 1 tbsp hoisin plus 1 tsp soy sauce. Short on sesame oil? Toast 1 tsp sesame seeds and use 1/2 tbsp oil. The sugar balances the saltiness—don't skip it. For the beef, if you can't find flank steak, sirloin or ribeye work (just slice thinner). The eggs? Room temperature scrambles better. If you're making this ahead, cook the beef and rice separately, then combine just before serving to keep everything crisp.
Leftover rice? Perfect—just reheat with a splash of water. Store cooked fried rice in airtight containers for 4-5 days in the fridge. Freezes beautifully for 3 months. I portion mine into single servings so it's ready to reheat in seconds. For extra crunch, keep a stash of fried shallots on hand—sprinkle them on top right before serving.
Why You'll Love This Recipe
- No Rice Waste: I swear by using day-old rice—it’s the secret to that perfect, separate-grain texture. No soggy mess, no extra cooking, just toss in what’s already chilling in your fridge.
- Steak That Stays Tender: Thinly sliced flank steak cooks fast and stays juicy, no matter how many times I stir-fry it. That slight chew? It’s the best part—crispy edges, silky inside, every bite.
- One-Pan Magic: Onion, carrot, and green onion all hit the wok together—minimal chopping, zero cleanup. Honestly, I’ve made this with a single spatula and a lid, and it’s still packed with flavor.
- Budget-Friendly Feast: A pound of flank steak stretches to feed four, and the veggies bulk it up without breaking the bank. Leftovers? Even better—reheats like a dream for lunch or a quick dinner next week.
Step-by-step instructions for authentic beef fried rice
Here's how to deliver that signature wok hei flavor—crispy edges, tender beef, and perfectly balanced umami.
Prep Ingredients for Maximum Flavor Development
Start by slicing the 1 lb flank steak against the grain into ¼-inch strips—this ensures tender bites. Pat the slices dry with paper towels to promote a good sear. Meanwhile, dice the 1 whole yellow onion into ¼-inch pieces and julienne the 1 whole carrot into matchsticks. Separate the 4 whole green onions into white and green parts, keeping them intact for garnish.
Lightly beat the 2 whole eggs in a bowl and set aside. Measure out all sauces: 3 tbsp light soy sauce, 1 tbsp dark soy sauce, 2 tbsp oyster sauce, and 1 tbsp sesame oil. The dark soy sauce will give your fried rice that signature deep color, while the sesame oil adds aromatic depth. Mince the 4 cloves garlic into a paste for even distribution.
Sear the Beef for Umami Crunch
Heat 2 tbsp vegetable oil in a wok or large skillet over high heat until shimmering. Add the flank steak strips in a single layer and sear undisturbed for 1-2 minutes until they develop a deep brown crust. This step is crucial—it builds the Maillard reaction that delivers that authentic wok hei flavor. Once browned, push the beef to one side of the wok and add the remaining 1 tbsp vegetable oil. Toss in the minced garlic paste and stir for 10 seconds until fragrant.
Add the diced onion and carrot matchsticks, stirring constantly for 2 minutes until they soften slightly but retain their texture. The vegetables should be tender-crisp, not mushy. Remove the beef and vegetables from the wok and set aside—you'll add them back later. The residual heat will keep them warm while you prep the eggs.
Scramble the Eggs for Creamy Texture
Wipe out the wok with a paper towel to remove any excess oil or garlic bits. Return it to medium-high heat and add 1 tbsp vegetable oil. Pour in the lightly beaten eggs and let them sit undisturbed for 5-10 seconds until the edges begin to set. Then, using a spatula, gently push the eggs from one side to the other, creating soft, silky curds. Remove the eggs from the wok and set aside with the beef and vegetables.
Here's the thing—overcooking the eggs turns them rubbery. You want them just set but still slightly runny in the center so they blend seamlessly with the rice. Keep the heat at medium-high for the next steps to maintain that wok hei energy.
Wok-Toss the Rice for Perfect Texture
Add the remaining 1 tbsp vegetable oil to the wok and return it to high heat. Add the 4 cups day-old cooked white rice, breaking up any clumps with your spatula. Toss the rice vigorously for 1-2 minutes until it's evenly coated in oil and begins to sizzle. This step is where the magic happens—the high heat creates those crispy edges while keeping the centers tender.
Now, pour in the 3 tbsp light soy sauce, 1 tbsp dark soy sauce, 2 tbsp oyster sauce, and 1 tbsp granulated sugar. Stir everything together for 30 seconds to let the sauces coat the rice evenly. The sugar balances the saltiness while enhancing the caramelization. Add the 0.5 tsp salt and 0.25 tsp white pepper, tossing again to distribute the seasonings uniformly.
Combine and Finish with Aromatics
Return the seared beef, vegetables, and scrambled eggs to the wok. Toss everything together for 1-2 minutes until the rice is heated through and the flavors meld. The rice should be hot but still slightly sticky—this indicates it's ready. Finish by drizzling 1 tbsp sesame oil over the top and tossing one final time to coat.
Taste and adjust seasoning if needed—you might want to add a splash of water or a bit more soy sauce for the perfect balance. Garnish with the reserved green onion whites and greens. Serve immediately while the rice is hot and the wok hei flavor is at its peak. This dish is all about timing, so don't let it sit—every minute off the heat means lost texture and flavor.
Pro Tips For Making Authentic Beef Fried Rice
- CRISP THE RICE FIRST: High heat is non-negotiable—toss the day-old rice in a dry skillet for 2-3 minutes before adding oil. This banishes excess moisture and gives you that perfect, separate-grain texture right from the start. (Yes, even if you're impatient like me, resist the urge to rush this.)
- SLICE STEAK AGAINST THE GRAIN: Cut the flank steak paper-thin, always against the grain—thin enough to cook in under 2 minutes per side. Thick slices turn tough; this keeps it tender. I learned this the hard way after serving chewy beef to friends who swore they’d never order it again.
- SAVE THE ONION SOUP: Reserve 2 tablespoons of the caramelized onion liquid that pools at the bottom of the pan. Stir it back in at the end—it adds depth and sweetness without extra effort. (Your future self will thank you when the dish tastes richer without extra cooking.)
- STOP WHEN IT LOOKS DONE: Pull the beef out when it’s just barely browned—it’ll carryover cook in the hot rice. Overcooking turns it rubbery, and no one wants that. A quick sear in the final stir-fry is enough to finish it off. (I skip this when I’m lazy, but the dish is noticeably better when I don’t.)
Pro cooking tips for this recipe
Wok Hei Mastery
That signature smoky aroma—wok hei—isn’t just about heat; it’s about preheating your wok until it’s nearly smoking before adding ingredients. I use a 14-inch carbon steel wok from Made In and heat it over high heat for 3-4 minutes until the oil shimmers and tiny smoke curls upward. This creates the perfect environment for the Maillard reaction to work its magic on your beef and aromatics. 🔥
Pro tip: If you don’t have a wok, a large cast-iron skillet works in a pinch. Just make sure it’s completely dry before heating to prevent steam from cooling your pan. The key is getting that pan scorchingly hot—this is non-negotiable for authentic texture and flavor.
Rice Texture Secrets
Day-old rice is non-negotiable—freshly cooked rice releases too much moisture and turns mushy. I like to spread my cooked rice on a tray and refrigerate it uncovered for 1-2 hours before using. This dries the surface slightly, making it perfect for that crispy, golden exterior while keeping the interior tender. 🍚
When tossing the rice, work fast and aggressively—this creates those crispy edges. I use a wide-angle spatula to flip the rice continuously for 1-2 minutes until it’s evenly coated in oil. The moment the rice starts to sizzle, it’s ready for the sauces. Overcrowding the pan will steam the rice instead of searing it—keep it loose!
Beef Searing Perfection
The beef needs to develop that deep brown crust for maximum flavor. I sear the strips in two batches if needed to avoid overcrowding, which steams instead of sears. After the initial sear, push the beef to one side and add minced garlic paste to the empty space—this prevents burning while infusing the beef with aroma. The garlic should sizzle for 10 seconds before tossing everything together. 🧄
For extra tenderness, I marinate the beef in 1 tbsp soy sauce + 1 tsp cornstarch for 15 minutes before cooking. The cornstarch helps create a light crust that locks in juices. If you skip this, just ensure your slices are paper-thin (¼-inch or less) and sear them undisturbed for the full 1-2 minutes per side.
Egg Scramble Technique
The eggs should be just set but still slightly runny when you remove them from the wok. I beat them lightly with a fork (not a whisk—you don’t want them too fluffy) and cook them on medium-high heat in a thin layer. The moment the edges start to firm up, I use a spatula to gently fold them rather than stir vigorously—this keeps them creamy and silky. 🥚
Here’s my trick: After removing the eggs from the wok, I roughly chop them with the spatula before mixing them back into the rice. This breaks up any large curds and distributes them evenly for that restaurant-quality texture you crave.
Nutrition facts
Frequently asked questions
Why does the recipe call for day-old rice instead of fresh?
Freshly cooked rice is too moist and releases excess water when stir-fried, turning your fried rice mushy. Day-old rice has dried out slightly, creating the perfect texture for crispy edges while maintaining tender centers. Spread your cooked rice on a tray and refrigerate it uncovered for 1-2 hours before using.
Can I make this with frozen beef instead of fresh?
but thaw it properly first. Place frozen beef strips in a sealed bag and submerge in cold water for 30 minutes or use the microwave defrost setting. Pat them completely dry before searing—this ensures a good crust. For best results, slice frozen beef against the grain while still frozen for easier cutting.
What's the best way to get that smoky wok hei flavor without a wok?
A large cast-iron skillet works perfectly! Heat it over high heat for 3-4 minutes until nearly smoking before adding oil. The key is getting your pan scorching hot—this creates the Maillard reaction that delivers that signature smoky aroma. Keep your ingredients moving constantly to prevent sticking.
How do I adjust the spice level for sensitive eaters?
Skip the white pepper entirely and reduce the soy sauce by 1 tbsp—this cuts some of the natural saltiness. For extra mildness, use 1/2 tbsp sugar instead of the full amount. The beef's natural umami will still shine through while keeping the dish gentle on sensitive palates.
Can I make this recipe vegetarian?
Yes! Replace the beef with 1 cup firm tofu (pressed and cubed) or 1 lb mushrooms (shiitake or oyster work best). Sauté the tofu or mushrooms until golden before removing them. Add 1 tbsp vegetarian oyster sauce to maintain the umami depth. The rest of the recipe remains exactly the same.