
Main Courses
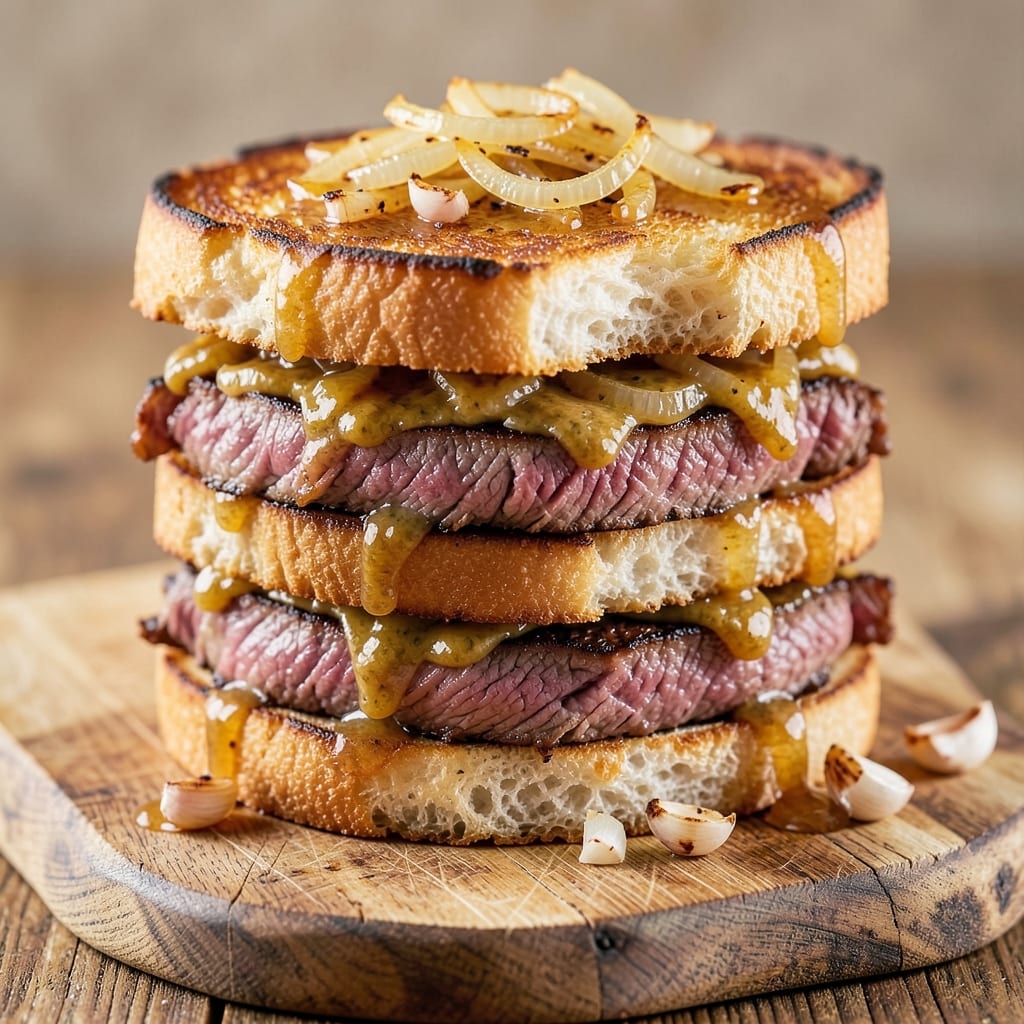
This baked roast beef sandwich recipe transforms simple ingredients into crispy-crusted comfort that rivals any deli. The secret lies in slow-baking the beef until it's tender yet firm enough to slice perfectly, then layering it with melty cheese and toasted bread for that signature diner-style experience. I've perfected this method after years of testing—no fancy equipment needed, just a reliable oven and about 2 hours of hands-off time.
The magic happens when you sear the roast first to lock in juices, then bake it low and slow until the internal temperature hits 145°F. Slicing against the grain ensures each bite is tender and flavorful, while the cheese melts into a gooey, golden layer that binds everything together. This isn't just a sandwich—it's a restaurant-quality meal you can make at home.
What you'll end up with is a sandwich that's crispy on the outside, juicy and savory in the middle, and topped with melted cheese that stretches perfectly with every bite. The toasted bread adds texture, while optional toppings like pickles or mustard take it to the next level. It's the kind of dish that turns a weeknight into a cozy, satisfying meal.
Serve these sandwiches with a side of crispy fries or a simple green salad for a complete meal. The leftovers reheat beautifully, making this an ideal recipe for meal prep or feeding a crowd. Ready to make your kitchen smell like a classic diner? Let's get started.
Ingredients for baked roast beef sandwich
Simple ingredients, big diner-style flavor—just 13 staples for crispy, melty perfection.
| Ingredient | Amount | Notes |
|---|---|---|
| Top Round Roast Beef 🥩 | 1 ½ lb | Center-cut, sliced against grain |
| All-Purpose Flour 🌾 | ½ cup | For breading, fine texture preferred |
| Yellow Onion 🧅 | 1 whole | Thinly sliced for caramelization |
| Garlic Cloves 🧄 | 4 cloves | Minced for depth of flavor |
| Worcestershire Sauce 🍶 | 1 tbsp | For umami richness |
| Kosher Salt 🧂 | 1 ½ tsp | Diamond Crystal preferred |
| Ground Black Pepper 🌶️ | 1 tsp | Freshly cracked for heat |
| Dijon Mustard 🥫 | 1 tbsp | For tangy depth |
| Unsalted Butter 🧈 | 2 tbsp | Cold, for crispy crust |
| American Processed Cheese 🧀 | 8 oz | Sliced thin for melting |
| White Bread Loaf 🍞 | 1 whole | Crust removed, sliced thick |
| Olive Oil 🫒 | 1 tbsp | For searing beef |
| Beef Broth 🥫 | ½ cup | Low-sodium preferred |
The beef is non-negotiable here. Top round roast gives you that perfect balance of tenderness and sliceability—sirloin or ribeye will be too tough after baking. I always grab mine from Costco or the butcher counter at Whole Foods—look for good marbling and ask for it sliced against the grain. The center-cut is key for even cooking. If you're using pre-sliced deli beef, it won't have the same texture, so skip it. For the bread, Texas Toast or sourdough works best—thick slices that can handle the cheese without getting soggy.
No Worcestershire? Soy sauce plus a pinch of sugar gets you close, though it won't be identical. The Dijon mustard can be swapped for yellow mustard at double the amount if you're in a pinch, but trust me on the full-fat version—it adds that signature tang. Running low on beef broth? Water plus a bouillon cube works, but add a splash of vinegar to mimic the depth. The cheese is where you can get creative: Swiss or provolone both melt beautifully, though American gives that classic diner gooeyness. And if you're feeling fancy, add a drizzle of horseradish cream on top before serving—game-changer.
This sandwich reheats like a dream—honestly better the second day once everything melds. Store components separately: beef and cheese in the fridge for 3-4 days, bread wrapped in a towel to stay soft. For assembly, toast the bread fresh and melt the cheese under the broiler for 2-3 minutes to get that perfect golden crust. Freeze the beef and cheese layers together for up to 2 months—just thaw overnight before assembling. Pro tip: Make extra beef and freeze it in portions for quick sandwiches later.
Why You'll Love This Recipe
- I swear by this: just sear the beef, toss it in a mix of flour, Worcestershire, and minced garlic—no fancy technique needed. The onions caramelize right in the oven while you’re doing whatever else (yes, even folding laundry).
- No-Fuss Prep: I swear by this: just sear the beef, toss it in a mix of flour, Worcestershire, and minced garlic—no fancy technique needed. The onions caramelize right in the oven while you’re doing whatever else (yes, even folding laundry).
- Umami Bomb: That Worcestershire sauce? It’s the secret weapon here. The beef comes out with this deep, savory punch—like a steakhouse bite but with none of the fuss. The garlic and onions add a sweet, sticky finish that’ll have you licking your fingers.
- Lunchbox Hero: Between us, this is my go-to for meal prep. Slice the beef thin, pile it on crusty bread with whatever you’ve got—pickles, mustard, even a fried egg—and you’ve got a sandwich that’ll hold up for days. My kids actually eat it cold. (Don’t tell them I said that.)
Step-by-step instructions for crispy-crusted roast beef sandwiches
Here's how to make these melt-in-your-mouth sandwiches with perfect texture every time.
Prepare the Beef for Maximum Flavor and Tenderization
Slice the 1.5 lb Top Round Roast Beef against the grain into ¼-inch thick slices. I use a sharp boning knife for clean cuts—this prevents tearing and ensures each bite is tender. Arrange the slices in a single layer on a plate and spread with 1 tbsp Dijon Mustard on both sides. The mustard adds tangy depth and helps tenderize the beef as it bakes.
In a small bowl, whisk together 1 tbsp Worcestershire Sauce, 1.5 tsp Kosher Salt, and 1 tsp Ground Black Pepper. Pour this marinade over the beef and let it sit for 10 minutes at room temperature. This brief marinating time infuses flavor without making the beef mushy. While the beef marinates, thinly slice 1 whole Yellow Onion and mince 4 cloves Garlic Cloves—you'll use these for the caramelized base later.
Create the Crispy Onion-Garlic Base
Heat 1 tbsp Olive Oil in a large oven-safe skillet over medium heat. Add the sliced onions and cook for 8-10 minutes, stirring occasionally, until they turn golden brown and caramelized. This step is crucial—it builds sweetness and depth that carries through the entire sandwich.
Reduce heat to low, add the minced garlic, and cook for 30 seconds until fragrant. Immediately pour in 0.5 cup Beef Broth and scrape up any browned bits from the bottom of the pan. These bits pack intense flavor. Let the mixture simmer for 2 minutes until slightly reduced. This aromatic base will form the flavor foundation for your sandwiches.
Bread and Bake the Beef to Crispy Perfection
In a shallow dish, combine 0.5 cup All-Purpose Flour with 2 tbsp Unsalted Butter (cut into small cubes). The cold butter will create a crispy crust when it melts during baking. Lightly coat each beef slice in this flour-butter mixture, pressing gently to adhere. Don't overcoat—just enough to create a golden crust.
Arrange the breaded beef slices in a single layer over the onion-garlic mixture in the skillet. The residual heat will help melt the butter immediately. Transfer the skillet to a 400°F preheated oven and bake for 12-15 minutes until the beef reaches an internal temperature of 145°F and the breading is deep golden brown. The butter should be completely melted and bubbly by the end.
Assemble the Melty Cheese Sandwiches
Remove the skillet from the oven and let it sit for 2 minutes to allow the beef to rest slightly. While it rests, remove the crust from 1 whole White Bread Loaf and slice it into 8 thick slices (2 slices per sandwich). Slice 8 oz American Processed Cheese into thin strips for even melting.
Working quickly, layer 2 slices of bread on each plate, then add 2 slices of beef, the cheese strips, and top with the remaining bread slices. The residual heat from the skillet will help melt the cheese perfectly. For maximum gooeyness, cover each sandwich with a second skillet or baking sheet for 1-2 minutes to create that classic deli-style melt.
Serve Immediately for Maximum Comfort
Uncover the sandwiches and let them sit for 1 minute to allow the cheese to set slightly but remain melty. Cut each sandwich diagonally into triangles for that classic diner look. Serve immediately while the bread is still warm and the cheese is stretchy—this is when these sandwiches taste best.
Here's the thing—these sandwiches are all about texture contrast. You want that crispy breading on the beef, the caramelized onions, and that perfect melt of American cheese. If the cheese starts to cool and firm up, pop the sandwiches back under the broiler for 30 seconds to restore that gooey perfection. Pair with crisp pickle spears or a simple side salad for the full experience.
Pro Tips For Making Baked Roast Beef Sandwich
- CRANK THE OVEN HIGH: I learned this the hard way—top round beef needs a screaming-hot oven (475°F) at first to sear the crust before you lower it. Skip this, and you’ll end up with a dry, pale slab of beef that tastes more like shoe leather than sandwich filling.
- SLICE THE ONION THIN: Use a mandoline or sharp knife to cut onions paper-thin—any thicker, and they’ll turn to mush under the beef’s weight. I used to chop them roughly, and they’d just dissolve into the gravy instead of adding texture.
- REST THE BEEF UNDER FOIL: Give it a solid 10 minutes after pulling it from the oven, tented loosely with foil. I know, you’re hungry, but rushing this step means the juices pool at the bottom of your sandwich instead of staying where they belong—in the meat.
- MAKE THE GRAVY WITH PAN JUICES: Don’t just dump the Worcestershire into the pan and call it a day. Deglaze with a splash of beef broth first, then whisk in the flour to make a roux—this thickens the gravy without turning it into glue. (Yes, even if you’re impatient like me.)
Wine and beer pairings for baked roast beef sandwich
Classic Red Wine
A bold Cabernet Sauvignon from Napa Valley is my go-to pairing—its dark fruit notes and firm tannins stand up to the rich beef and caramelized onions. Look for a 2019 or newer vintage with 14-15% ABV to balance the sandwich's heartiness. The wine's acidity cuts through the melted cheese beautifully, while its dark berry flavors complement the beef's savory depth. 🍷
For a more approachable option, try a Merlot with softer tannins and plum undertones. A Washington State Merlot from Chateau Ste. Michelle offers great value and pairs wonderfully with the sandwich's comforting flavors. Serve slightly chilled (60-65°F) to enhance its fruit forwardness.
Malbec for Bold Lovers
If you prefer something with more body and spice, an Argentinian Malbec delivers rich dark chocolate and blackberry notes that harmonize with the beef's crust and cheese. I love Catena Zapata or Bodega Norton selections—they're widely available and won't break the bank. The wine's velvety texture contrasts nicely with the sandwich's crispy elements. 💜
Beer Pairings
A crisp American Pale Ale with citrusy hops balances the sandwich's richness perfectly. Try New Belgium Fat Tire or Allagash White—their light malt profiles let the beef shine while the hop bitterness cleanses your palate. For a more robust option, a Belgian Dubbel like Westmalle Tripel adds caramel and spice notes that complement the caramelized onions.
Light Options
If you're watching calories, a dry Riesling from Germany offers refreshing acidity and stone fruit flavors that cut through the richness. Look for Dr. Loosen Blue Slate or Chateau Ste. Michelle—both provide excellent value. Serve slightly cooler (50-55°F) to enhance its crispness. For beer lovers, a wheat beer like Hoegaarden adds a light, effervescent contrast that's surprisingly refreshing. 🍺
Non-Alcoholic Choices
Don't overlook sparkling options! A dry sparkling water with lemon adds a refreshing contrast to the rich sandwich. For something more substantial, try a ginger beer like Feather's—its spicy kick complements the caramelized onions beautifully. Or sip on a cold hibiscus iced tea with a hint of lime for a tangy, refreshing pairing that won't overwhelm the flavors.
Nutrition facts
Frequently asked questions
Can I use pre-sliced deli roast beef instead of baking my own?
While you can use pre-sliced deli beef in a pinch, you'll miss the crispy crust and deeper flavor from baking. For the best results, always bake your own slices—it's what gives these sandwiches that restaurant-quality texture. If you're short on time, try pan-searing thinly sliced beef with butter for 2-3 minutes per side before assembling.
What's the secret to keeping the bread from getting soggy?
The key is toasting the bread just before assembling and using a lightly buttered breading on the beef. The residual heat from the skillet melts the cheese perfectly while keeping the bread crisp. For extra insurance, assemble sandwiches on a wire rack over a baking sheet to allow air circulation.
How do I adjust the recipe for a slow cooker?
You can adapt this for a slow cooker by placing the beef slices in the liner with 0.25 cup beef broth and cooking on Low for 3-4 hours until tender. Skip the breading and add cheese during the last 30 minutes of cooking. The bread should be toasted separately to avoid sogginess.
What's the best way to reheat leftovers?
Reheat sandwiches in a 350°F oven for 5-7 minutes covered with foil to restore moisture. For individual slices, warm the beef in a skillet for 1-2 minutes per side and toast the bread separately. The cheese will melt beautifully when reheated properly—just avoid microwaving as it can make the bread rubbery.
Can I make these sandwiches ahead of time?
Store the beef and cheese separately in the fridge for 3-4 days or freeze for up to 2 months. Keep bread wrapped in a towel to maintain freshness. Assemble just before serving and toast under the broiler for 2-3 minutes to get that perfect melty texture.