
Main Courses
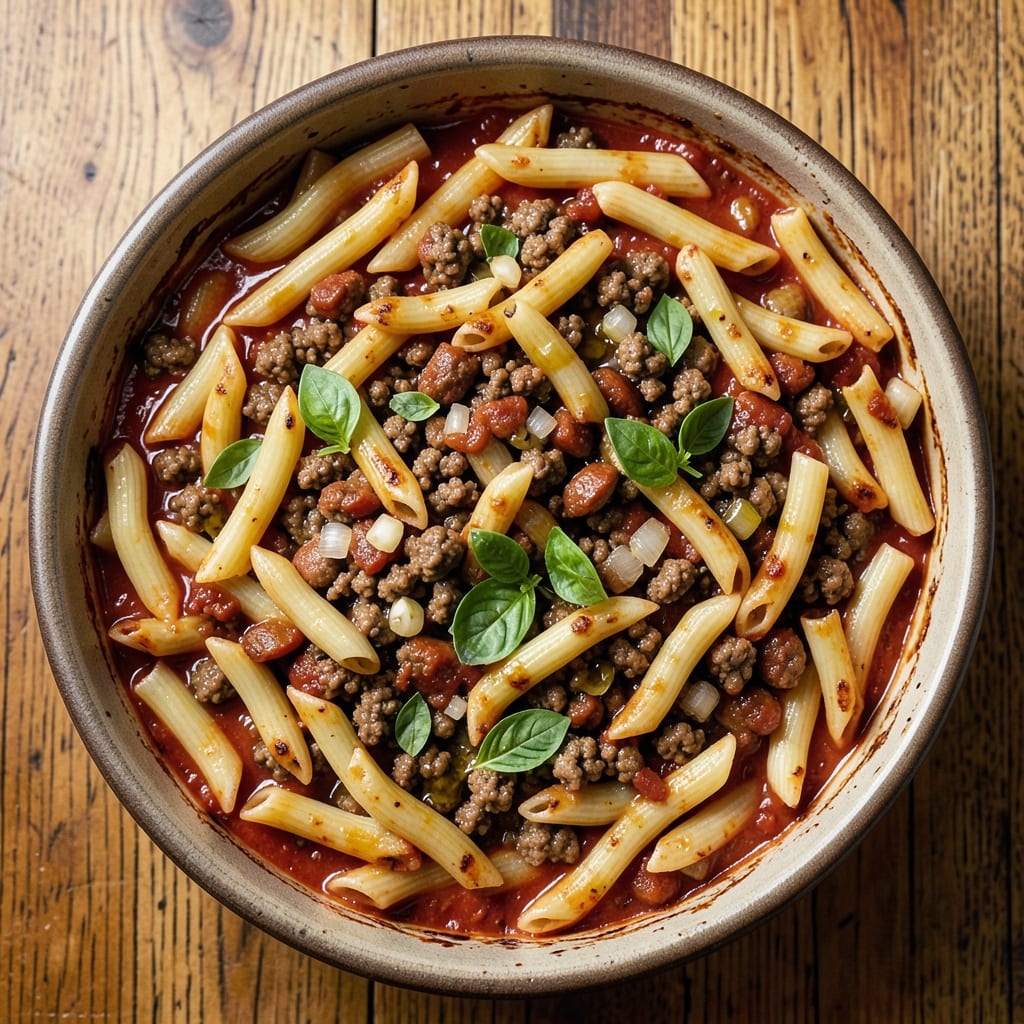
This baked ziti recipe with ground beef and sausage delivers the ultimate Italian-American comfort food experience—rich, hearty layers of pasta, meaty goodness, and melted cheese that'll have everyone asking for seconds. I perfected this version after years of testing, balancing bold Italian flavors with that perfect cheesy, saucy texture we all love. The secret lies in browning the meat properly and letting the cheese stretch just right during baking.
What makes this recipe special is the combination of ground beef and Italian sausage—two proteins that work together beautifully to create deep, savory flavor. We're talking tender, al dente pasta coated in a rich marinara sauce, layered with meat and cheese, then baked until bubbly and golden. This isn't just dinner; it's a flavor experience that transforms any weeknight into a cozy family gathering.
The result is restaurant-quality baked ziti with crispy cheese on top and perfectly tender pasta underneath—every bite delivers that satisfying combination of meaty, cheesy, and saucy goodness. The aroma alone will have your whole house smelling like an Italian trattoria, and the leftovers? Even better the next day when the flavors meld even more.
Serve with garlic bread and a simple salad for the full Italian-American experience. Let's get cooking—this recipe is about to become your new weeknight staple.
Ingredients for baked ziti recipe with ground beef and sausage
Sixteen ingredients, one unforgettable Italian-American masterpiece waiting in your baking dish.
| Ingredient | Amount | Notes |
|---|---|---|
| Ziti Pasta 🍝 | 1 ½ lb | Medium or ridged shape preferred |
| Ground Beef 🥩 | 1 ½ lb | 80/20 fat ratio for flavor |
| Italian Sausage 🌭 | 1 lb | Sweet or spicy, casings removed |
| Onion 🧅 | 1 whole | Yellow or red, finely chopped |
| Garlic Cloves 🧄 | 6 cloves | Fresh, minced for sauce |
| Marinara Sauce 🍅 | 2 ½ cups | Homemade or quality jarred |
| Ricotta Cheese 🧀 | 15 oz | Whole milk, not low-fat |
| Mozzarella Cheese 🧀 | 2 cups | Shredded, part-skim or whole milk |
| Parmesan Cheese 🧀 | ½ cup | Freshly grated, block preferred |
| Large Eggs 🥚 | 2 whole | Beaten for ricotta binding |
| All-Purpose Flour 🌾 | ¼ cup | For sauce thickening if needed |
| Olive Oil 🫒 | ½ cup | For browning meat |
| Salt 🧂 | 1 ½ tsp | Kosher or sea salt |
| Black Pepper 🌶️ | 1 tsp | Freshly ground preferred |
| Dried Basil 🌿 | 1 tsp | Or 2 tbsp fresh |
| Dried Oregano 🍃 | ½ tsp | Italian blend preferred |
The meat combo is non-negotiable here. Ground beef should be 80/20 fat ratio—it's what makes the sauce rich later. Italian sausage adds that smoky depth, and Trader Joe's or Whole Foods carry the best pre-cased options. For the onions, yellow or red work—just avoid sweet onions like Vidalia. The ricotta? Whole milk only—low-fat version gets rubbery. I always grab mine from the deli section at Costco when I'm doing a big batch, but any grocery store's ricotta tub works in a pinch. Look for bright color in the cheese—yellowish means it's fresh.
No Italian sausage? Substitute with extra ground beef plus a teaspoon of fennel seeds—it mimics the flavor surprisingly well. Fresh basil is ideal but dried oregano at half the amount works if you're short. The marinara can be jarred (I've used Rao's for years), but if you're making your own, San Marzano tomatoes are worth the splurge. For the ricotta mixture, egg whites instead of whole eggs keeps it lighter. The mozzarella? Pre-shredded is fine (just drain it first), but block cheese melts better. Want extra crispy top? Sprinkle a pinch of Diamond Crystal kosher salt before baking—it caramelizes beautifully.
This dish tastes even better the next day, so make extra if you can. Store leftovers covered in the fridge for 4-5 days—it reheats perfectly in the oven at 350°F for 15 minutes. For freezing, portion into individual servings and freeze for up to 3 months. The ricotta mixture can be prepped ahead and refrigerated for 2 days before assembling. Pasta stays al dente longer if you undercook it by 1 minute before baking—it finishes cooking in the oven.
Why You'll Love This Recipe
- One-Pan Magic: Honestly, I swear by this recipe—just brown the beef and sausage, toss in chopped onion and garlic, stir in the ziti, sauce, and cheese, then bake. No extra pots, no messy cleanup. That crispy top layer? Pure reward for minimal effort.
- Meat Lovers’ Dream: Between us, the combo of crumbled Italian sausage and ground beef gives this dish a hearty, savory punch that’s hard to beat. The sausage adds that smoky depth while the beef keeps it rich and satisfying—no bland pasta here.
- Leftovers That Beg for More: I make this on Sundays and it lasts me four days. The flavors actually improve after a night in the fridge (yes, really), and reheating? Just a quick zap in the microwave. My kids fight over the portions—proof it’s worth doubling.
- Budget-Friendly Feast: This recipe stretches a dollar without sacrificing flavor. Ground beef and sausage are affordable staples, and ziti is cheap but delivers that perfect chewy bite. Feed a crowd or save leftovers for lunch—either way, your wallet stays happy.
Step-by-step instructions for baked ziti with ground beef and sausage
Here's how to build layers of cheesy, meaty perfection that'll have everyone asking for seconds.
Brown the Meat Mixture for Deep Flavor
Heat the 0.5 cup olive oil in a large skillet over medium-high heat. Add the 1.5 lb ground beef and 1 lb Italian sausage, breaking it up with a wooden spoon. Cook for 8-10 minutes until the meat is browned and no longer pink, stirring occasionally to break up clumps.
Push the meat to one side of the skillet and add the 1 whole finely chopped onion. Cook for 3-4 minutes until softened. Stir in the 6 minced garlic cloves and cook for 30 seconds until fragrant. Season with 1.5 tsp salt, 1 tsp black pepper, 1 tsp dried basil, and 0.5 tsp dried oregano. The mixture should smell rich and aromatic—this is where all the flavor develops.
Prepare the Cheese Filling
In a medium bowl, combine the 15 oz ricotta cheese, 2 beaten large eggs, and 0.5 cup grated parmesan cheese. Mix gently with a spoon until just combined—don't overmix or the filling will become dense. The mixture should be thick but spreadable, like a soft dough.
Reserve 1 cup mozzarella cheese for topping later. Fold the remaining 1 cup mozzarella cheese into the ricotta mixture until evenly distributed. This cheese will melt beautifully between the pasta layers, creating that signature creamy texture we all love.
Cook and Assemble the Pasta Layers
Cook the 1.5 lb ziti pasta according to package instructions until al dente—about 2 minutes less than recommended. Drain and rinse briefly under cold water to stop the cooking process, then drain again thoroughly. The pasta should be hot but not steaming when you assemble.
In a large bowl, combine the cooked pasta, meat mixture, and 2.5 cups marinara sauce. Mix gently but thoroughly to coat all the pasta strands. The sauce should cling to the pasta, creating a cohesive filling that won't slide apart when baking.
Layer and Bake to Golden Perfection
Preheat your oven to 375°F. Lightly grease a 9x13-inch baking dish or similar size. Spread half of the pasta mixture in an even layer in the bottom of the dish. Sprinkle with half of the reserved 1 cup mozzarella cheese and half of the remaining 0.5 cup parmesan cheese.
Add the remaining pasta mixture on top, then sprinkle with the rest of the mozzarella and parmesan. The cheese should peek through the top layer—this ensures that beautiful golden crust when it bakes. Bake uncovered for 30-35 minutes until the top is bubbly and golden brown, and the edges are slightly crispy.
Rest and Serve with Confidence
Remove the baked ziti from the oven and let it rest for 10-15 minutes before serving. This resting time allows the layers to set slightly and makes it easier to slice without everything sliding out. The interior should be hot and bubbly, with melted cheese throughout.
Cut into squares and serve immediately. Each bite should deliver tender pasta, rich meat sauce, and that perfect blend of creamy ricotta and melted mozzarella. The top should be crispy in spots while still being soft enough to cut through easily. Leftovers reheat beautifully—just cover with foil and warm in the oven for 15-20 minutes at 350°F.
Pro Tips For Making Baked Ziti Recipe With Ground Beef And Sausage
- Brown the Meat Twice: Cook the ground beef and sausage separately—ground beef first on high heat until it loses its raw color, then push it aside and brown the sausage without mixing. The beef will reheat fine later, but the sausage stays juicier when it’s not steamed by the beef’s moisture. I learned this the hard way after serving dry sausage in my first batch.
- Salt the Pasta Water Like the Ocean: Throw in 2 tablespoons of salt per 4 quarts of water—yes, even if your pasta says "well-salted." The ziti needs to absorb flavor, and under-salted water means bland noodles that won’t hold up in the sauce. Trust me, you’ll taste the difference when you bite into that first forkful post-bake.
- Pre-Cook the Ziti Al Dente: Boil the ziti one minute less than the package says, then drain and toss it with a splash of pasta water and a pinch of oil. It’ll finish cooking in the oven, and you’ll avoid the soggy, gluey mess that happens when pasta overcooks in the sauce. (Your future self will thank you when you’re not scraping stuck ziti off the pan.)
- Layer Sauce, Not Pasta: Spread half the sauce on the bottom of the baking dish, then add a third of the pasta. Repeat with sauce, pasta, and top with the rest of the sauce—this guarantees every bite gets saucy, not just the top layer. I skip this and end up with dry ziti on the bottom every time.
Pro cooking tips for great baked ziti recipe with ground beef and sausage
Meat Browning Mastery
This is where the flavor magic happens—don't skip browning the meat! Cook the beef and sausage until deeply browned with crispy edges. I use a cast-iron skillet for maximum heat retention, and I never rush this step. The browning creates Maillard reaction flavors that transform ordinary ground meat into something extraordinary. If your meat isn't browned, your ziti will taste flat and one-dimensional. 🔥
Cheese Layering Secrets
For that perfect creamy texture, distribute the cheese strategically. Sprinkle mozzarella between layers and on top—this creates pockets of melted cheese throughout. I always reserve some mozzarella for the final topping to ensure a golden, crispy crust. Pro tip: Use part-skim mozzarella for better melting, but don't skimp on the parmesan—it adds depth that pre-shredded can't match. The ricotta mixture should be spread evenly but not forced—let it settle naturally between pasta layers.
Pasta Cooking Precision
Cook your ziti pasta al dente but with 1-2 minutes less than package instructions. It'll finish cooking in the oven, and overcooked pasta turns mushy in baked dishes. I always rinse it briefly under cold water after draining to stop cooking immediately—this prevents a gummy texture. Hot pasta holds sauce better than room-temperature pasta, so assemble while it's still piping hot for maximum flavor absorption. 💫
Baking Time Variations
Your oven's hot spots matter! Rotate the baking dish halfway through cooking to ensure even browning. If the top browns too quickly, tent loosely with foil for the last 10 minutes to prevent burning. I test doneness by checking the internal temperature—it should reach 160°F at the center. For extra crispy edges, bake 5 minutes uncovered at the end. Remember: The cheese will continue melting as it rests, so pull it out when the top looks golden but still slightly soft.
Resting Like a Pro
This is where home cooks fail most often. Let your ziti rest for 10-15 minutes before serving—it's not optional! This resting time lets the layers set, making it easier to slice cleanly without a messy slide-out. I promise you, the first time you cut into freshly baked ziti without resting will be a lesson in why this step matters. The flavors also meld more beautifully during this time, creating that restaurant-quality taste we all crave. 💪
Equipment Upgrades Worth It
Invest in a 9x13-inch glass baking dish—it conducts heat better than metal and lets you see the progress. I use Pyrex because it's durable and creates that perfect golden crust. For browning meat, a 12-inch cast-iron skillet is my go-to—it retains heat like nothing else. And trust me, a good pasta server makes serving this dish feel like a five-star restaurant experience. These tools might seem like extras, but they make all the difference in the final result. 🍽️
Nutrition facts
Frequently asked questions
Can I use penne instead of ziti?
Penne works beautifully and has a similar shape that holds sauce well. For best results, use 1.5 lb penne pasta and cook it 1 minute less than package instructions since it'll finish cooking in the oven. The slightly tubular shape gives it a nice texture contrast with the creamy ricotta filling.
How can I make this vegetarian?
Swap the meat for 1.5 lb mushrooms (cremini or portobello) sautéed with garlic and onions, plus 1 cup lentils or 1 block crumbled firm tofu for protein. Use 1 tbsp soy sauce or 1 tsp smoked paprika to mimic the meaty flavor. The ricotta and cheese layers will still deliver that satisfying comfort food experience!
Why did my baked ziti get watery?
Watery ziti usually means either overcooked pasta or too much sauce. Next time, cook pasta 1 minute less than package instructions and drain it well. Also check your sauce—if it's too thin, simmer it uncovered for 5-10 minutes to reduce. The ricotta mixture should be thick but spreadable, not soupy.
Can I make this ahead of time?
This dish actually tastes better the next day! Assemble it completely (including cheese topping) and refrigerate for up to 24 hours before baking. For freezing, bake first, then cool completely, wrap tightly in foil, and freeze for up to 3 months. To reheat, bake at 350°F for 20-25 minutes covered with foil.
What's the best way to reheat leftovers?
Oven reheating preserves the best texture. Cover with foil and bake at 350°F for 15-20 minutes until bubbly. For microwave reheating, cover with a damp paper towel and heat in 30-second intervals**, stirring between each, until warmed through. The oven method gives you that crispy cheese top again!