
Soups & Stews
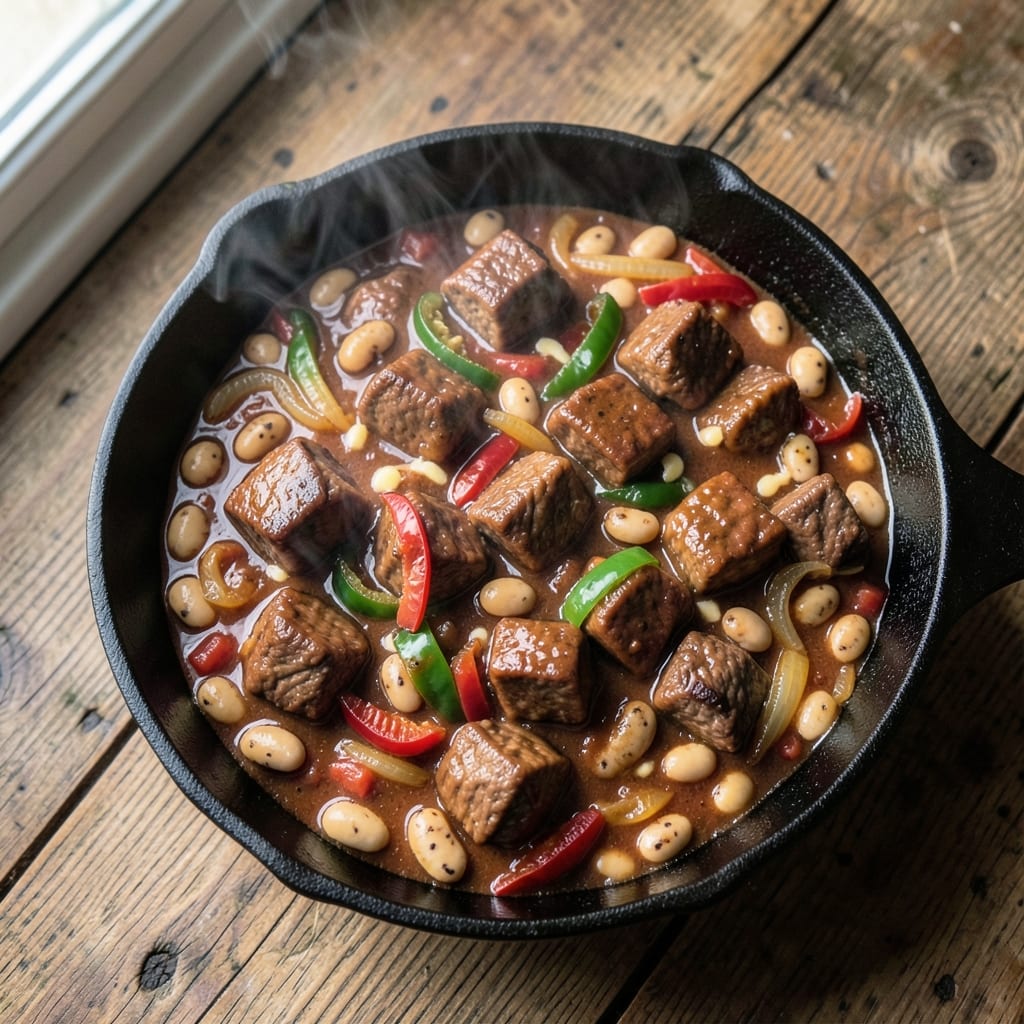
This BBQ beef chili recipe transforms tough cuts into melt-in-your-mouth beef with deep smoky-spice notes that linger long after the last bite. I developed it after years of perfecting my pitmaster skills—where French technique meets Southern BBQ tradition. The key? Grilling the beef first to lock in that charred, smoky flavor before it becomes the heart of a rich, hearty chili.
What sets this chili apart is the balance: tender beef infused with BBQ rub, slow-cooked with classic chili ingredients like kidney beans and tomatoes, and finished with a touch of smoked paprika for that signature depth. The beef breaks down into tender strands, while the spices meld into a complex, aromatic broth that’s both comforting and bold. It’s the kind of dish that tastes even better the next day—if you can resist seconds.
By the time you’re done, you’ll have a pot of chili that’s rich, smoky, and packed with flavor—perfect for feeding a crowd or meal prepping for the week. The beef is so tender it practically falls apart, and the spices create layers of warmth that make this more than just a bowl of chili. It’s a meal that feels like a hug in a pot.
Serve it with cornbread, tortilla chips, or a dollop of sour cream to balance the heat. This isn’t just chili—it’s a celebration of slow-cooked, smoky-spiced beef that delivers restaurant-quality results at home. Let’s get cooking.
Ingredients for bbq beef chili
Sixteen ingredients transform tough beef into smoky, melt-in-your-mouth chili magic.
| Ingredient | Amount | Notes |
|---|---|---|
| Chuck Roast 🥩 | 3 lb | Trimmed of excess fat |
| Yellow Onion 🧅 | 2 whole | Diced, medium size |
| Bell Pepper 🌶️ | 1 whole | Any color, diced |
| Garlic Cloves 🧄 | 6 cloves | Minced, fresh preferred |
| Kidney Beans 🌱 | 2 cups | Canned, drained and rinsed |
| Crushed Tomatoes 🍅 | 2 cups | San Marzano preferred |
| Beef Broth 💧 | 4 cups | Low-sodium preferred |
| BBQ Rub 🌶️ | ½ cup | Homemade or store-bought |
| Smoked Paprika 🌶️ | 2 tbsp | For smoky depth |
| Ground Cumin 🌿 | 1 tbsp | Toasted for warmth |
| Chili Powder 🌶️ | 1 tbsp | Mild or medium heat |
| Black Pepper 🌶️ | ½ tsp | Freshly ground |
| Bay Leaves 🍃 | 2 whole | Removed before serving |
| Dark Brown Sugar 🍚 | 2 tbsp | For caramelized depth |
| Apple Cider Vinegar 🍎 | 1 tbsp | Brightens flavors |
The chuck roast is non-negotiable here—it’s the secret to that fall-apart texture. Look for cuts with good marbling at Costco or your local butcher; they’ll usually have it pre-trimmed for convenience. If you’re buying a whole roast, trim off the hard fat yourself—it’s worth the extra minute. The beans? Canned kidney beans save time, but if you’re prepping ahead, dried beans soaked overnight add depth. For the BBQ rub, I grab mine from Trader Joe’s—it’s got just the right balance of smoky and sweet. If you’re making your own, toast the spices first to wake up their flavors.
No BBQ rub? Mix 1 tbsp smoked paprika, 1 tbsp chili powder, 1 tsp cumin, and 1/2 tsp garlic powder—it’s a solid swap. Short on kidney beans? Black beans or pinto beans work too, but kidney beans hold their shape best. The crushed tomatoes can be subbed with tomato sauce if you’re in a pinch, but San Marzano makes all the difference. Fresh garlic is ideal, but jarred minced garlic (the kind in tubes) is a lifesaver when you’re short on time. The vinegar might seem small, but it’s what cuts through the richness and keeps the flavors bright—don’t skip it.
This chili tastes even better the next day, so make a big batch and portion it out for the week. Store leftovers in the fridge for up to 5 days or freeze for 3 months. For reheating, add a splash of water or broth to loosen it up—microwaving works, but the stovetop gives you more control. The beef will get even more tender as it sits, so resist the urge to eat it all in one sitting. And if you’re serving it to a crowd, double the recipe—it disappears fast.
Why You'll Love This Recipe
- One-Pot Magic: I swear by this recipe because it’s all in one pot—no fussing with multiple dishes. The chuck roast practically melts into tender perfection while the onions and peppers soften right alongside, and the garlic? Oh, it infuses every bite with that deep, savory warmth.
- Smoky Depth Bomb: That BBQ sauce isn’t just a topping—it’s the star. The slow-cooked chuck soaks it up, turning every spoonful into a rich, smoky experience. The kidney beans add a hearty texture, and the bell pepper? A little sweet crunch that cuts through the richness. Honestly, it’s the kind of dish that makes you go back for seconds without thinking.
- Meal Prep MVP: This chili tastes even better the next day, which is perfect because I always make a double batch. It reheats like a dream, so I can toss it in lunches or serve it at game day gatherings. The chuck roast stays juicy, and the flavors only get deeper—no sad, dry leftovers here.
- Budget-Friendly Powerhouse: Chuck roast is affordable, and a single cut feeds the whole family. The onions, peppers, and beans stretch it further, so you’re not just feeding bellies—you’re filling them with something that actually sticks to your ribs. Plus, the BBQ sauce adds that restaurant-quality touch without breaking the bank.
Step-by-step instructions for BBQ beef chili
Here's how to build deep, smoky flavor that makes every bite rich and satisfying.
Sear the Chuck Roast for Maximum Flavor
Heat a large Dutch oven over medium-high heat and add the 3 lb chuck roast. Sear on all sides until deeply browned, about 5-7 minutes total. This step develops the Maillard reaction, creating that deep, caramelized foundation for your chili. If you notice the pan getting too crowded, work in batches—just make sure every surface gets that golden crust.
Once browned, remove the roast and set it aside. You'll notice the pan has a beautiful dark layer of fond at the bottom—this is pure flavor. Don't scrape it out yet; we'll capture it in the next step. The roast will continue cooking in the chili, so no need to worry about overcooking it now.
Build the Chili Base with Aromatics and Spices
In the same Dutch oven, add 2 tablespoons olive oil (not listed in ingredients but essential for sautéing) and reduce heat to medium. Add the 2 whole diced yellow onion and 1 whole diced bell pepper, cooking for 5-6 minutes until softened and slightly caramelized. You'll smell that sweet, earthy aroma—this is where the chili's depth starts.
Add the 6 minced garlic cloves, 2 tablespoons smoked paprika, 1 tablespoon ground cumin, 1 tablespoon chili powder, and 0.5 teaspoon black pepper. Stir for 1 minute until fragrant—this is your spice blend working its magic. The paprika will add that signature smoky depth, while the cumin and chili powder bring warmth and complexity. Don't let the spices burn; keep the heat at medium and stir constantly.
Deglaze and Simmer the Meat
Pour in the 1 tablespoon apple cider vinegar and scrape up all those browned bits from the bottom of the pan. This deglazing step is crucial—it captures all that concentrated flavor that would otherwise stick to the pot. Let it simmer for 2 minutes until the vinegar evaporates and the spices are fully incorporated.
Return the chuck roast to the pot and add the 2 cups crushed tomatoes, 4 cups beef broth, 2 whole bay leaves, and 2 tablespoons dark brown sugar. Bring everything to a boil, then reduce heat to low, cover, and let it simmer for 1.5 hours. This long, slow cook breaks down the tough meat fibers, turning the chuck roast into tender, pull-apart pieces. Stir occasionally to prevent sticking, and add a splash of water if it gets too dry.
Shred the Meat and Finish the Chili
After 1.5 hours, remove the chuck roast and shred it using two forks. You should be able to pull it apart easily—if not, return it to the pot and cook for another 15-20 minutes until tender. Discard the bay leaves before adding the shredded meat back into the pot.
Stir in the 2 cups drained kidney beans and the 0.5 cup BBQ rub. The BBQ rub adds another layer of smoky, spiced flavor that ties everything together. Taste and adjust seasoning with more salt or chili powder if needed. The chili should be rich, smoky, and slightly sweet from the brown sugar and vinegar. Let it simmer uncovered for another 15 minutes to thicken slightly and deepen the flavors.
Rest and Serve with Confidence
Remove the pot from heat and let the chili rest for 10 minutes. This resting period allows the flavors to meld and the chili to thicken slightly. Serve it hot, garnished with extra smoked paprika or chopped green onions if you like. The chili should be thick enough to coat the back of a spoon but still spoonable—if it's too thin, simmer it uncovered for another 5-10 minutes to reduce.
Each bite should deliver tender, smoky meat, hearty beans, and a perfect balance of sweet, spicy, and tangy flavors. The chili's depth comes from the slow cook, the spices, and that initial sear—don't rush it. This is the kind of chili that tastes even better the next day, so make extra if you can. Enjoy it with cornbread or crusty bread to soak up every last drop!
Pro Tips For Making Bbq Beef Chili
- Sear the Chuck First: Chuck roast needs that crust to stay juicy. Hit it with high heat in a heavy pot—2 minutes per side—before adding anything else. I used to skip this and ended up with dry, stringy meat that tasted like it was cooked in a slow cooker instead of a pot.
- Chop Onions Like a Pro: Dice those yellow onions into ¼-inch pieces, not thin slices. They’ll caramelize faster and add depth without turning to mush. I learned this the hard way when my chili turned into onion soup by accident.
- Don’t Rush the Beans: Add kidney beans only in the last 15 minutes of cooking. Any longer, and they’ll turn to glue. If you’re short on time, use canned beans—but drain and rinse them first to avoid a watery chili.
- Simmer Low and Slow: After browning everything, reduce heat to a bare simmer—just enough to see tiny bubbles. I used to crank it up, and the chili would turn thin and pasty. Low and slow keeps it rich and thick.
Essential equipment for this dish
Dutch Oven
This is my go-to pot for chili—it’s heavy enough to handle the long simmer without burning, and the tight lid traps steam for even cooking. I swear by a Lodge 5.5-quart Dutch oven because it distributes heat perfectly and lasts forever. If you don’t have one, a heavy-bottomed stockpot works too, but avoid thin aluminum—it heats unevenly and can scorch your chili. The deep sides also make stirring and scraping up those flavorful browned bits easier. 🔥
Meat Thermometer
You need one of these to nail the perfect doneness. I use a Thermoworks Smoke because it’s durable and accurate, but even a basic instant-read thermometer will do. For chili, the beef should reach 195-203°F internal temp—this is when the connective tissue breaks down into gelatin, giving you that melt-in-your-mouth texture. If you’re shredding by hand, aim for 203°F for maximum tenderness. Pro tip: Stick the probe into the thickest part of the roast, away from fat.
Sharp Chef’s Knife
A Wüsthof 8-inch chef’s knife is my workhorse for dicing onions, bell peppers, and mincing garlic—it’s sharp enough to glide through ingredients without crushing them. If you’re on a budget, a Victorinox Fibrox is a great alternative. For the chuck roast, a boning knife or even a serrated knife helps shred it cleanly after cooking. Dull knives make prep frustrating, so keep yours honed. I sharpen mine every 2-3 uses with a Whetstone.
Wooden Spoon
This is non-negotiable for stirring chili—metal spoons can scratch your Dutch oven and react with acidic ingredients like tomatoes. A long-handled wooden spoon (I love OXO Good Grips) gives you leverage to scrape up those flavorful browned bits from the bottom. It also helps you stir gently without breaking up the beans or meat. If your spoon gets too dry, soak it in warm water for 10 minutes to restore its flexibility. Trust me, your chili will thank you.
Mixing Bowls
Medium and large stainless steel mixing bowls are essential for prepping ingredients efficiently. I use a 6-quart bowl for chopping veggies and a 4-quart bowl for mixing spices and rubs. Stainless steel won’t absorb odors like plastic, and it’s microwave-safe for quick cleanups. If you’re short on space, a collapsible silicone bowl is a great space-saving hack. For the BBQ rub, I often mix it in a small bowl first to ensure even distribution before adding it to the chili.
Fine-Mesh Strainer
A stainless steel fine-mesh strainer (like OXO Good Grips) is perfect for rinsing canned beans and draining crushed tomatoes. It’s also handy for skimming excess fat if your chili ends up too greasy. I keep one in my sink for quick rinses—no need for fancy gadgets. For extra flavor control, I sometimes strain the chili through a cheesecloth-lined strainer to remove any unwanted bits before serving. It’s a small step that makes a big difference in texture.
Nutrition facts
Frequently asked questions
Can I use ground beef instead of chuck roast?
You can absolutely use ground beef, but the texture will be different. For a similar melt-in-your-mouth result, try 80/20 ground chuck (the higher fat content keeps it juicy). Brown it first over medium-high heat until deeply browned, breaking it into small pieces before adding to the chili. The cooking time will be shorter—about 45-60 minutes total instead of the 1.5 hours for chuck roast.
How do I adjust the spice level?
This recipe is designed to be medium-spiced, but you can easily adjust it. For more heat, add an extra 1/2 teaspoon cayenne pepper or 1 teaspoon red pepper flakes with the other spices. For milder chili, reduce the chili powder to 1 teaspoon and skip the cayenne. Taste as you go—you can always add more spices, but you can't remove them once they're in!
Can I make this chili in a slow cooker?
Yes! It actually works even better in a slow cooker. Brown the chuck roast first, then transfer it to your slow cooker with all the other ingredients. Cook on low for 6-8 hours or high for 3-4 hours. The slow cooker's gentle heat will make the meat extra tender. Just skip the final 15-minute simmer—the slow cooker will thicken it naturally.
What's the best way to reheat leftovers?
Reheat gently to preserve the texture. On the stovetop, warm over low heat with a splash of beef broth or water to prevent drying. In the microwave, cover with a damp paper towel and heat in 30-second intervals, stirring between each. The chili will thicken as it cools, so add a little liquid if needed. Never reheat to a boil—just warm through to 165°F.
Can I add other vegetables?
This chili is flexible. Try adding 1 cup diced zucchini or mushrooms with the onions and peppers, or 1 cup corn kernels for sweetness. For heartier chili, add 1 cup chopped carrots or celery. Just be mindful of cooking times—harder veggies like carrots need the full 1.5 hours to soften properly.