
Main Courses
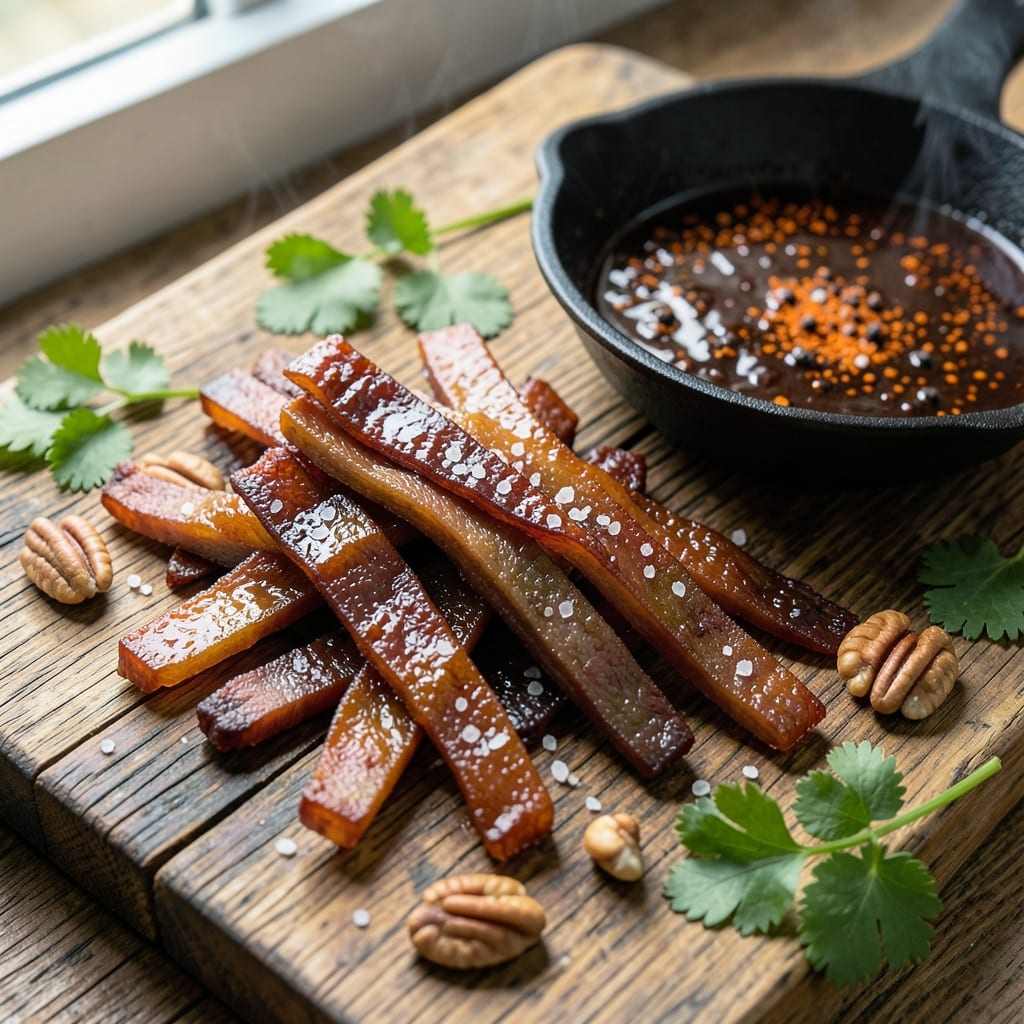
This BBQ flavored beef jerky recipe transforms tough cuts into tender, smoky strips with a perfect balance of sweet and tangy flavors—no heatwave required. 🔥 The secret lies in a slow cure that tenderizes the meat while infusing it with deep, caramelized BBQ notes, creating a texture that's crispy on the edges and chewy inside. I developed this method after years of perfecting my pitmaster rubs, ensuring every bite delivers that classic BBQ taste without the smoker's wait.
The process starts with a simple yet precise curing blend of brown sugar, smoked paprika, and a touch of liquid smoke—no fancy equipment needed beyond a dehydrator or even your oven. What makes this recipe stand out is the two-stage drying method: first to remove moisture, then a final crisp to lock in that signature jerky crunch. It's the kind of project that rewards patience with a product that keeps well for weeks, making it perfect for camping trips or snacking at home.
By the time you're done, you'll have restaurant-quality jerky that rivals store-bought versions but with layers of flavor you won't find in any package. The sweetness from the brown sugar caramelizes slightly during drying, while the smoked paprika adds that unmistakable BBQ depth. Each strip is tender yet firm, with a crisp edge that satisfies every time you take a bite.
This recipe works with any lean cut of beef, from flank steak to top round, and scales easily for batch cooking. Whether you're a pitmaster looking to expand your skills or a home cook craving a smoky snack, this method delivers professional results with minimal fuss. Let's get started on your first batch!
Ingredients for bbq flavored beef jerky
Lean beef, smoky spices, and a touch of sweetness—everything you need for restaurant-quality jerky at home.
| Ingredient | Amount | Notes |
|---|---|---|
| Lean Beef (Top Round or Flank Steak) 🥩 | 1 ½ lb | Thinly sliced against grain |
| Brown Sugar 🍯 | ½ cup | Light or dark variety |
| Smoked Paprika 🌶️ | 2 tbsp | For authentic BBQ depth |
| Liquid Smoke 🔥 | 1 tbsp | Adjust for smokiness |
| Kosher Salt 🧂 | 1 ½ tbsp | Diamond Crystal preferred |
| Black Pepper 🌶️ | 1 tsp | Freshly ground preferred |
| Garlic Powder 🧄 | 1 tsp | Fresh ground if possible |
| Onion Powder 🧅 | 1 tsp | For subtle sweetness |
| Cayenne Pepper 🔥 | ½ tsp | Adjust for heat preference |
| White Vinegar 🍶 | ¼ cup | For tenderizing |
| Dehydrator or Oven 🔥 | 1 whole | 165°F/74°C for dehydrator |
| Plastic Bags 👜 | 2 whole | Gallon-size for curing |
The beef cut matters most here. Top round or flank steak are ideal—they're lean but still flavorful. Slice against the grain for that chewy-yet-tender texture. I always grab mine from Costco when it's on sale, but any grocery store has it. Look for cuts with good marbling—just a little fat keeps the jerky from drying out too fast. If you're using pre-sliced jerky meat, skip the slicing step. The spices? Penzeys or the bulk bins at Whole Foods have the best quality, but regular grocery store brands work fine too.
No liquid smoke? Smoked salt at double the amount gets you close. Short on vinegar? Lemon juice works too, but it'll add a slightly different tang. The brown sugar caramelizes during drying, so don't worry if you use a little less—it'll intensify. For extra smokiness, add 1/4 tsp of chipotle powder. If you're sensitive to heat, cut the cayenne to 1/4 tsp. The plastic bags? Gallon-size Ziploc freezer bags are perfect—they seal tight and take up less space than those big curing bags. Poke holes with a fork if you're not using vacuum-sealed ones.
This jerky keeps for 3-4 weeks in the fridge or 6 months in the freezer. I store mine in glass jars with parchment paper between layers to keep it crisp. For camping, use vacuum-sealed bags to prevent moisture. The first batch is always the best—once you've got the hang of it, you'll want to make it every few weeks. Pro tip: Label your bags with the date so you know what's freshest.
Why You'll Love This Recipe
- Five-Ingredient Magic: I swear by this combo—lean beef, a dusting of brown sugar, and just a whisper of liquid smoke turn something simple into a smoky, sweet sensation. No fancy equipment, just a knife and a dehydrator (or even your oven on low).
- Smoky Sweet Bite: That balance of brown sugar’s caramel depth and smoked paprika’s warmth? It’s the kind of flavor that sticks with you. Honestly, I’ve caught myself sneaking bites straight from the bag when I think no one’s looking.
- Grab-and-Go Power: Pack it in lunchboxes, toss it in backpacks, or keep a stash in your desk drawer. It’s my go-to for road trips, camping, or when I forget to pack a real lunch. (Yes, even on a Tuesday night.)
- Budget-Friendly Protein: A pound of flank steak stretches farther than you’d think, and the spices cost pennies. Between us, this is how I feed my family hearty, satisfying snacks without breaking the bank—or the calorie count.
Step-by-step instructions for BBQ flavored beef jerky
Here's how to transform lean beef into smoky, sweet jerky with perfect texture every time.
🔪 Step 1: Prep the Beef for Maximum Flavor
Start by slicing the 1.5 lb lean beef against the grain into strips about ¼-inch thick. I use a sharp boning knife for clean cuts—this prevents the jerky from becoming chewy. Place the slices in a large bowl and pour in the 0.25 cup white vinegar. This tenderizes the meat and helps develop deep flavor.
Let the beef marinate for 15 minutes while you prepare the dry rub. The vinegar will start breaking down the muscle fibers, making the jerky more tender. Don't skip this step—it's what makes the difference between tough jerky and melt-in-your-mouth perfection.
👨🍳 Step 2: Create the Signature BBQ Rub
In a small bowl, combine the 0.5 cup brown sugar, 2 tbsp smoked paprika, 1.5 tbsp kosher salt, 1 tsp black pepper, 1 tsp garlic powder, 1 tsp onion powder, and 0.5 tsp cayenne pepper. Mix thoroughly until all the spices are evenly distributed through the sugar.
This is where the magic happens—the smoked paprika gives that authentic BBQ depth, while the brown sugar adds just enough caramelized sweetness. I like to press the spices into the meat rather than just sprinkling, so they stick better during the drying process. Add the 1 tbsp liquid smoke to the mixture and stir well.
🥘 Step 3: Coat and Cure the Beef
Drain the beef and pat it dry with paper towels. Transfer the meat to the 2 whole plastic bags and add the BBQ rub mixture. Seal the bags and massage the spices into the beef for 2-3 minutes until every piece is well coated. This ensures even flavor distribution and maximum bark development.
Place the sealed bags in the refrigerator and let them cure for 12-24 hours. The longer it cures, the more tender and flavorful the jerky will be. I usually do this overnight—it's hands-off and worth the wait. The cold temperature helps the spices penetrate deeply into the meat.
🔥 Step 4: Dry to Perfect Texture
Preheat your dehydrator to 165°F or set your oven to 175°F with the door slightly ajar for airflow. Arrange the beef strips on dehydrator trays or oven racks, making sure they don't overlap. This prevents uneven drying and ensures crispy edges.
Dry the jerky for 4-6 hours, checking periodically. You want it to be completely dry with no moisture remaining—it should snap when bent. If using an oven, prop the door open with a wooden spoon to allow moisture to escape. The jerky is done when it's firm to the touch and no longer sticky.
⏰ Step 5: Cool and Store for Maximum Freshness
Let the jerky cool completely on the trays before transferring it to an airtight container. I like to store mine in a vacuum-sealed bag if possible—this preserves the flavor and texture for up to 2 weeks at room temperature. If you're not using a vacuum sealer, a regular container with a tight lid works fine.
Here's the thing—properly dried jerky should be crispy but not brittle. If it breaks easily, it's overdone. If it's still flexible, give it another hour. The perfect jerky has that satisfying snap when you bend it, with a smoky-sweet flavor that lingers. Enjoy your homemade BBQ jerky with no heatwave in sight!
Pro Tips For Making Bbq Flavored Beef Jerky
- Trim Thin, Not Thick: I learned this the hard way—jerky needs to be ¼-inch thick max for even drying. Thicker slices? They’ll stay chewy no matter how long you dehydrate. Use a sharp knife and slice against the grain for that perfect tender bite. ---
- Salt First, Then Wait: Sprinkle kosher salt before applying the BBQ rub and let the meat sit for 15 minutes. This draws out moisture so the sugar and smoked paprika stick like glue. Skip this, and your jerky turns out sticky or unevenly flavored. ---
- Liquid Smoke Timing Matters: Add liquid smoke last, right before dehydrating—not during marinating. Too early, and it burns off, leaving just a faint smoky ghost. A few drops at the end? That’s where the real depth comes from. ---
- Dehydrate at 160°F: Crank the dehydrator to 160°F (not the max setting). Hotter temps = rubbery jerky. Check slices at 4 hours—if they’re dry but still slightly pliable, they’re done. Rigid? Overdone. Flexible? Needs more time.
Make-ahead tips for bbq flavored beef jerky
Batch Prep Strategy
Plan your jerky-making sessions around your schedule—I like to make a 2-lb batch every Sunday so I always have fresh snacks for the week. Double the recipe and split it between two dehydrator trays or oven racks for even drying. I use quart-sized freezer bags for curing to save space in my fridge. Label each bag with the date so you can track freshness. 📅
Freezer Storage Hacks
For long-term storage, freeze your jerky in vacuum-sealed bags or wrap individual pieces in parchment paper before freezing. I keep a dedicated freezer bin just for jerky—it lasts 6 months without losing texture. When you're ready to eat, let it thaw at room temperature for 1-2 hours before enjoying. The flavor actually intensifies after freezing! ❄️
Portion Control Tips
Pre-portion your jerky into single-serving bags before storing to make snacking convenient. I use 1-ounce portions per bag—perfect for a quick energy boost. Store these in the fridge for up to 2 weeks or freeze for 3 months. For camping trips, pack jerky in resealable plastic bags with a small packet of dried fruit for a balanced trail mix. 🥾
Reheating for Maximum Crisp
If your jerky loses its crispness, revive it by heating in a 200°F oven for 5-10 minutes on a wire rack. This restores the snap without making it rubbery. I also like to warm jerky in a skillet over medium heat for 1-2 minutes—it gets slightly crispy around the edges and smells amazing. Never microwave jerky—it'll turn soggy and lose all its texture. 🔥
Gift-Worthy Packaging
For a thoughtful gift, package jerky in small glass jars with a ribbon and a handwritten note. I add a wooden skewer through the lid for easy serving. For bulk gifts, use cellophane bags tied with twine and a custom label. These make great hostess gifts or thank-you presents—they're always a hit at potlucks! 🎁
Equipment Prep
Before your first batch, clean your dehydrator trays or oven racks thoroughly with hot soapy water to remove any residue. I like to line the trays with parchment paper for easy cleanup. If using an oven, place a wire rack on top of the baking sheet to allow airflow. This prevents soggy jerky and ensures even drying. Keep a small fan nearby to help circulate air if your dehydrator has poor airflow. 💨
Nutrition facts
Frequently asked questions
Can I use venison or other game meat for this BBQ jerky?
Game meats like venison or elk work beautifully with this recipe. The leaner cuts actually benefit from the longer curing time. Just reduce the curing period to 12 hours max since game meat can become too tender. Use the same spices but cut the salt slightly (1 tbsp) as game meat often has more natural sodium.
Why does my jerky turn out tough instead of tender?
This usually happens when beef isn't sliced against the grain or over-dried. Always cut strips ¼-inch thick and arrange them single-layer on trays. Check for doneness by bending - it should snap but not break. If using an oven, keep the door slightly open to maintain 175°F consistently.
How can I make this jerky spicier? Double the cayenne to 1 tsp or add ½ tsp chipotle powder to the rub. For extra heat, mix in ¼ tsp crushed red pepper flakes directly into the curing marinade.
What's the best way to store jerky for camping?
Use vacuum-sealed bags or heavy-duty resealable plastic bags with all air removed. Store in a cool, dry place - it'll last 2-3 weeks at room temperature. For longer trips, freeze in 1-ounce portions wrapped in parchment paper. The vacuum sealing preserves both flavor and texture perfectly.
Can I make this jerky without liquid smoke?
Yes! Replace the 1 tbsp liquid smoke with 2 tbsp smoked salt or 1 tbsp chipotle powder** for smoky depth. The smoked paprika will still give BBQ flavor, but these alternatives add more pronounced smoke character. Adjust other spices if you notice the flavor becoming too salty.