
Main Courses
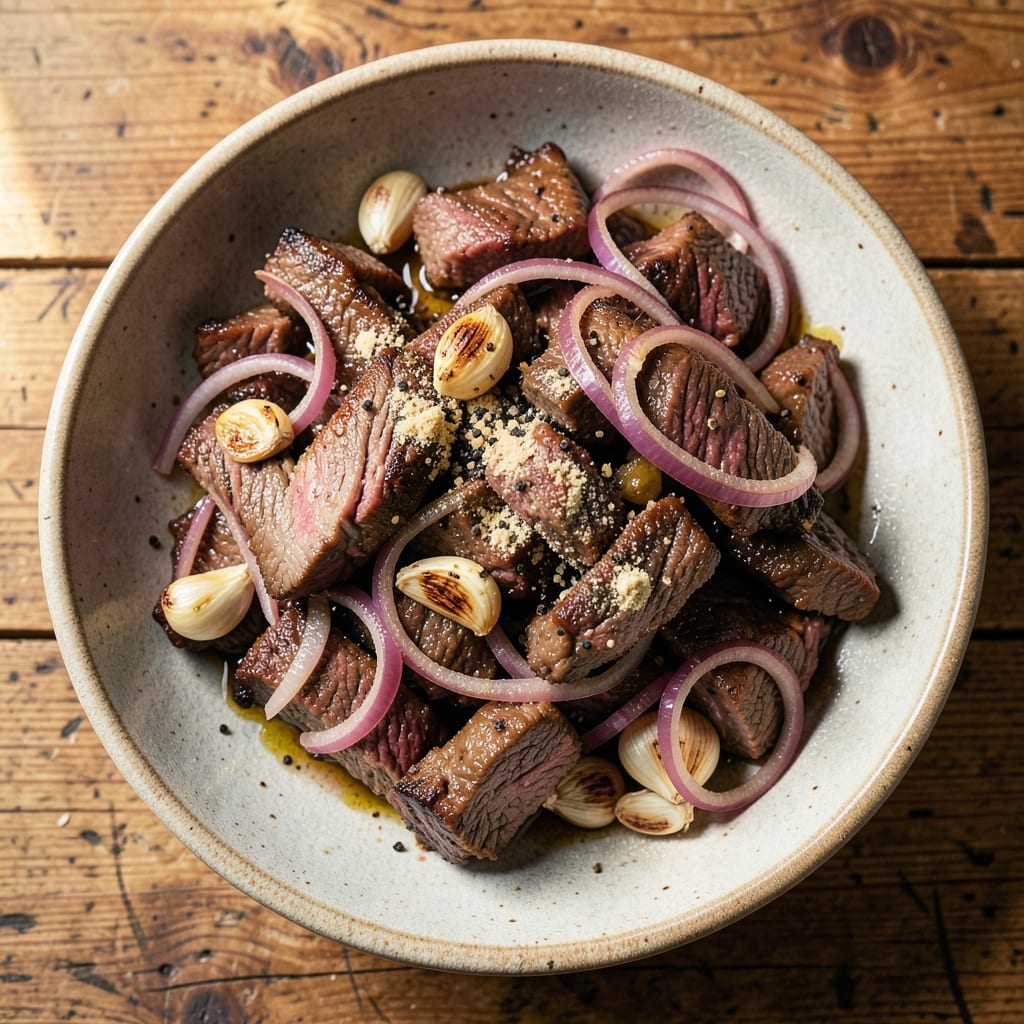
Transforming beef trimmings into a flavorful main course is one of those cooking skills that saves money and reduces waste—exactly what I needed after realizing my freezer was full of unused scraps. This method turns tough cuts into tender, pan-seared bites with rich gravy that elevates any meal, proving that every part of the animal deserves attention. The key lies in proper seasoning and slow cooking to break down fibers, ensuring every bite is packed with depth.
What makes this recipe stand out is its versatility—use the pan-seared bites as a standalone dish or chop them into ground beef for tacos, meatballs, or pasta sauce. The gravy, made from the same pan drippings, adds a luxurious touch that turns simple ingredients into something restaurant-worthy. It’s the kind of meal that makes you appreciate how far smart cooking can take you, even with humble ingredients.
By the time you’re done, you’ll have perfectly seasoned beef with caramelized edges and a gravy so rich it’ll have everyone asking for seconds. The best part? Leftovers transform effortlessly into beef stew, chili, or even homemade burgers—no waste, just creativity. This is the kind of recipe that changes how you think about cooking with what you have.
Whether you’re feeding a family or just yourself, this method delivers restaurant-quality results without the fuss. The technique is simple but effective, ensuring tender meat and flavorful gravy every time. Let’s turn those trimmings into a meal you’ll be proud to serve.
Ingredients for beef trimmings
Twelve simple ingredients transform tough beef trimmings into restaurant-worthy pan-seared bites with rich gravy.
| Ingredient | Amount | Notes |
|---|---|---|
| Beef Trimmings 🥩 | 1 ½ lb | Fat cap included, cut into 1-inch pieces |
| Yellow Onion 🧅 | 1 whole | Diced, medium size |
| Garlic Cloves 🧄 | 4 cloves | Minced, fresh preferred |
| All-Purpose Flour 🌾 | ¼ cup | For dredging, unsifted |
| Diamond Crystal Kosher Salt 🧂 | 1 ½ tsp | For seasoning, adjust to taste |
| Freshly Ground Black Pepper 🌶️ | ½ tsp | Coarsely ground |
| Smoked Paprika 🌶️ | 1 tsp | For depth, not sweet |
| Dried Thyme 🌿 | ½ tsp | Or 1 tsp fresh thyme |
| Beef Broth 🍲 | 1 ½ cups | Homemade or quality store-bought |
| Unsalted Butter 🧈 | 2 tbsp | Cold, for gravy |
| Fresh Parsley 🌿 | ⅛ cup | Chopped, for garnish |
| Extra-Virgin Olive Oil 🫒 | 2 tbsp | High heat tolerance |
The beef trimmings are the star here—look for cuts with good marbling at your butcher shop or grocery store meat counter. Costco or local butchers often have pre-cut trimmings at a discount, but if you're buying whole, ask for the fatty pieces—they render down beautifully for flavorful gravy. Freshness matters: if the trimmings smell sour or have grayish fat, skip them. For the flour, King Arthur or Gold Medal brands work best for dredging—they absorb moisture without getting gummy. The thyme can be fresh or dried, but if using dried, measure carefully—it's more potent than fresh.
No beef broth? Chicken or vegetable broth works in a pinch, though the flavor will be subtly different. Short on smoked paprika? Regular paprika plus a pinch of cayenne mimics the smokiness. The olive oil is non-negotiable for searing—avoid anything labeled 'light' or 'low smoke point. For the parsley, fresh is ideal, but dried works at one-third the amount if you're in a bind. The butter for the gravy should be cold and cubed—adding it directly from the fridge ensures proper emulsification. If you're making this ahead, prep the dredged beef trimmings and store them in the fridge for up to 24 hours before cooking.
This recipe rewards patience—the gravy tastes even better the next day as flavors meld. Store leftovers in an airtight container for 4-5 days in the fridge or freeze for 3 months. I like to portion the gravy separately so it can be reheated quickly for dipping. The pan-seared bites keep well too—reheat gently in a skillet with a splash of broth to restore moisture. For extra flavor, add a splash of red wine or beef stock when reheating. The fat from the trimmings makes this gravy naturally rich, so you can cut back on butter if you prefer a lighter version.
Why You'll Love This Recipe
- Uses Scraps, Not Waste: I swear by this recipe for turning beef trimmings into something worth eating—no fancy cuts needed. Just toss those leftover bits with onion and garlic, coat them in flour, and you’ve got a meal that doesn’t skimp on flavor.
- Crispy-Garlicky Magic: That simple flour crust? It’s the secret weapon—crispy on the outside, tender inside, with garlic cloves searing into the mix. Honestly, the smell alone makes my kitchen feel like a restaurant.
- Game for Meal Prep: Double the batch, store it in the fridge, and reheat it all week—no sad leftovers here. The flavor actually improves the next day, and it’s perfect for tossing into wraps or over rice.
- Budget-Friendly Powerhouse: Beef trimmings are cheap, and this recipe stretches them far. I’ll be real: it’s my go-to when I’m pinching pennies, and no one ever guesses it’s not a premium cut.
Step-by-step instructions for zero-waste beef trimmings
Turn scraps into flavorful bites with this simple, efficient method.
Season and Dredge the Beef Trimmings
In a large bowl, combine the 1.5 lb beef trimmings with the 1.5 tsp diamond crystal kosher salt, 0.5 tsp freshly ground black pepper, 1 tsp smoked paprika, and 0.5 tsp dried thyme. Use your hands to massage the seasoning into every piece, ensuring even coverage. This step is crucial for building deep flavor in the leaner cuts.
Next, transfer the seasoned trimmings to a shallow dish and dredge each piece in the 0.25 cup all-purpose flour, shaking off any excess. The flour creates a light crust that helps develop a golden sear and thickens the gravy later. Work quickly so the flour doesn't get gummy from moisture.
Sear the Trimmings in Olive Oil
Heat the 2 tbsp extra-virgin olive oil in a large skillet over medium-high heat until it shimmers but doesn't smoke. Add the dredged beef trimmings in a single layer, leaving space between pieces to prevent steaming. Cook undisturbed for 4-5 minutes until they develop a deep golden-brown crust on all sides.
Real talk: This is where the magic happens. The high heat caramelizes the natural sugars in the meat while rendering the fat. If the pan gets too crowded, work in batches to maintain even browning. Once all pieces are golden and slightly crispy, transfer them to a plate and set aside.
Sauté Aromatics for Flavor Base
In the same skillet (no need to wipe it clean), reduce heat to medium and add the 1 whole yellow onion and 4 cloves garlic cloves. Cook for 5-6 minutes until the onions soften and turn translucent, then deepen to golden brown. The garlic should be fragrant but not burned—this forms the aromatic foundation for the gravy.
Here's the thing—don't rush this step. The onions should release their sweetness while the garlic infuses its pungent flavor. If you smell burning, reduce heat immediately. The goal is a rich, caramelized base that will carry through to the finished dish.
Deglaze and Simmer the Gravy
Pour in the 1.5 cups beef broth, scraping up all the browned bits from the bottom of the pan with a wooden spoon. This deglazing captures all the flavor that would otherwise be lost. Bring to a gentle simmer and return the seared beef trimmings to the pan, spooning the sauce over them to coat evenly.
Cover the skillet and let it simmer for 10-12 minutes on low heat, stirring occasionally. The liquid should reduce slightly, creating a velvety sauce that clings to the beef. You're looking for a consistency where the sauce lightly coats the back of a spoon—this ensures each bite is flavorful without being soggy.
Finish with Butter and Garnish
Remove the skillet from heat and stir in the 2 tbsp cold unsalted butter, allowing it to melt and emulsify with the sauce. This final step adds richness and helps create a glossy finish. Taste and adjust seasoning with additional salt if needed—remember, the beef trimmings may have varying salt levels.
Divide the beef trimmings among plates, ladling the flavorful gravy over the top. Garnish with 0.125 cup chopped fresh parsley for brightness and color. Serve immediately with crusty bread or over mashed potatoes to soak up every last bit of that zero-waste gravy.
Pro Tips For Making Beef Trimmings
- Trim the Fat, Keep the Flavor: I learned this the hard way—skinning beef trimmings too aggressively strips away flavor. Leave a thin layer of fat (about 1/8-inch) on the cuts; it renders down and bastes the meat while cooking, keeping it juicy. If you’re dealing with extra-lean trimmings, add a splash of beef broth or olive oil to compensate.
- Dry the Meat First: Wet beef trimmings won’t brown worth a damn. Pat them thoroughly with paper towels before seasoning—this isn’t just about crispiness, it’s about getting that golden crust that makes the whole dish sing. I used to skip this, and my seared edges always looked sad and steamed instead of caramelized.
- Bloom the Garlic in Oil: After searing the beef, pull the pan off heat for 30 seconds before adding minced garlic. This prevents burning—garlic cooks fast, and once it’s blackened, it turns bitter. Add a splash of cold water if needed to deglaze; it’ll steam the garlic just enough to soften it without frying it to oblivion.
- Use Kosher Salt Like a Pro: Diamond Crystal kosher salt is coarser, so measure it by volume, not weight—1 teaspoon isn’t the same as 1 teaspoon of table salt. Sprinkle it early (right after searing) and again after adding onions and garlic. This ensures even distribution, and you won’t end up with clumps of salt hiding in your final dish. Trust me, your taste buds will notice.
Essential equipment for this recipe
Skillet Selection
For this recipe, I recommend using a 12-inch cast-iron skillet—it retains heat beautifully and develops that perfect crust on the beef trimmings. If you don’t have cast iron, a heavy stainless steel skillet (like All-Clad) works too, though it won’t brown as evenly. My go-to is a Lodge cast iron—it’s affordable, durable, and pre-seasoned, so you can start cooking right out of the box. Avoid non-stick pans for searing—they don’t get hot enough to create that flavorful crust. 🔥
Butcher’s Tools
If you’re working with whole trimmings, a sharp boning knife and heavy cutting board are essential. I use a Wüsthof 8-inch boning knife for precision cutting—it glides through fat and connective tissue like butter. For larger batches, a meat mallet helps tenderize tougher pieces by breaking down fibers. If you’re buying pre-cut trimmings, skip this step, but always ask your butcher to cut them into 1-inch chunks for even cooking.
Deglazing Essentials
A wooden spoon is non-negotiable for deglazing—the metal can scratch your skillet and release harmful particles. I also keep a small whisk nearby to emulsify the butter into the gravy at the end. For scraping up browned bits, a flexible silicone spatula works better than a metal one. Pro tip: Keep a small bowl of water nearby to rinse your whisk between uses—it prevents the flour from sticking to your tools. 💡
Gravy Thickeners
The flour you dredge the beef in doubles as a thickener for the gravy, but for extra richness, I like to have cornstarch on hand. A 1 tsp cornstarch mixed with 1 tbsp cold water can rescue a gravy that’s too thin—just whisk it in at the end and simmer for 1-2 minutes. For a smoother finish, a fine-mesh strainer helps remove any stray bits of thyme or onion if you prefer a silky texture. Store-bought gravy granules are a last resort—they lack the depth of homemade.
Storage Containers
Leftovers deserve proper storage. I use glass Pyrex containers with airtight lids for the beef and gravy—they reheat evenly and keep flavors intact for up to 5 days in the fridge. For freezing, quart-sized freezer bags with zip-top closures work best. Label them with the date and contents (e.g., “Beef Trimmings Gravy”) so you don’t forget. A vacuum sealer is a game-changer if you’re prepping large batches—it extends freshness to 3 months and prevents freezer burn. ❄️
Optional Upgrades
If you’re feeling fancy, a meat thermometer ensures your beef reaches a safe 165°F internal temperature while simmering. For extra flavor, a mortar and pestle lets you crush garlic cloves into a paste for deeper infusion. And if you love crispy edges, a tongs helps flip the beef trimmings without losing that golden crust. These aren’t must-haves, but they elevate the dish from good to chef’s kiss.
Nutrition facts
Frequently asked questions
Can I use beef trimmings with bones for this recipe?
Yes, but you'll need to remove them first. Bones won't cook properly in this method and can make the meat tough. If you're working with bone-in trimmings, use a boning knife to separate the meat from the bone before cutting into 1-inch pieces. The meat-only pieces will sear beautifully and create rich gravy from their natural fat.
How do I store leftover beef trimmings before cooking?
Store raw beef trimmings in an airtight container or resealable bag in the fridge for up to 2 days or freeze for 3 months. For best results, season them right before cooking to prevent drying out. Thaw frozen trimmings overnight in the fridge—never at room temperature. If you're prepping ahead, keep the seasoning separate until ready to cook.
What if my beef trimmings are too lean?
Lean trimmings still work, but you may need to adjust the cooking method slightly. Add 1 extra tablespoon of olive oil when searing and consider simmering the meat for 5-7 minutes longer to tenderize. For extra richness, stir in 1 extra tablespoon of butter at the end with the gravy. The flour dredging helps compensate by adding body to the sauce.
Can I make this recipe in a slow cooker?
Brown the trimmings first in a skillet, then transfer everything to a slow cooker with 1 cup of beef broth. Cook on low for 6-8 hours or high for 3-4 hours. The slow cooking breaks down fibers beautifully, creating tender meat and rich gravy. Just add the butter at the very end to prevent separation.
What are the best ways to use up leftover cooked beef?
This versatile cooked beef transforms into countless meals! Chop it for tacos, meatballs, or pasta sauce, or shred it for sloppy joes or chili. The gravy freezes perfectly for future use—just reheat with a splash of water or broth. For extra flavor, mix in 1 tsp Worcestershire sauce or 1 tbsp soy sauce when reheating.