
Soups & Stews
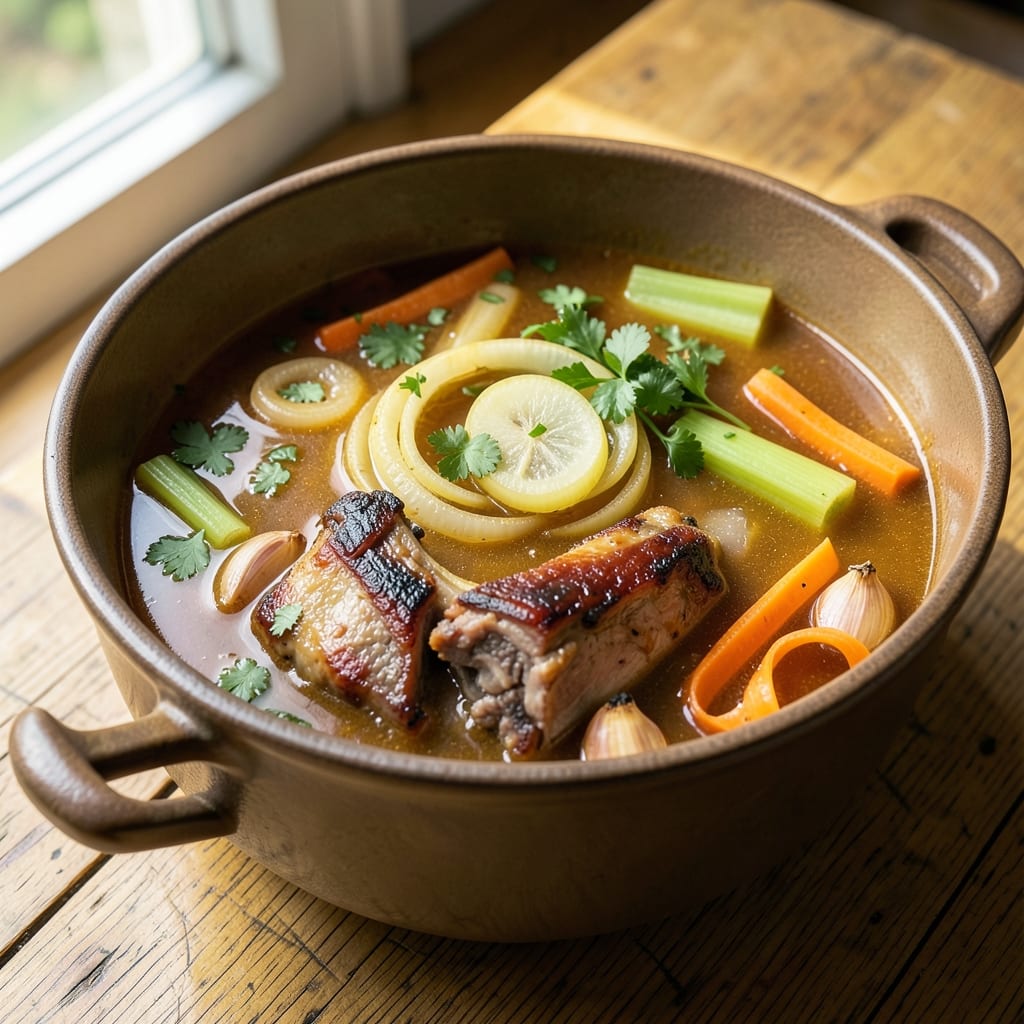
This better than bouillon beef broth recipe transforms simple bones and vegetables into a rich, umami-packed foundation for soups and stews. The secret lies in slow simmering—browning bones first unlocks deep, caramelized flavors that bouillon cubes can't match. What starts as a basic pot of water and aromatics becomes a velvety, aromatic broth packed with collagen and natural richness, perfect for elevating any dish.
Professional chefs know the difference between store-bought and homemade lies in the technique: high heat for browning, low and slow for extraction, and careful straining for clarity. This method delivers a clear, concentrated broth with layers of savory depth—ideal for braising, soups, or deglazing pans. The process is straightforward but requires patience, as the flavors develop over hours, not minutes.
What you'll end up with is a deeply flavorful, restaurant-quality broth that transforms ordinary meals into something extraordinary. The aroma alone will make your kitchen feel like a home-cooked haven, while the taste—rich yet balanced—proves that homemade always wins. Whether you're prepping for a week of soups or need a quick base for stews, this broth delivers.
Best of all, it keeps well in the freezer for months, so you'll always have a flavorful foundation ready. Let's get started on creating your own rich, homemade beef broth.
Ingredients for better than bouillon beef broth
Simple bones and aromatics transform into a velvety, umami-rich broth that beats bouillon cubes every time.
| Ingredient | Amount | Notes |
|---|---|---|
| Beef Bones 🦴 | 3 lb | Knuckle or marrow bones preferred |
| Yellow Onion 🧅 | 2 whole | Chopped, medium size |
| Carrots 🥕 | 4 whole | Peeled, roughly chopped |
| Celery Stalks 🧅 | 4 whole | Cleaned, roughly chopped |
| Garlic Cloves 🧄 | 8 cloves | Smashed, not minced |
| Fresh Parsley 🌿 | ½ cup | Stems removed, loosely packed |
| Fresh Thyme 🌿 | 4 sprigs | Stems intact for easy removal |
| Fresh Bay Leaves 🌿 | 2 whole | Dried works in pinch |
| Black Peppercorns 🌶️ | 1 tbsp | Crushed, not ground |
| Kosher Salt 🧂 | 2 tbsp | Diamond Crystal preferred |
| Apple Cider Vinegar 🍎 | 2 tbsp | Or white vinegar |
| Cold Water 💧 | 8 cups | Filtered preferred |
The bones are everything here. Knuckle or marrow bones from the butcher section give you that signature depth—Costco or Whole Foods usually have them pre-packaged, but ask your local butcher for the best quality. Look for bones with good marrow content (they should feel dense) and avoid anything with a strong odor. Freshness matters: if the bones smell funky, skip them. For the aromatics, yellow onions with a slight sweetness work best—avoid the bitter red ones. Carrots and celery should be firm with no soft spots. I always grab organic produce when possible, but conventional is fine if it's fresh. The parsley and thyme should be vibrant green with no wilting—Trader Joe's has great fresh bundles for this purpose.
No fresh herbs? Dried thyme at one-third the amount works, but fresh gives that bright, aromatic punch. Running low on bay leaves? Two dried leaves will do in a pinch, but fresh infuses better. The vinegar might seem odd, but it helps tenderize the bones and brightens the final broth—Bragg apple cider vinegar is my go-to, but any good quality will work. For the salt, Diamond Crystal dissolves better than table salt, giving you a cleaner broth. Want more depth? Add a splash of Worcestershire sauce (check for anchovy-free if needed) or a dash of fish sauce—both add umami magic. The water should be cold to prevent immediate cooking when you add hot bones later.
This broth tastes even better the next day as flavors meld. Store in the fridge for up to 5 days or freeze in 1-cup portions for up to 6 months. For freezing, use glass jars or silicone molds—they handle temperature changes better than plastic. Label everything with the date. Pro tip: skim off any fat that rises to the top before freezing—it keeps indefinitely in the freezer but can go rancid if left in. Reheat gently on the stove or microwave until just warmed through. The aroma alone will make your kitchen smell like a home-cooked haven every time.
Why You'll Love This Recipe
- No Chopping Chaos: I swear by the "mirepoix" trick—just roughly chop the onion, carrots, and celery (no need for perfect dice). Toss them in with the bones, cover with water, and let the slow simmer do the work. My hands stay clean, and the broth still tastes like it simmered for hours.
- Deep Umami Magic: That first crack of the beef bones? Pure flavor gold. The slow release of collagen turns this into a rich, velvety broth with none of the chemical aftertaste of bouillon cubes. Add a few smashed garlic cloves at the end, and it’s restaurant-quality without the fuss.
- Weeknight Workhorse: Use it for everything—dumplings, grain bowls, or even a quick pasta sauce. I keep a big batch in the freezer so I can dump it into pots without thinking. Honestly, it’s the secret to making even the simplest meals taste like you put in effort.
- Budget-Friendly Luxury: Beef bones are cheap, and this recipe stretches them into gallons of broth. Freeze what you don’t use, and you’ll always have a pantry staple that costs pennies per serving. No more overpriced bouillon packets here—just honest, homegrown flavor.
Step-by-step instructions for rich homemade beef broth
This method transforms simple ingredients into a velvety, umami-packed broth that rivals store-bought.
Prepare and Sear the Beef Bones
Pat the 3 lb beef bones completely dry with paper towels. This step is crucial—removing moisture helps create a deeper flavor and prevents steam from diluting your broth. Place the bones in a large Dutch oven or heavy pot and set over medium-high heat.
Let the bones sear for 10-12 minutes, turning occasionally, until they develop a deep mahogany color. You'll hear sizzling and smell the fat rendering—this is where the magic begins. The caramelized crust on the bones will dissolve into the broth, adding layers of complexity. Once golden, remove the bones and set them aside on a plate.
Sauté the Aromatic Vegetables
In the same pot (no need to wipe it clean—those browned bits are flavor gold), add the 2 whole chopped yellow onions, 4 whole peeled carrots, and 4 whole celery stalks. Cook over medium heat for 8-10 minutes, stirring occasionally, until the vegetables soften and the onions become translucent.
Add the 8 smashed garlic cloves and cook for another 1-2 minutes until fragrant. The garlic should just begin to color slightly—don't let it burn. Here's where the flavor foundation gets built. The vegetables will release their natural sugars, which will caramelize and deepen the broth's richness.
Build the Broth Base
Return the seared beef bones to the pot. Add the 4 sprigs fresh thyme, 2 whole fresh bay leaves, 1 tbsp crushed black peppercorns, and 2 tbsp kosher salt. Pour in the 8 cups cold water and bring to a rolling boil over high heat.
Once boiling, reduce heat to low and skim off any foam or impurities that rise to the surface with a fine-mesh skimmer or spoon. This step ensures a crystal-clear broth. The foam contains impurities that would otherwise make your broth cloudy. Skim for the first 5 minutes until the surface is clean.
Simmer for Deep Flavor Development
Partially cover the pot with a lid (leave a small gap for steam to escape) and simmer gently for 3-4 hours. The broth should never come to a full boil after the initial skimming—gentle simmering extracts maximum flavor from the bones and vegetables without breaking them down.
Here's the thing—patience pays off. The longer the bones simmer, the more collagen breaks down into gelatin, creating that silky texture. Check occasionally and add 1-2 cups of hot water if the liquid level gets too low. The broth should reduce slightly but never dry out completely.
Finish and Strain
After simmering, remove the pot from heat and let it sit for 10 minutes. This resting period allows any settled particles to sink to the bottom. Using a fine-mesh strainer or cheesecloth-lined colander, carefully strain the broth into a large bowl or clean pot.
Discard the solids and return the broth to the pot. Stir in the 2 tbsp apple cider vinegar and 0.5 cup fresh parsley. The vinegar brightens the flavors while the parsley adds freshness. Taste and adjust seasoning with additional salt if needed. The broth should be rich, savory, and balanced—not overly salty or acidic.
Pro Tips For Making Better Than Bouillon Beef Broth
- Char the Bones First: I learned this the hard way—skipping the char means missing out on that deep, smoky flavor. Use a blowtorch or broiler to blacken the bones in spots before adding them to the pot. The caramelized bits dissolve into the broth, adding complexity you won’t get any other way.
- Cut Celery and Onion Coarse: Tiny dice = muddy broth. Chop your celery into ½-inch chunks and slice onions into thick wedges so they don’t turn to mush. You’re not making soup here—you want those veggies to infuse, not dissolve into oblivion.
- Simmer Low and Long: After the initial boil, drop the heat to a gentle simmer—you should barely see bubbles breaking the surface. Too much heat = cloudy broth, and that’s a flavor killer. I’ve rushed this step twice and regretted it every time.
- Add Garlic Late: Crush the garlic cloves and toss them in during the last 30 minutes of cooking. Raw garlic burns easily, and if you add it too early, it’ll turn bitter. This is where the magic happens—just a few minutes of simmering makes all the difference.
Common mistakes when making your better than bouillon beef broth
Skipping the Sear
Skipping the sear step is one of the biggest mistakes I see new cooks make. Those caramelized crusts on the bones are packed with deep, meaty flavors that dissolve into the broth during simmering. Without searing, your broth will taste flat and one-dimensional. I've tried it both ways—trust me, the difference is night and day. Take the extra 10-12 minutes to properly brown those bones over medium-high heat—it's worth every second. 🔥
Not Skimming the Foam
That first 5 minutes of skimming might seem tedious, but it's non-negotiable for a clear, professional-quality broth. The foam contains impurities, blood, and fat that would otherwise make your broth cloudy and bitter. I recommend using a fine-mesh skimmer or a large spoon to remove as much as possible. If you skip this step, you'll end up with a murky broth that lacks clarity and refinement. The effort pays off with a silky, restaurant-worthy result.
Using Too Much Water
Starting with 8 cups of water is perfect for this recipe, but I've seen people double or even triple that amount. Too much water dilutes the concentrated flavors you're working so hard to extract from the bones and vegetables. The goal is to create a rich, umami-packed base—not a watered-down version of broth. If your pot is too full, reduce the water slightly or cook in batches. The broth should reduce naturally during simmering, intensifying the flavors.
Boiling Too Vigorously
After the initial boil, your broth should simmer gently—not roll at a full boil. Vigorous boiling breaks down the collagen in the bones too quickly, resulting in a thinner, less gelatinous broth. Keep the heat at low and maintain a gentle simmer throughout the 3-4 hour cooking time. I like to leave the lid slightly ajar to allow steam to escape, which helps maintain steady heat without boiling. This patience is what transforms good broth into exceptional broth.
Ignoring the Resting Period
Letting the broth rest for 10 minutes after cooking might seem like a small detail, but it's crucial. This resting time allows any settled particles to sink to the bottom, making straining easier and resulting in a clearer broth. Skipping this step means you'll strain out more of the flavorful sediment along with the solids. It also helps the broth cool slightly before straining, which makes handling hot liquids safer and more manageable. Don't rush this step—it's a simple way to elevate your final product. ✨
Overlooking the Vinegar
The 2 tablespoons of apple cider vinegar might seem like an afterthought, but it plays a vital role in brightening the broth and tenderizing the bones. Without it, the broth can taste flat or overly meaty. I've made this broth both with and without vinegar, and the difference is noticeable. The acidity also helps balance the richness, creating a more harmonious flavor profile. If you're short on time, a splash of lemon juice works in a pinch, but vinegar is the classic choice for a reason.
Nutrition facts
Frequently asked questions
Can I use chicken bones instead of beef?
For a lighter flavor, substitute chicken bones (like backs or necks) for beef, but reduce simmering time to 2-3 hours instead of 3-4. The technique remains the same—browning bones and skimming foam are key. Chicken broth will have a milder taste but still pack serious umami when made this way.
How do I make this broth in a pressure cooker?
Follow the same steps, but after searing bones and sautéing veggies, add everything to your pressure cooker with 6 cups water (less liquid = faster cooking). Seal, cook on high pressure for 45-60 minutes, then let pressure release naturally. Strain and finish with vinegar and parsley. The result is rich but faster—perfect for busy days!
Why does my broth turn cloudy?
Cloudiness usually means you didn't skim the foam properly or boiled too vigorously. For crystal-clear broth, skim for 5-10 minutes after boiling, then simmer gently. If it's already cloudy, try straining through cheesecloth or letting it rest 10 minutes before straining again. Patience is key!
Can I add wine or beer to the broth?
Yes! Add 1/2 cup red wine or beer during simmering to deepen flavor. The alcohol will cook off, leaving behind rich notes. For beer, use a malty variety like stout. Just don't add it too early—wait until after the initial boil to preserve the alcohol's flavor.
How do I store and reheat leftovers?
Store in the fridge for 5 days or freeze in ice cube trays for 6 months. Reheat gently on the stove (never microwave directly) to preserve texture. For soups, use frozen cubes directly—no thawing needed! The fat will rise to the top when cold; skim before reheating.