
Soups & Stews
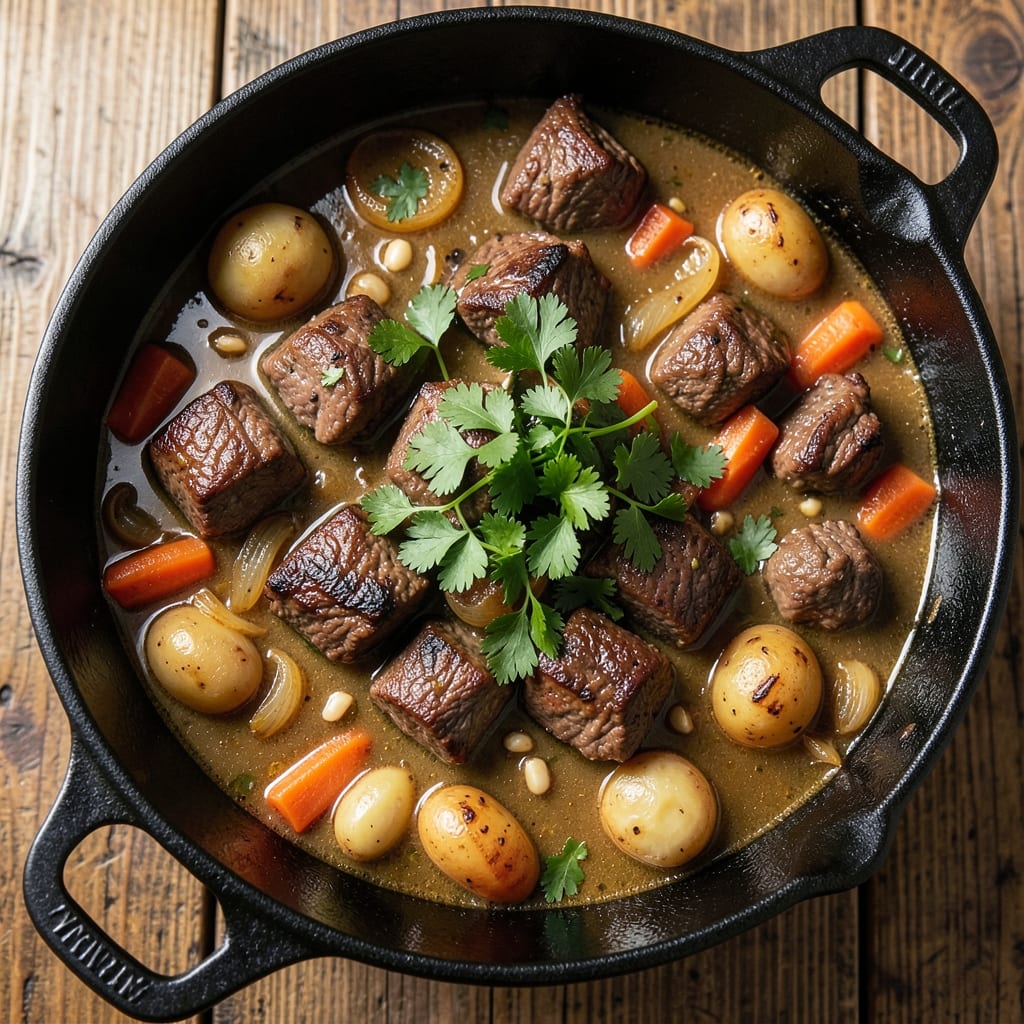
This Costco beef stew recipe transforms a bulk pack of Kirkland Signature beef into a hearty, slow-simmered masterpiece that tastes like a homey Sunday dinner. The secret lies in low-and-slow cooking—where tough cuts melt into tender perfection while potatoes and carrots soak up the rich, savory broth. I perfected this version after realizing how Costco’s pre-cut vegetables and bulk beef could simplify a classic without sacrificing depth.
The beauty of this recipe is its flexibility: simmer it all day in a Dutch oven for traditional richness or use an Instant Pot for a 3-hour shortcut. Costco’s Kirkland beef—often chuck roast or round—holds up beautifully, developing layers of flavor as it breaks down. The key? Browning the meat first to build a deep, caramelized foundation, then letting it bubble away until the broth thickens into a velvety, comforting sauce.
What you’ll end up with is a steaming bowl of tender beef, fork-tender potatoes, and sweet carrots all swimming in a sauce so rich it’ll have everyone asking for seconds. The aroma alone—warm spices, caramelized onions, and slow-cooked meat—turns any kitchen into a cozy gathering spot. This is the kind of stew that reheats even better the next day, making it perfect for meal prep or feeding a crowd.
Pair it with crusty bread to soak up every last drop, or serve alongside a simple green salad for balance. The leftovers? Even better—just reheat with a splash of broth to restore that restaurant-quality richness. Let’s get cooking!
Ingredients for costco beef stew
Kirkland Signature beef and Costco's pre-cut vegetables simplify this classic beef stew without sacrificing depth.
| Ingredient | Amount | Notes |
|---|---|---|
| Kirkland Signature Chuck Roast 🥩 | 3 lb | Pre-cut from Costco bulk pack |
| Yellow Onions 🧅 | 2 whole | Medium, sliced into half-moons |
| Carrots 🥕 | 2 lb | Whole, peeled and cut into chunks |
| Russet Potatoes 🥔 | 3 lb | Cut into 2-inch chunks, peeled |
| Garlic Cloves 🧄 | 6 cloves | Minced for depth of flavor |
| Beef Broth 💧 | 6 cups | Low-sodium preferred for balance |
| Red Wine 🍷 | 1 cup | Bold dry red like Cabernet Sauvignon |
| Tomato Paste 🍅 | 2 tbsp | Smooth, not chunky |
| All-Purpose Flour 🌾 | 2 tbsp | For thickening the sauce |
| Fresh Thyme 🌿 | 2 tbsp | Leaves only, chopped |
| Fresh Rosemary 🌿 | 1 tbsp | Needles only, chopped |
| Bay Leaves 🌿 | 2 whole | Dried for subtle earthiness |
| Kosher Salt 🧂 | 2 tsp | Diamond Crystal preferred |
| Ground Black Pepper 🌶️ | 1 tsp | Freshly cracked for heat |
| Olive Oil 🫒 | 2 tbsp | Extra-virgin for browning |
The Kirkland Signature chuck roast from Costco is ideal for this recipe—its marbling ensures tender, flavorful meat after slow cooking. Look for pre-cut chunks in the meat section to save time, or ask the butcher to trim it yourself for even cooking. Costco’s bulk beef is often more affordable than individual cuts, and the quality holds up beautifully in long-simmered dishes. If you can't find chuck roast, round steak works as a substitute, though it may require slightly longer cooking. For the best flavor, pat the meat dry before browning to achieve that critical caramelized crust.
No red wine? Dry sherry or beef broth with a splash of balsamic vinegar works beautifully as a substitute. Fresh thyme and rosemary are ideal, but dried varieties at one-third the amount will suffice in a pinch. The tomato paste can be replaced with 1 cup of crushed tomatoes if you prefer a chunkier texture. Costco’s pre-cut carrots and potatoes are perfect for this recipe—just peel and chop them to even sizes so they cook uniformly. For extra richness, swap 1 cup of the broth for beef stock if you have it on hand. The flour is essential for thickening the sauce, but if you're gluten-sensitive, cornstarch works just as well.
This stew tastes even better the next day as flavors meld, so make a double batch if you're feeding a crowd. Store leftovers in an airtight container in the fridge for up to 5 days or freeze for 3 months for longer storage. To reheat, add a splash of broth or water to restore moisture and prevent drying. The Costco-sized portions make this perfect for meal prep—portion into individual containers for easy lunches. For serving, crusty bread or a simple green salad balances the hearty flavors beautifully.
Why You'll Love This Recipe
- One-Pot Wonder: The chuck roast practically cooks itself—just brown it, toss in the onions and garlic, then let it slow-simmer until tender. No fancy techniques, no extra pots to wash.
- Deep, Rich Flavor: That Kirkland chuck melts into shreds while soaking up the caramelized onions and garlic—honestly, the aroma alone makes my kitchen smell like a French bistro. The carrots stay crisp, and the potatoes? Buttery perfection.
- Game for Any Night: Between us, this is my go-to for lazy Sundays, post-gym protein refuel, or when friends drop by unannounced. Serve it with crusty bread, or let it cool for packed lunches—it’s that versatile.
Step-by-step instructions for Costco beef stew
This method delivers deep, restaurant-quality flavor with tender beef and perfectly cooked vegetables.
Sear the Chuck Roast for Maximum Flavor
Pat the 3 lb Kirkland Signature Chuck Roast dry with paper towels and cut it into 2-inch chunks. Heat a large Dutch oven over medium-high heat and add the 2 tbsp olive oil. Once shimmering, add the beef in batches, searing for 2-3 minutes per side until deeply browned. This step develops the rich, caramelized crust that forms the stew's foundation.
Remove the beef and set aside. Don't clean the Dutch oven—those browned bits are packed with flavor. Here's the thing: if you rush this searing step, you'll end up with bland beef. Take your time and let each piece develop that beautiful crust before moving on.
Build the Aromatic Base
In the same Dutch oven, add the sliced 2 whole yellow onions and cook for 5 minutes until softened and golden. Add the peeled and chunked 2 lb carrots and continue cooking for another 5 minutes until they begin to soften. This gradual cooking ensures the vegetables develop sweetness without burning.
Add the 6 cloves minced garlic, 2 tbsp chopped fresh thyme, and 1 tbsp chopped fresh rosemary. Stir for 30 seconds until fragrant—this is when your kitchen will smell like a French bistro. The garlic should sizzle slightly but not burn. If it starts to darken too quickly, reduce the heat to medium.
Develop the Sauce Foundation
Pour in the 1 cup red wine and scrape up all the browned bits from the bottom of the pot. Let it simmer for 3-4 minutes until reduced by half. Add the 2 tbsp tomato paste and stir to combine. This creates a rich, velvety base that will thicken beautifully during the simmering process.
Sprinkle the 2 tbsp all-purpose flour over the mixture and stir vigorously for 1 minute to remove any lumps. The flour will help thicken the stew later, creating that perfect consistency we're after. If you skip this step, your stew might end up too thin and watery.
Simmer the Stew to Perfection
Return the seared beef to the Dutch oven. Add the 6 cups beef broth, 2 tsp kosher salt, and 1 tsp ground black pepper. Bring to a gentle boil, then reduce heat to low and add the 2 whole bay leaves. Cover and simmer for 1 hour 30 minutes until the beef is fork-tender and falling apart.
After the initial hour, add the peeled and chunked 3 lb russet potatoes to the stew. This timing ensures the potatoes cook through without turning to mush. The stew should be bubbling gently but not vigorously—this low-and-slow approach is crucial for tender meat and flavor development.
Adjust Consistency and Serve
Remove the bay leaves and taste the stew. If it needs thickening, mix 1 tbsp cornstarch with 1 tbsp cold water and stir it into the stew. Simmer for another 5 minutes until thickened to your desired consistency. The stew should coat the back of a spoon but still be spoonable.
Serve the stew immediately, garnished with additional fresh thyme if desired. Each bite should deliver tender beef, sweet carrots, creamy potatoes, and a rich, wine-infused sauce. For best results, let it sit for 10 minutes before serving to allow flavors to meld completely. This hearty stew makes a perfect centerpiece for chilly evenings or family gatherings.
Pro Tips For Making Costco Beef Stew
- SEAR THE ROAST FIRST: That chuck roast won’t develop deep flavor just sitting in broth—get it screaming hot in a Dutch oven with 2 tablespoons of oil for 3-4 minutes per side until it’s browned like a medium-rare steak. I used to skip this, and the stew tasted bland. Now? It’s the thing that makes the whole dish sing.
- CHOP POTATOES UNEVENLY: Cut those Russets into chunks of varying sizes—some whole halves, some quartered—so they don’t all turn to mush at once. The big pieces stay hearty while the smaller ones soften, and you’ll have texture at every bite. (Yes, it looks messy. That’s the point.)
- DON’T OVERCROWD THE POT: If you dump in all the veggies at once, the carrots and onions will steam instead of caramelize. Brown the onions first, then add carrots in batches so they get a quick sear before the liquid comes in. This isn’t a soup—it’s a stew, and color matters.
- SALT THE MEAT TWICE: Generously salt the chuck roast right after searing, then add another pinch of salt to the pot when you pour in the broth. The first layer seasons the surface, the second ensures the meat stays juicy as it cooks low and slow. (Trust me, the Kirkland roast needs the help.)
Pro cooking tips for this dish
Sear Like a Pro
That initial sear is where all the magic happens—don't skip it! For the Kirkland Signature chuck roast, cut it into 2-inch chunks and pat them completely dry with paper towels. Use a heavy Dutch oven (I love my Lodge 5.5-quart) and heat it over medium-high heat until the oil shimmers. Work in batches—overcrowding lowers the temperature and steams instead of sears. Aim for a deep, golden-brown crust on each piece. Pro tip: Let the beef rest for 5 minutes after searing before adding it back to the pot. This resting time helps the meat retain juices during the long simmer. 🔥
Layer Flavors Gradually
Build your aromatic base in stages for maximum depth. After searing, add the onions first and cook them until they're soft and golden—about 5 minutes. Then introduce the carrots and cook another 5 minutes to let their natural sugars caramelize slightly. This gradual approach prevents burning while developing sweetness. When adding the garlic, thyme, and rosemary, stir constantly for just 30 seconds—garlic burns faster than you think! I like to use Penzeys brand for my herbs because their flavor is consistently vibrant. 🌿
Wine Reduction Matters
The wine isn't just for flavor—it's for deglazing those precious browned bits from the bottom of your pot. After adding the 1 cup red wine, let it bubble away until reduced by half (3-4 minutes). This concentrated reduction packs more flavor punch. I always use a bold Cabernet Sauvignon—its tannins complement the beef beautifully. If you're avoiding alcohol, dry sherry works perfectly as a substitute. The key is to scrape every last bit from the bottom with a wooden spoon—those bits are flavor gold. 🍷
Low-and-Slow Wins
Patience is your friend here. After adding all ingredients, maintain a gentle simmer—not a rolling boil. The lid should be slightly ajar to allow some steam to escape, which prevents the stew from getting watery. For the first 1 hour 30 minutes, keep the heat at low and resist the urge to peek. Every time you lift the lid, you lose heat and moisture. I set a timer so I don't forget—this stew needs undisturbed time to work its magic. The potatoes should go in after the initial hour to avoid turning to mush. 🕒
Thicken Like a Chef
That flour slurry is your secret weapon for achieving the perfect consistency. Mix 1 tbsp cornstarch with 1 tbsp cold water and whisk it vigorously before adding to the stew. The cold water prevents lumps, and the cornstarch thickens beautifully. Simmer for just 5 minutes—any longer and you risk a gluey texture. Taste as you go! The stew should coat the back of a spoon but still be spoonable. If it's still too thin, repeat with another ½ tbsp cornstarch. Remember, you can always thin it later with broth, but you can't un-thicken it. 💡
Rest Before Serving
This is one of those cooking rules that seems counterintuitive but makes all the difference. After simmering, let the stew rest for 10 minutes before serving. This allows the juices to redistribute throughout the meat and vegetables, ensuring every bite is moist and flavorful. I also like to remove the bay leaves before serving—they can leave a bitter aftertaste if left in too long. Garnish with fresh thyme or a drizzle of high-quality olive oil for that restaurant-quality finish. Trust me, this resting time transforms your stew from good to extraordinary. ✨
Nutrition facts
Frequently asked questions
Can I use Costco's pre-cut beef chunks instead of chuck roast?
Costco's pre-cut beef chunks (like their Kirkland Signature beef stew meat) work perfectly for this recipe. The key is to sear them thoroughly before simmering—this helps tenderize even pre-cut pieces. Just follow the same searing instructions, working in batches to avoid crowding.
How long does this beef stew keep in the fridge?
This hearty stew stays fresh in an airtight container for 5 days in the fridge. The flavors actually deepen overnight, making it perfect for meal prep! For longer storage, freeze portions for up to 3 months. When reheating, add a splash of broth to restore moisture.
Can I make this in an Instant Pot instead of a Dutch oven?
Yes! For a 3-hour shortcut, brown the beef in a skillet first, then transfer everything to your Instant Pot. Use the High Pressure setting for 45 minutes, then natural release. Add potatoes during the last 15 minutes of cooking. The Instant Pot version is just as tender but much faster than stovetop simmering.
What if my stew is too thin after simmering?
Don't worry—this is easily fixed! Mix 1 tbsp cornstarch with 1 tbsp cold water and whisk it into the stew. Simmer for 5 minutes until thickened. If you prefer a smoother texture, you can also reduce the broth by simmering uncovered for 10-15 minutes to evaporate excess liquid.
Can I substitute potatoes with another vegetable?
Certainly! For a different texture, try parsnips or turnips—they hold up well to long cooking. If you want something creamier, swap in cauliflower florets or butternut squash cubes. Just adjust cooking time: denser veggies may need an extra 15-20 minutes of simmering.