
Soups & Stews
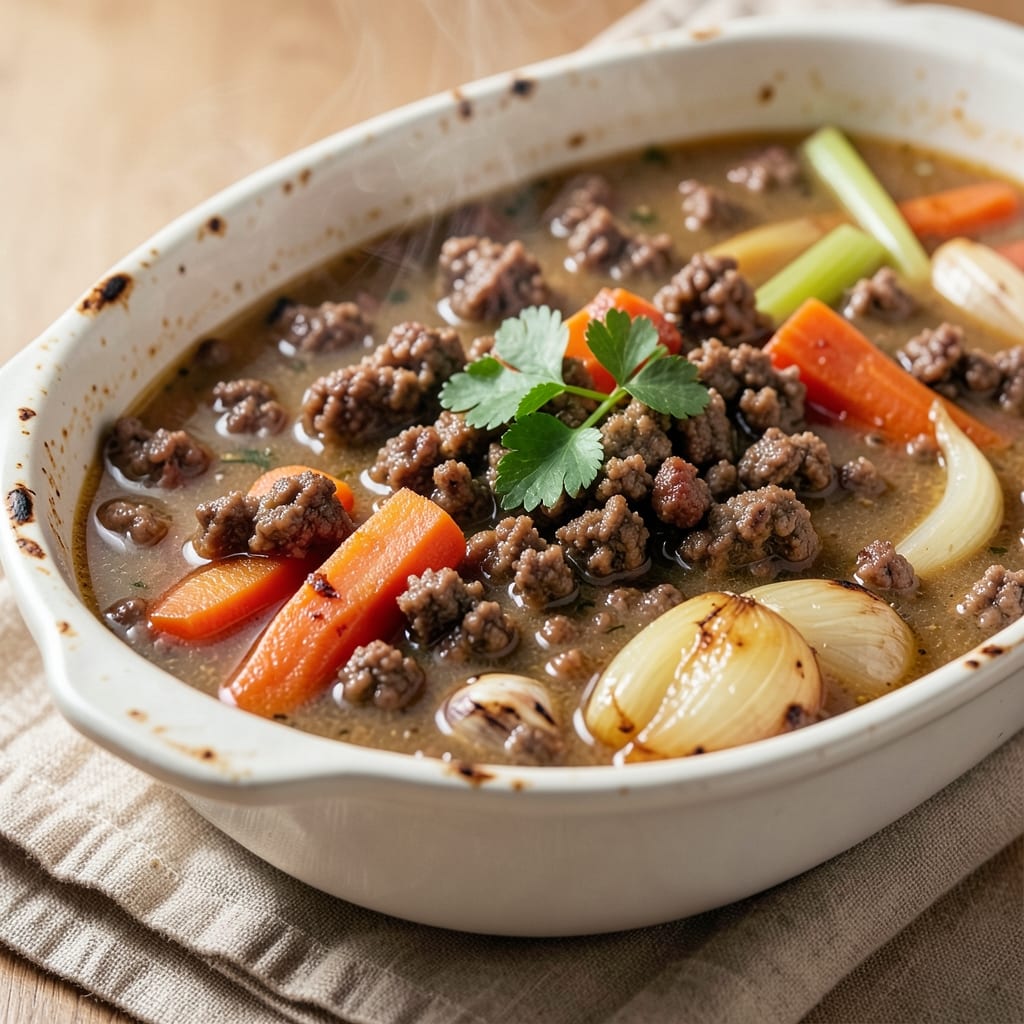
This ground beef chicken broth recipe transforms simple ingredients into a deeply flavorful, one-pot wonder that's perfect for weeknight dinners or meal prep. The secret lies in browning the beef first—this step unlocks rich, caramelized flavors that infuse the broth with umami depth you won't find in store-bought versions. I developed this during a particularly busy week when I needed a hearty, satisfying meal that required minimal effort but maximum flavor impact.
The beauty of this recipe is its versatility—you can adjust the ingredients based on what you have on hand, yet it always delivers that comforting, savory profile that makes any meal feel special. With just 30 minutes of active time and a one-pot approach, you'll have a meal that's restaurant-quality without the fuss. The ground beef develops a satisfying texture when cooked properly, while the chicken broth provides that essential depth that elevates everything from simple vegetables to hearty grains.
What you'll end up with is a dish that's rich, aromatic, and packed with layers of flavor—perfect for serving over rice, with crusty bread for dipping, or even as a filling for tacos. The broth absorbs all the caramelized goodness from the beef, creating a sauce that's both comforting and complex. This is the kind of meal that transforms a basic pantry staple into something extraordinary, proving that great food doesn't require complicated techniques.
Best of all, this recipe scales beautifully—double or triple it for a crowd, or make a big batch to freeze for those lazy days when you need dinner on the table fast. The leftovers reheat perfectly, maintaining that same rich, savory quality. Let's get cooking—your taste buds will thank you.
Ingredients for ground beef chicken broth
Transform ordinary pantry staples into a deeply flavorful one-pot masterpiece with these essential ingredients.
| Ingredient | Amount | Notes |
|---|---|---|
| Ground Beef 🥩 | 1 ½ lb | 85% lean, finely chopped |
| Chicken Broth 🍲 | 4 cups | Low-sodium preferred |
| Yellow Onion 🧅 | 1 whole | Diced, medium size |
| Garlic Cloves 🧄 | 4 cloves | Minced, fresh preferred |
| Carrots 🥕 | 3 medium | Peeled, sliced into rounds |
| Celery Stalks 🥬 | 3 whole | Diced, fresh preferred |
| Tomato Paste 🍅 | 2 tbsp | High-quality, no sugar added |
| Dried Thyme 🌿 | 1 tsp | Or 1 tbsp fresh |
| Dried Oregano 🍃 | 1 tsp | Mexican oregano preferred |
| Ground Black Pepper 🌶️ | ½ tsp | Freshly cracked preferred |
| Bay Leaves 🍃 | 2 whole | Fresh or dried |
| Olive Oil 🫒 | 1 tbsp | Extra-virgin preferred |
| Salt 🧂 | 1 tsp | Kosher or sea salt |
| All-Purpose Flour 🌾 | 1 tbsp | For thickening if needed |
| Fresh Parsley 🌿 | ¼ cup | Chopped, for garnish |
The ground beef is where the magic starts—85% lean gives you that perfect balance of flavor and texture without turning greasy. Costco or local butchers often have the best prices for bulk ground beef, and it's worth splurging here since you're getting the foundation of your dish. Look for bright red color and good marbling—this is your umami bomb. The chicken broth? Homemade is ideal but store-bought works in a pinch (just check for low sodium). I always grab Swanson or Pacific Foods brands when I'm in a hurry, but nothing beats the depth of homemade. The aromatics—onion, garlic, carrots, and celery—are non-negotiable for that classic 'holy trinity' flavor base.
No fresh thyme? Dried works perfectly—just use a third the amount. Running low on tomato paste? Canned crushed tomatoes in a pinch (use half the volume). The bay leaves add incredible depth but can be skipped if you're in a hurry—just add an extra pinch of oregano. For the olive oil, extra-virgin is worth it here—it adds that fruity, peppery note that elevates everything. Want more richness? Add a splash of red wine or beef broth when deglazing. The flour is your secret weapon for thickening if the broth gets too thin—just mix it with a little cold water first to avoid lumps.
This dish tastes even better the next day as flavors meld together—make a double batch and freeze half for lazy weeknights. Store leftovers in airtight containers for up to 5 days in the fridge or 3 months in the freezer. For serving, I love it over rice with a sprinkle of fresh parsley and a squeeze of lemon. The broth thickens as it cools, so if it seems too thick when reheating, just add a splash of water or broth. Trust me, this is the kind of meal that gets better with time—perfect for making ahead when you know you'll be busy.
Why You'll Love This Recipe
- Pantry Magic: I swear by this when I’ve got nothing but a few cans and a bag of beef—no fancy shopping required. Brown the ground beef with onions and garlic, toss in broth and carrots, and let it simmer. That’s it. No stress, no last-minute grocery runs.
- Rich Umami Bomb: Between the beef’s deep savoriness and the chicken broth’s depth, this isn’t just "flavor"—it’s the kind that lingers. The carrots add a subtle sweetness that balances everything, and honestly? It tastes like you slaved over it for hours.
- Leftover Goldmine: Make a big batch—this stuff only gets better the next day. I use it to stretch meals (hello, rice bowls), freeze it for future soups, or even turn it into a hearty pasta sauce. Never waste a pot again.
- Budget Stretch: Ground beef and broth are my go-to for feeding the family without breaking the bank. A single batch feeds four, costs less than takeout, and still feels like a proper meal. My wallet and my kids thank me every time.
Step-by-step instructions for savory umami ground beef broth
This one-pot masterpiece transforms simple ingredients into a deeply flavorful base—rich, aromatic, and packed with umami depth.
🍳 Step 1: Sear the Ground Beef for Maximum Flavor
Heat the 1 tablespoon olive oil in a large Dutch oven over medium-high heat until shimmering. Add the 1.5 lb ground beef, breaking it apart with a wooden spoon as it hits the pan. Let it cook undisturbed for 3-4 minutes until the beef loses its raw color and begins to brown deeply—this releases those incredible meaty flavors that will infuse your broth.
Here's the thing—don't stir constantly. Let those browned bits form at the bottom of the pan (they're called fond, and they're pure flavor gold). Once the beef is well-browned, use a spatula to scrape up those caramelized bits and distribute them evenly. This ensures every spoonful of your final broth carries that deep, savory punch.
👨🍳 Step 2: Sauté the Aromatic Vegetables
Add the 1 whole yellow onion (already diced) and cook for 4-5 minutes until softened and beginning to caramelize at the edges. Toss in the 3 medium carrots (sliced into rounds) and 3 whole celery stalks (diced), cooking for another 5 minutes until everything is tender and fragrant. You'll smell that sweet, earthy aroma building—this is where your broth gets its complexity.
Next, add the 4 cloves garlic cloves (minced) and cook for just 30 seconds—garlic burns fast, and you want it to perfume the broth without turning bitter. Stir in the 2 tablespoon tomato paste, letting it cook for 1 minute until it darkens slightly. This step develops a deep, slightly sweet umami base that ties all the flavors together beautifully.
🥘 Step 3: Deglaze and Build the Broth Base
Pour in the 4 cups chicken broth, scraping up any browned bits from the bottom of the pot with a wooden spoon. Add the 1 teaspoon dried thyme, 1 teaspoon dried oregano, 0.5 teaspoon ground black pepper, 2 whole bay leaves, and 1 teaspoon salt. Bring everything to a boil over high heat, then immediately reduce to a gentle simmer. Here's where the magic happens—let it bubble away for 20 minutes uncovered, allowing the flavors to meld and the broth to deepen.
I like to stir occasionally during this time, just to keep things moving and prevent any sticking. The broth should reduce slightly, becoming more concentrated and aromatic. If it looks like it's getting too thick, add ½ cup water to maintain the right consistency. This simmering step transforms simple ingredients into something truly special.
🍳 Step 4: Thicken and Finish the Broth
In a small bowl, whisk together the 1 tablespoon all-purpose flour with 2 tablespoons cold water to create a slurry. Slowly pour this into the simmering broth while stirring constantly. The flour will help thicken the broth slightly, giving it a luxurious body that's perfect for soups, stews, or drizzling over rice.
Simmer for another 5-7 minutes until the broth reaches your desired thickness. Taste and adjust seasoning—you might need a bit more salt or pepper to balance the flavors perfectly. Remove the pot from heat and let it sit for 5 minutes to allow any floating bits to settle. Then, carefully ladle the broth through a fine-mesh strainer into a clean pot or bowl, discarding the solids.
🍽️ Step 5: Garnish and Serve with Fresh Herbs
Return the strained broth to the pot and stir in the 0.25 cup fresh parsley (chopped) just before serving. This final garnish adds a bright, fresh contrast to the deep, savory flavors of the broth. Serve it warm alongside your favorite dishes—it's perfect for dipping bread, cooking grains, or elevating simple weeknight meals to restaurant quality.
This broth keeps beautifully in the refrigerator for up to 5 days or can be frozen for 3 months. The flavors only deepen over time, making it a perfect make-ahead project for busy weeks. Enjoy every rich, umami-packed sip—you've earned it!
Pro Tips For Making Ground Beef Chicken Broth
- BROWN THE BEEF FIRST: Don’t just toss raw ground beef into the pot—sizzle it in a dry skillet or Dutch oven over medium-high heat until it loses its pink color. I learned this the hard way when my broth turned muddy instead of rich; breaking the meat’s surface first releases deeper flavor and prevents a bland base.
- CHOP ONIONS COARSELY: Tiny onion pieces disappear and turn to mush—what you want is big, uneven chunks (about ½-inch) that caramelize slowly. They’ll sweeten the broth over time, but if you dice them too fine, you’ll just end up with a watery, flavorless slurry.
- SIMMER, DON’T BOIL: Once everything’s in the pot, keep the heat low enough that only tiny bubbles break the surface. Boiling burns the broth and makes it bitter—this isn’t soup, it’s a slow extraction of flavor. A gentle simmer for at least 45 minutes does the real work.
- ADD CARROTS LAST: Tossing in carrots too early turns them to mush, but adding them in the final 15 minutes keeps them tender-crisp and visually appealing. If you’re short on time, skip them entirely—this isn’t a vegetable stew, but they’re worth the effort if you’ve got a few extra minutes.
Flavor customization for these flavors
Spicy Kick
For a bold, fiery twist, add 1 teaspoon cayenne pepper or 1 tablespoon hot sauce like Cholula or Tabasco when you pour in the chicken broth. If you love heat, I sometimes add ½ teaspoon smoked paprika too—it deepens the smokiness while keeping the spice balanced. For a smoother heat, simmer the broth for an extra 5 minutes to let the flavors meld. 🌶️
Herb-Forward Variations
Swap out the thyme and oregano for 1 teaspoon each of rosemary and basil for a Mediterranean-inspired broth. I love this combo with lemon zest added at the end—it brightens the dish beautifully. For a Southeast Asian twist, add 1 teaspoon fish sauce and 1 teaspoon grated ginger when deglazing. The umami from the fish sauce elevates the beef flavors to new heights.
Creamy Comfort
Transform this broth into a creamy masterpiece by stirring in ½ cup heavy cream or ½ cup coconut milk at the end. For a lighter option, use ¼ cup Greek yogurt—it adds tanginess without heaviness. I often finish with a sprinkle of toasted breadcrumbs for texture. This works perfectly as a soup base or drizzled over mashed potatoes.
Smoky Depth
Infuse your broth with smoky flavor by adding 1 smoked paprika or ½ teaspoon liquid smoke when you pour in the broth. For a more intense smoke, char a whole onion and garlic clove in a dry skillet first, then add them to the pot. This technique is inspired by my time judging BBQ competitions—smoke transforms everything. 🔥
Umami Bomb
Boost the savory profile by adding 1 tablespoon soy sauce or 1 teaspoon miso paste when you deglaze. For an extra layer of depth, stir in 1 teaspoon Worcestershire sauce—it adds a tangy, slightly sweet note that balances the richness. I also love adding ½ cup mushrooms (cremini or shiitake) when sautéing the vegetables for an earthy umami punch.
Sweet & Savory Balance
Add a touch of sweetness by stirring in 1 teaspoon honey or 1 teaspoon brown sugar when you pour in the broth. This balances the savory flavors beautifully, especially if you're using a bold spice blend. For a more complex sweetness, add ½ cup diced apples or pears when sautéing the vegetables—they caramelize nicely and add a subtle fruitiness. 🍯
Nutrition facts
Frequently asked questions
Can I use ground turkey or chicken instead of beef?
Ground turkey or chicken works beautifully—just reduce the cooking time slightly since they cook faster than beef. For turkey, aim for 85% lean to maintain richness, and adjust seasoning to taste. The texture will be lighter, but the umami depth from the broth remains intact. For chicken, add an extra pinch of salt to compensate for its milder flavor.
How do I make this recipe vegetarian?
Replace the ground beef with 1.5 lbs mushrooms (cremini or shiitake) or 1 cup lentils for a hearty base. Use vegetable broth instead of chicken broth and add 1 teaspoon soy sauce or 1 tbsp nutritional yeast for umami depth. The tomato paste and herbs will still create that savory foundation you love.
Why did my broth turn out too thin?
Broth thickness depends on simmering time and ingredients. If yours is too thin, try simmering uncovered for 10-15 extra minutes to reduce it naturally. For immediate thickening, whisk 1 tbsp cornstarch with 2 tbsp cold water, stir into the broth, and simmer 2-3 minutes until thickened. Avoid adding flour directly—it can create lumps.
Can I make this in an Instant Pot?
Yes! Sauté the beef and vegetables as directed, then add all remaining ingredients (except parsley). Seal the lid and cook on High Pressure for 10 minutes, followed by a 5-minute natural release. Finish by stirring in parsley. The pressure cooker intensifies flavors beautifully—just taste and adjust seasoning after cooking.
What are the best ways to use this broth?
This versatile broth shines in rice bowls, tacos, or as a base for soups. Use it to cook grains like quinoa or farro, or drizzle over roasted vegetables. For extra richness, reduce it by half to make a savory sauce for pasta or grilled meats. The possibilities are endless!