
Main Courses
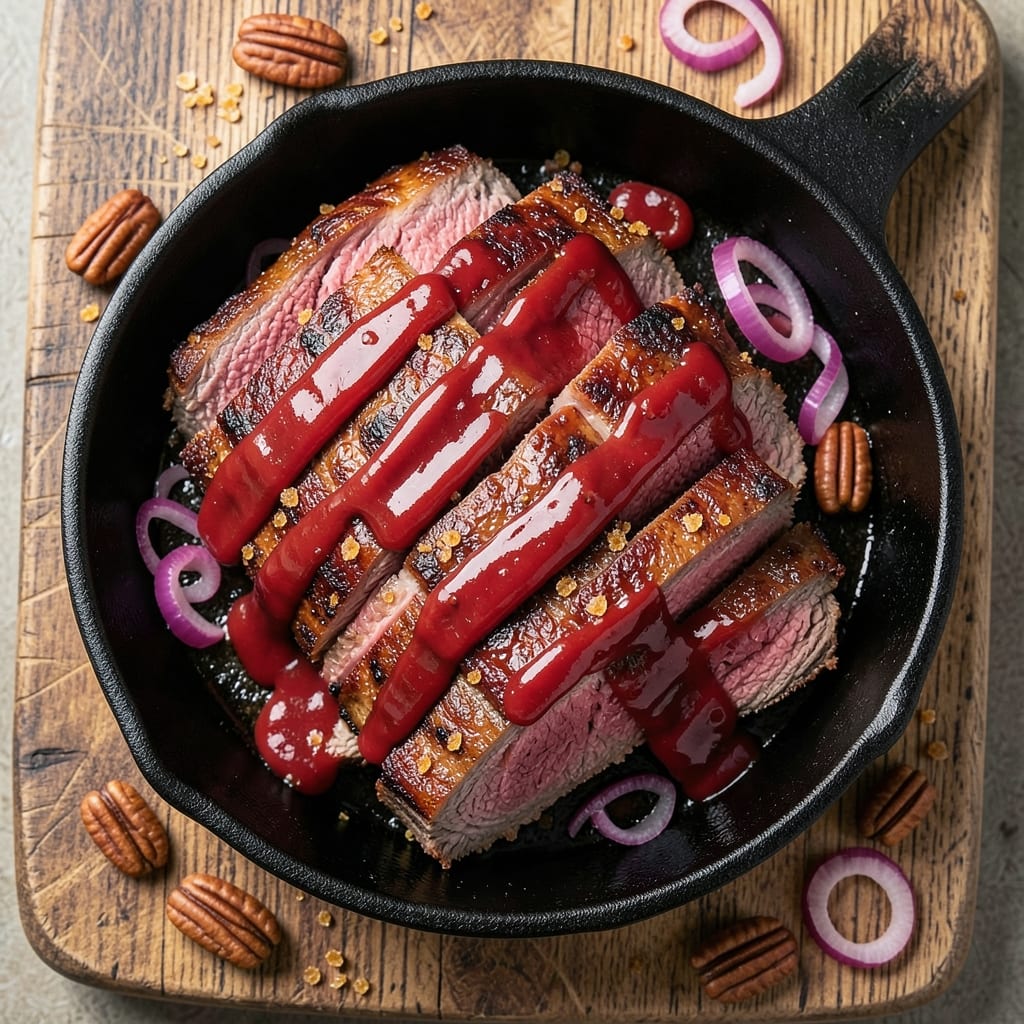
This BBQ beef bottom round roast recipe delivers melt-in-your-mouth tenderness with a deep, caramelized crust—exactly what makes Texas-style BBQ unforgettable. After years of perfecting my pitmaster techniques, I've cracked the code for transforming tough, affordable cuts into showstopping centerpieces that impress even the most discerning crowds. The secret lies in low-and-slow smoking paired with precise temperature control, ensuring every bite is juicy without sacrificing that coveted bark.
What sets this method apart is the foolproof combination of a dry rub (smoked paprika, brown sugar, and cayenne) followed by a reverse sear finish. I start with a 3-day dry brine—trust me, this step transforms the meat by keeping it moist through hours of smoking. The roast spends 8-10 hours at 225°F, wrapped in butcher paper during the last 2 hours to trap steam and create that signature tender core. For those short on time, I include a sous vide shortcut that delivers 80% of the results in just 24 hours.
By the time you slice into that perfectly smoked roast, you'll be rewarded with juicy, fork-tender beef that practically falls apart, all wrapped in a glossy, caramelized crust. The aroma alone will draw everyone to the table, and the first bite delivers that perfect balance of smoky depth and sweet-spicy complexity. This is the kind of dish that turns casual gatherings into legendary meals—no fancy plating required, just pure, satisfying BBQ.
Pair it with classic sides like tangy coleslaw, smoky baked beans, and buttery cornbread for the full experience. The roast reheats beautifully for leftovers, making it ideal for meal prep or feeding a crowd. Let's get smoking—your taste buds will thank you.
Ingredients for bbq beef bottom round roast
The perfect balance of smoky depth and sweet-spicy complexity starts with these core ingredients.
| Ingredient | Amount | Notes |
|---|---|---|
| Beef Bottom Round Roast 🥩 | 8 lb | Center-cut preferred for tenderness |
| Smoked Paprika 🌶️ | ½ cup | High-quality, not pre-mixed |
| Brown Sugar 🍯 | ¼ cup | Light or dark, packed |
| Cayenne Pepper 🔥 | 2 tbsp | Adjust for heat preference |
| Kosher Salt 🧂 | ½ cup | Diamond Crystal preferred |
| Black Peppercorns 🌶️ | 1 tbsp | Freshly cracked for texture |
| Garlic Powder 🧄 | 2 tbsp | Not garlic salt |
| Onion Powder 🧅 | 2 tbsp | For depth of flavor |
| Mustard Powder 🍯 | 1 tbsp | Adds tangy complexity |
| Butcher Paper 📄 | 1 sheet | For wrapping during smoke |
| Yellow Onion 🧅 | 1 whole | Quartered for dry brine |
| Fresh Garlic 🧄 | 4 cloves | Minced for dry brine |
| Apple Cider Vinegar 🍎 | ¼ cup | For dry brine acidity |
| Wood Chips (Hickory or Oak) 🌳 | 4 cups | Soaked for 1 hour first |
| Beef Tallow or Vegetable Oil 🫒 | 2 tbsp | For rub adhesion |
The beef is non-negotiable—bottom round roast from a trusted butcher makes all the difference. Costco or local meat counters carry the best cuts, but look for center-cut (less connective tissue) if possible. I've used 8 lbs for a crowd, but scale up or down by 1 lb per serving. The dry brine ingredients (onion, garlic, vinegar) are your secret weapon—trust me on the 3-day soak—it keeps the meat incredibly moist. For the rub, Penzeys or bulk bins have the freshest spices, but don't stress if you've got the basics at home. The wood chips? Hickory for bold smoke, oak for a milder touch—soak them in water for at least an hour before smoking.
No smoked paprika? Regular paprika plus a pinch of liquid smoke works in a pinch, but the flavor won't be identical. Cayenne too spicy? Swap for half the amount of red pepper flakes. Running low on butcher paper? Heavy-duty aluminum foil is a decent substitute (just don't expect the same bark). The dry brine can be prepped the night before—just store the meat uncovered in the fridge so it dries slightly. For the wood chips, if you can't find hickory or oak, mesquite adds a unique depth. And if you're short on time, sous vide at 165°F for 24 hours before searing delivers 80% of the magic—just skip the wood chips in that case.
The dry-brined meat keeps 3 days in the fridge before cooking—use that time to your advantage. Once smoked, reheat slices gently in a 300°F oven for 10-15 minutes to preserve moisture. Leftovers? Freeze sliced portions for up to 3 months—they reheat beautifully. I always make a double batch because this roast disappears fast. The rub stays potent for 6 months in an airtight container, so double it up if you're planning more BBQ nights. And that butcher paper? Save the scraps—they're perfect for wrapping individual slices when serving.
Why You'll Love This Recipe
- Foolproof Seasoning: I swear by this mix—just a handful of pantry staples (smoked paprika, brown sugar, cayenne) that cling to the beef like a second skin. The brown sugar caramelizes into a sticky glaze while the cayenne adds that just-right kick without overpowering.
- One-Pot Magic: Honestly, this roast is my lazy-day hero. Toss the seasoning on raw, pop it in the oven, and walk away—no basting, no flipping, no stress. The bottom round stays juicy because it’s not fighting for moisture, and the crust? Chef’s kiss.
- Leftovers That Win: Between us, the second day is often better. Slice the roast thin for sandwiches, cube it for tacos, or shred it into soups—it’s the ultimate meal prep hack. I’ve even frozen portions, and reheating? Just a splash of water and 10 minutes.
- Budget Beef, Big Impact: A bottom round roast costs a fraction of prime cuts, but this recipe makes it feel special. The smoky-sweet crust turns tough meat into something tender and crave-worthy. My wallet and my family thank me every time.
Step-by-step instructions for slow-smoked beef bottom round roast
Here's the foolproof method for transforming tough bottom round into melt-in-your-mouth perfection.
Prepare the Dry Brine for Maximum Flavor and Tenderness
In a small bowl, combine the 0.5 cup kosher salt, 0.25 cup brown sugar, 2 tbsp cayenne pepper, 2 tbsp garlic powder, 2 tbsp onion powder, 1 tbsp mustard powder, and 1 tbsp freshly cracked black peppercorns. Mix thoroughly until evenly distributed. This dry brine blend creates the perfect balance of heat, sweetness, and complexity that will penetrate the meat deeply.
Quarter the whole yellow onion and mince the 4 cloves fresh garlic. In a separate bowl, whisk together the 0.25 cup apple cider vinegar, 2 tbsp beef tallow or vegetable oil, and the onion/garlic mixture. This aromatic brine will infuse the meat with layers of flavor while helping tenderize it from within. Let both mixtures sit at room temperature while you prepare the smoker.
Apply the Rub and Brine the Roast Overnight
Pat the 8 lb beef bottom round roast completely dry with paper towels—this is crucial for developing that beautiful bark later. Generously coat every surface with the dry rub mixture, pressing it firmly into the meat so it adheres well. The roast should look like it's wearing a thick, flavorful coat.
Create a pocket in the roast by making a small cut in the thickest part. Stuff the onion/garlic/vinegar mixture into this pocket, then wrap the roast tightly in the sheet of butcher paper. Place the wrapped roast on a plate and refrigerate uncovered for 12-24 hours. This dry-brining process ensures deep flavor penetration and helps break down tough muscle fibers for unparalleled tenderness.
Set Up the Smoker for Low-and-Slow Cooking
Soak the 4 cups wood chips (hickory or oak) in water for at least 1 hour before smoking. This prevents them from burning and creates a steady stream of flavorful smoke. Set up your smoker to maintain a consistent temperature of 225°F—this low heat is what transforms tough beef into fork-tender perfection.
When the smoker reaches the target temperature and you see clean, blue smoke (not thick white steam), place the roast on the grill grates. Position it fat-side up so the rendered fat bastes the meat during cooking. Close the lid and resist the urge to peek—every time you open it, you release heat and extend the cooking time. Let it smoke undisturbed for 8-10 hours, until the internal temperature reaches 195-200°F and the meat is fork-tender.
Wrap and Finish for Ultimate Juiciness
When the roast reaches 195°F, it will hit "the stall"—a point where the temperature stops rising as moisture evaporates. This is where the magic happens. Unwrap the roast and pat it dry with fresh paper towels, then wrap it tightly in fresh butcher paper (not aluminum foil). Return it to the smoker and continue cooking for another 2-3 hours, until the internal temperature reaches 203-205°F.
The paper wrapping allows the roast to breathe while maintaining moisture, creating that perfect balance of bark and tenderness. The high internal temperature ensures the collagen breaks down completely, resulting in meat that practically melts in your mouth. The final resting temperature will carry over to about 208°F, which is ideal for this cut.
Rest and Slice for Maximum Juiciness
Remove the roast from the smoker and let it rest on a cutting board for at least 30 minutes before slicing. This resting period allows the juices to redistribute throughout the meat, ensuring every slice is moist and flavorful. The roast should still be warm but not piping hot when you serve it.
Slice the roast against the grain into ¼-inch thick pieces. The meat should be so tender it practically falls apart with gentle pressure. Serve immediately with your favorite BBQ sauce or a simple pan sauce made from the drippings. Each bite should deliver perfect harmony of smoky, sweet, and spicy flavors with that irresistible caramelized crust.
Pro Tips For Making Bbq Beef Bottom Round Roast
- SEAR FIRST, THEN SLOW: The bottom round roast can dry out if you rush the sear, but skipping it means bland, gray meat. Get your pan screaming hot—I’m talking smoke coming off—and let that roast develop a crust for 3-4 minutes per side before you even think about adding liquid. The crust locks in flavor and moisture, and trust me, your BBQ sauce will cling better later.
- SALT THE MEAT TWICE: I used to salt the roast once right before cooking, but the crust never formed right. Instead, salt it generously (about 1.5 teaspoons per pound) the night before, let it sit uncovered in the fridge, and then salt it again right before searing. The first salting seasons deep, and the second ensures that crust sticks like glue.
- DON’T SKIP THE FAT CAP: That white fat layer on the bottom round? Leave it on. It renders down during cooking, basting the meat and keeping it juicy. If you trim it off, you’re fighting the beef’s natural moisture system. Just score the fat in a crosshatch pattern before searing—it’ll crisp up and add texture without ruining the roast.
- USE A MEAT THERMOMETER: Guessing doneness with a finger is how you end up with chewy, overcooked beef. For a bottom round, pull it at 195°F internal temp—yes, it’ll still feel firm, but it’ll rest up to 160-165°F and stay tender. I learned this after serving a roast that was technically "done" but tasted like shoe leather. Invest $15 and save yourself the regret.
Essential equipment for perfect results
Smoker Essentials
Your smoker is the heart of this recipe, and I can't stress enough how critical temperature control is. I use a Traeger Pellet Grill for its consistency, but any quality smoker will work—just monitor temps closely. A digital thermometer like the Meater or ThermoWorks Smoke is non-negotiable. For beginners, I recommend starting with a charcoal smoker (like the Weber Smokey Mountain) because it's affordable and teaches you the fundamentals of heat management. 🔥
Butcher Paper
This isn't just wrapping—it's your secret weapon for bark development and moisture retention. Pink butcher paper (not regular paper towels!) creates that perfect crust while allowing the meat to breathe. I keep a roll of Butcher & Packing Supply Co. Pink Butcher Paper on hand—it's food-safe and strong enough to hold its shape. If you can't find it, heavy-duty aluminum foil works in a pinch, though the bark won't be as crisp. Store it in a cool, dry place to prevent tearing.
Meat Thermometer
A dual-probe thermometer is my non-negotiable tool for this recipe. The Meater or ThermoWorks Smoke gives you real-time internal and smoker temps, so you can focus on cooking instead of guessing. I place one probe in the thickest part of the roast and the other in the smoker. Never rely on the smoker's built-in gauge—it's often inaccurate. For budget options, the Thermoworks Smoke is a game-changer under $100. Calibrate it before your cook to ensure accuracy. 🌡️
Wood Chips
Hickory and oak are my go-to woods for this roast, but don't limit yourself. Hickory delivers bold, traditional BBQ flavor, while oak offers a milder, more versatile smoke. Soak your chips in water for at least 1 hour before using—this prevents burning and ensures steady smoke. I buy Traeger Pellets for convenience, but for authentic flavor, local hardwood chips from a specialty store are unbeatable. Store them in an airtight container in a cool, dark place to preserve freshness.
Cutting Board & Knife
Slicing against the grain requires a sharp, stable surface. I use a large wooden cutting board (like the John Boos 18x24-inch) for stability and a Dexter-Russell 12-inch slicing knife for precision. A meat mallet (like the Victorinox) helps tenderize the meat if you're short on time, but the slow cook is the real star here. Keep your board clean and dry to prevent slipping. For leftovers, I store sliced portions in glass airtight containers to maintain moisture.
Resting Tools
After smoking, resting the roast properly is where the magic happens. I use a large ceramic platter (like the Le Creuset) to catch any juices, and I wrap the roast in clean kitchen towels to insulate it. For larger roasts, a cooling rack helps air circulate, but I find towels work better for retaining heat. Never skip the rest—it's the difference between juicy perfection and dry disappointment. A timer (even your phone) reminds me to wait the full 30 minutes before slicing. 💫
Nutrition facts
Frequently asked questions
Why does the recipe call for a 3-day dry brine instead of just marinating?
The dry brine works differently than a marinade. It uses kosher salt and sugar to break down muscle fibers and draw moisture to the surface, creating that perfect bark while keeping the meat incredibly tender. The apple cider vinegar in the pocket adds acidity that tenderizes from within. Unlike marinades that just flavor the surface, this method transforms the meat at a cellular level—giving you that melt-in-your-mouth texture we all crave.
Can I use aluminum foil instead of butcher paper for wrapping?
You can, but you'll miss out on that perfect bark texture. Butcher paper allows just enough moisture to escape while keeping the meat tender, creating a beautiful crust. If you must use foil, wrap it loosely to prevent steaming. For best results, use pink butcher paper—it's food-safe and designed specifically for this purpose. The difference in bark quality is noticeable!
What's the deal with the "stall" in smoking? How do I handle it?
The stall happens around 160-170°F when moisture evaporates from the meat's surface, temporarily stopping temperature rise. This is where wrapping in fresh butcher paper comes in—it traps steam while allowing the meat to continue cooking. Don't panic if your temp plateaus! Just wrap it and give it 2-3 more hours at 225°F. The final temp will climb back up to 203-205°F.
How do I know when the roast is done without a thermometer?
While a thermometer is ideal, you can check doneness by inserting a skewer into the thickest part—it should slide in easily with just slight resistance. The meat should pull apart like pulled pork when probed gently. For visual cues, look for a deep mahogany crust and slightly shrunk edges. Remember, bottom round needs that high internal temp (203°F) to break down collagen properly. Without a thermometer, you risk dry meat.
Can I make this in an oven instead of a smoker?
Preheat your oven to 225°F and use a meat thermometer to monitor temps. Place the roast on a rack over a tray of water (for steam) and cook for 6-8 hours195°F. Finish with 10 minutes at 450°F for bark. The key is maintaining that low temp for collagen breakdown. For smoke flavor, add wood chips to a foil packet and place on the oven rack.